|
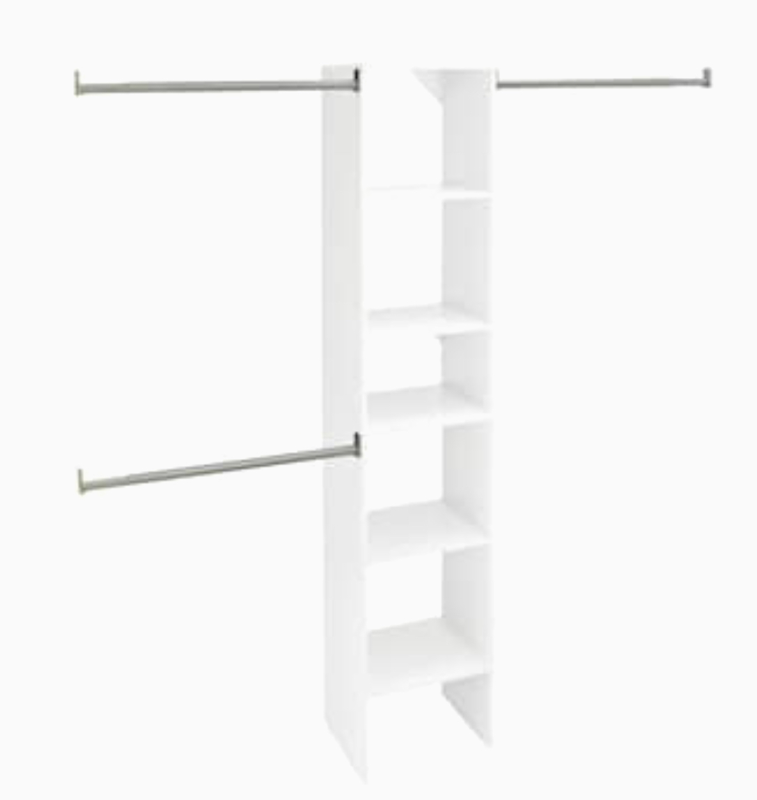
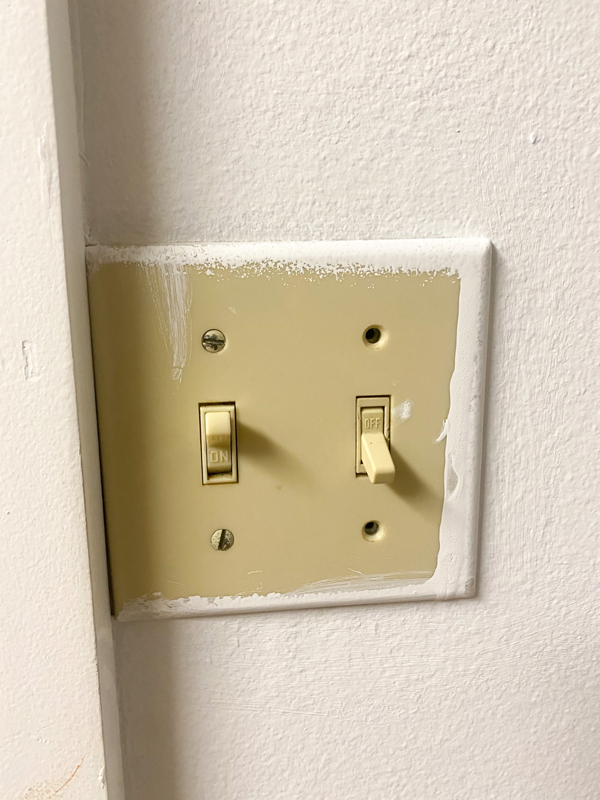
We recently bought a new home and after personally designing our previous two closets and seeing how life changing efficient shelving can be, I decided my first home project here would be to reconfigure the closet. We didn’t take out or add any walls, new flooring or anything crazy, just simply painted the walls and installed new shelving. When I say it’s made a world of a difference for us, it really has! 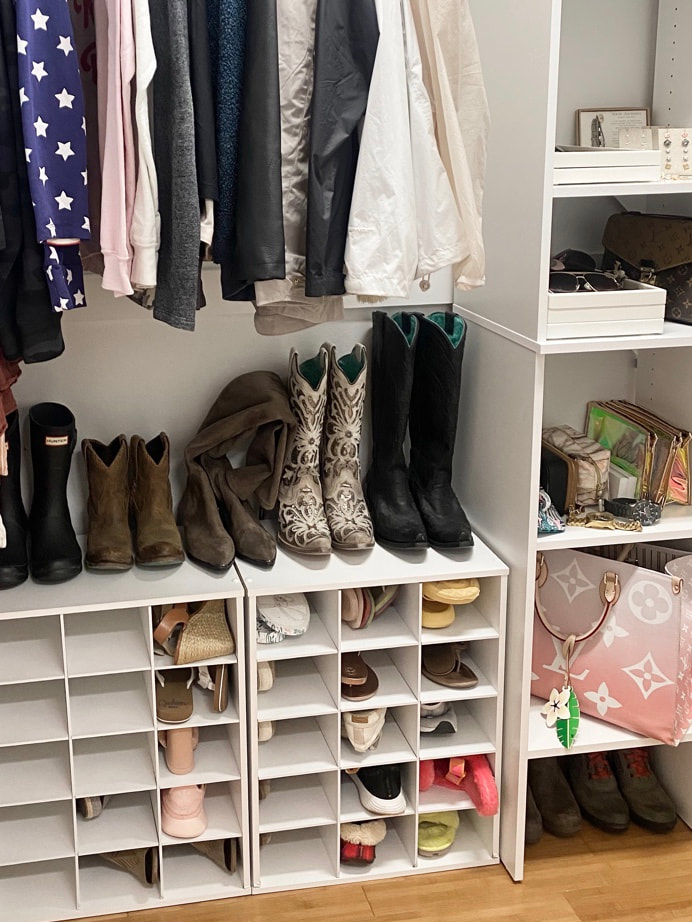 If you have ever looked into a closet system you know how incredibly expensive they can get. Having a closet company come to your home and professionally design the space for you can be in the thousands or even tens of thousands of dollars. We were not looking to spend much but wanted to better utilize our space and make it aesthetically more appealing too. Our closet has a wall in the middle spanning across about 80% of the width, separating the “his” and the “hers” side; you’ll see the “hers” side in these transformation photos. 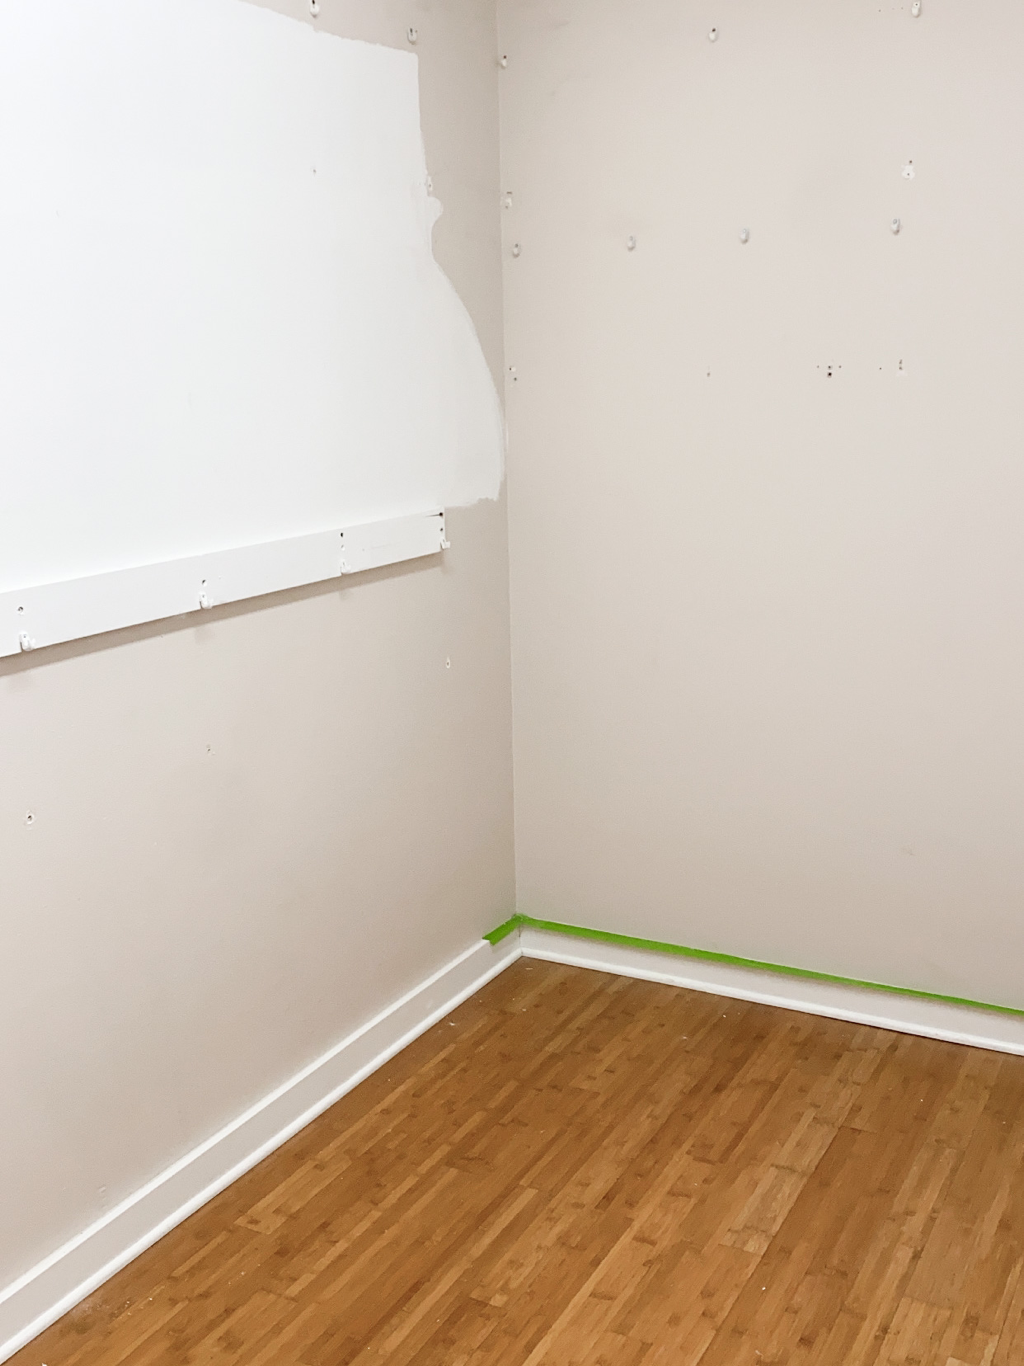 When we first moved in the closet had wire shelving in place and the closet paint color was inconsistent as shown above. I decided to paint all of the walls white to have a consistent slate to start with before installing new shelving. I also took a moment to change out the closet light switch plate. The rest of the covers throughout our home had already been changed to white but this one must have been forgotten and I wanted a consistent look throughout the house. Plus a white light switch cover looked much better with the white painted walls! I purchased two of these shoe organizers as well as this closet tower kit. I like how the tower kit includes adjustable shelving; I use these shelves to keep my jewelry, purses and sunglasses organized. We have been very happy with the transformation and the install was simple. A drill and tape measure (plus a step stool!) was all I needed. All of the hardware needed to secure the tower to the wall is included in the kit. I think the closet looks much nicer after the changes and it definitely keep clothing, shoes and accessories much more organized. The cost for the shelving and shoe organizers came to about $200 and the paint was another $20. I would love to eventually add a large white shelf above the top of the rods, spanning the entire width of the closet, for additional storage space. 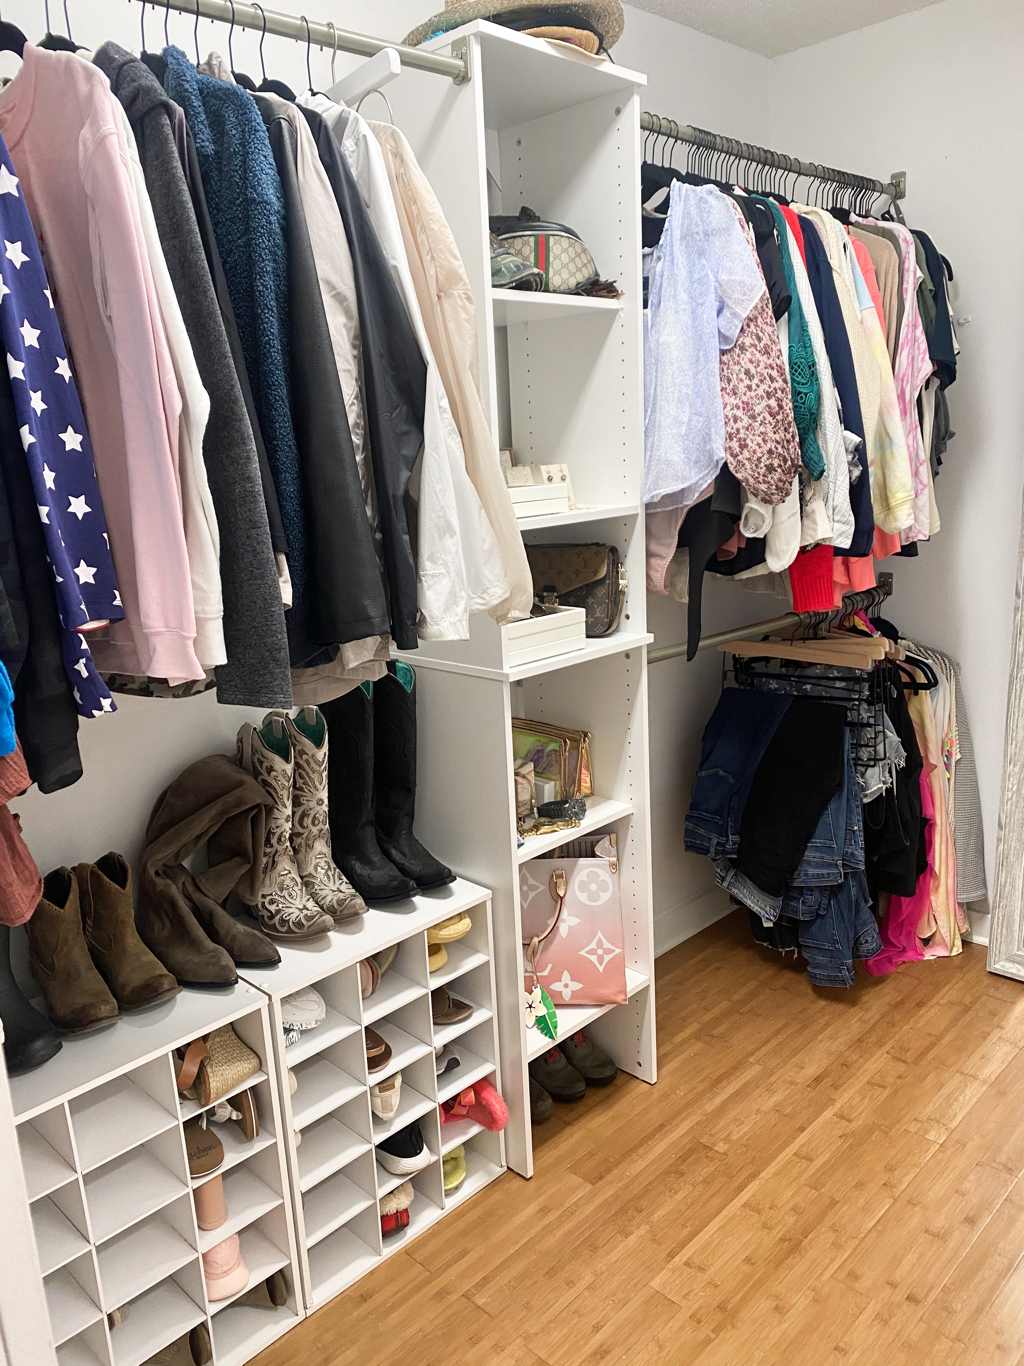 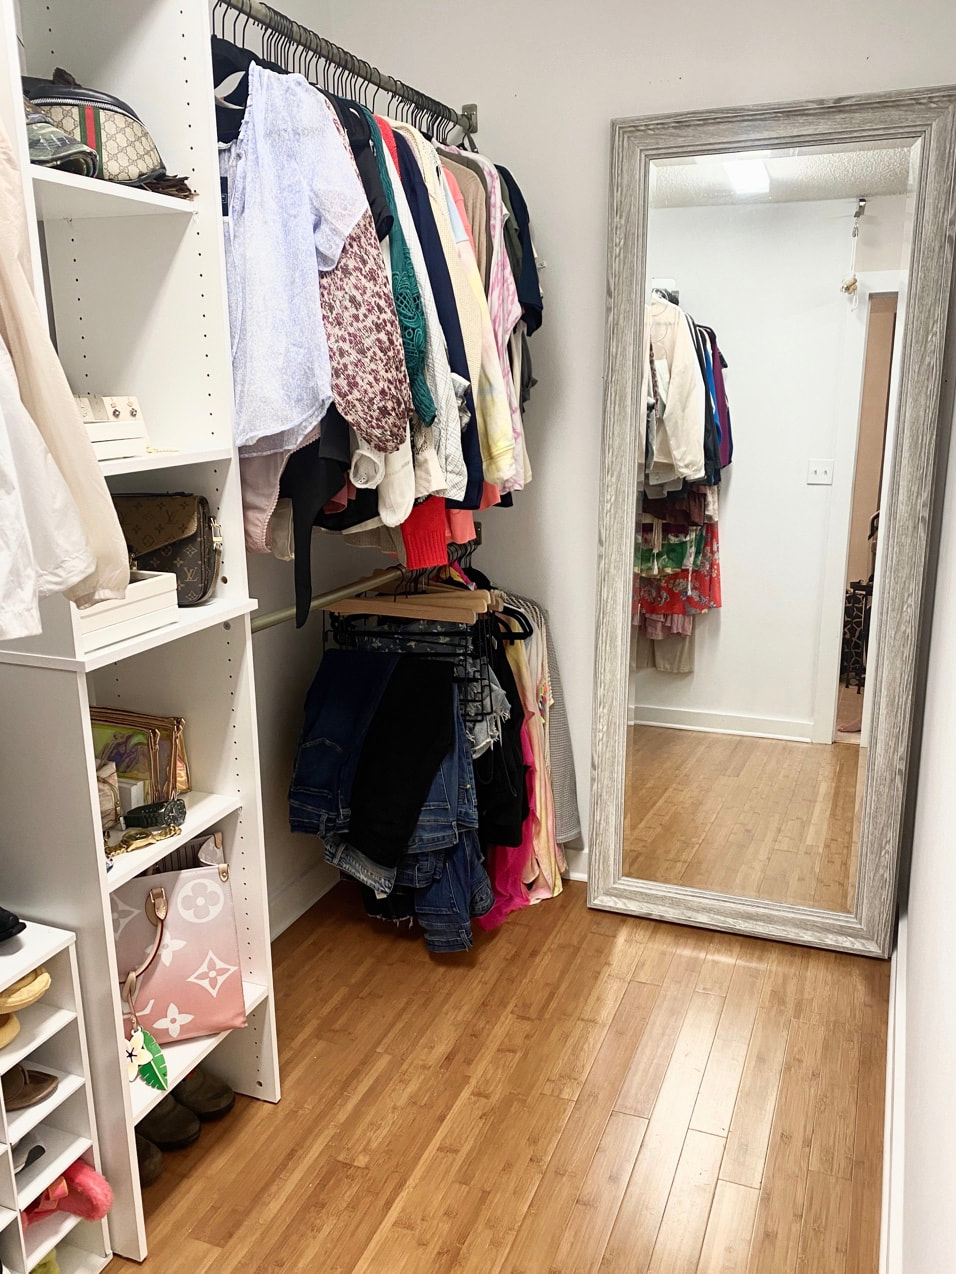 What do you think? Could your closet use an update? Have you tried something similar that has worked well for you? I’d love to hear about it! This post was written in partnership with The Jerry Blankers Team and is published at www.jerryblankers.com/blog. All opinions are my own. If you are in need of a realtor in Whatcom County, WA, we used them for our most recent land purchase and home sales and I highly recommend them! You can give them a call at 360-410-1297 or email [email protected] or [email protected]. Instagram: @blankersrealestate
0 Comments
Whether you’re team summer sunshine or team pumpkin spice, one thing is for certain: fall has arrived. The cooler air, earlier sunsets and the busyness of back to school oftentimes have us spending more time indoors at home making it even more important to be comfortable and prepared in your space. There are so many things to think of I thought it would be handy to compile a list of items to check at your home to ensure you are ready for the changing of the seasons! Check Home for Outdoor Maintenance and RepairsBefore winter weather arrives, it’s time to check on any areas that may need maintenance or repairs done. Remove dead limbs off of trees and leaves from gutters, fix broken fences and damaged walkways. If you have a trampoline, consider tying it down if heavy winds could be an issue this season. Prepare for Weather HazardsCheck that you have everything you need for the colder weather such as a snow shovel and driveway salt. Make sure you know where your flashlights are (check/change the batteries) and if you have a generator be sure to test it, have gas/propane on hand for it, etc. 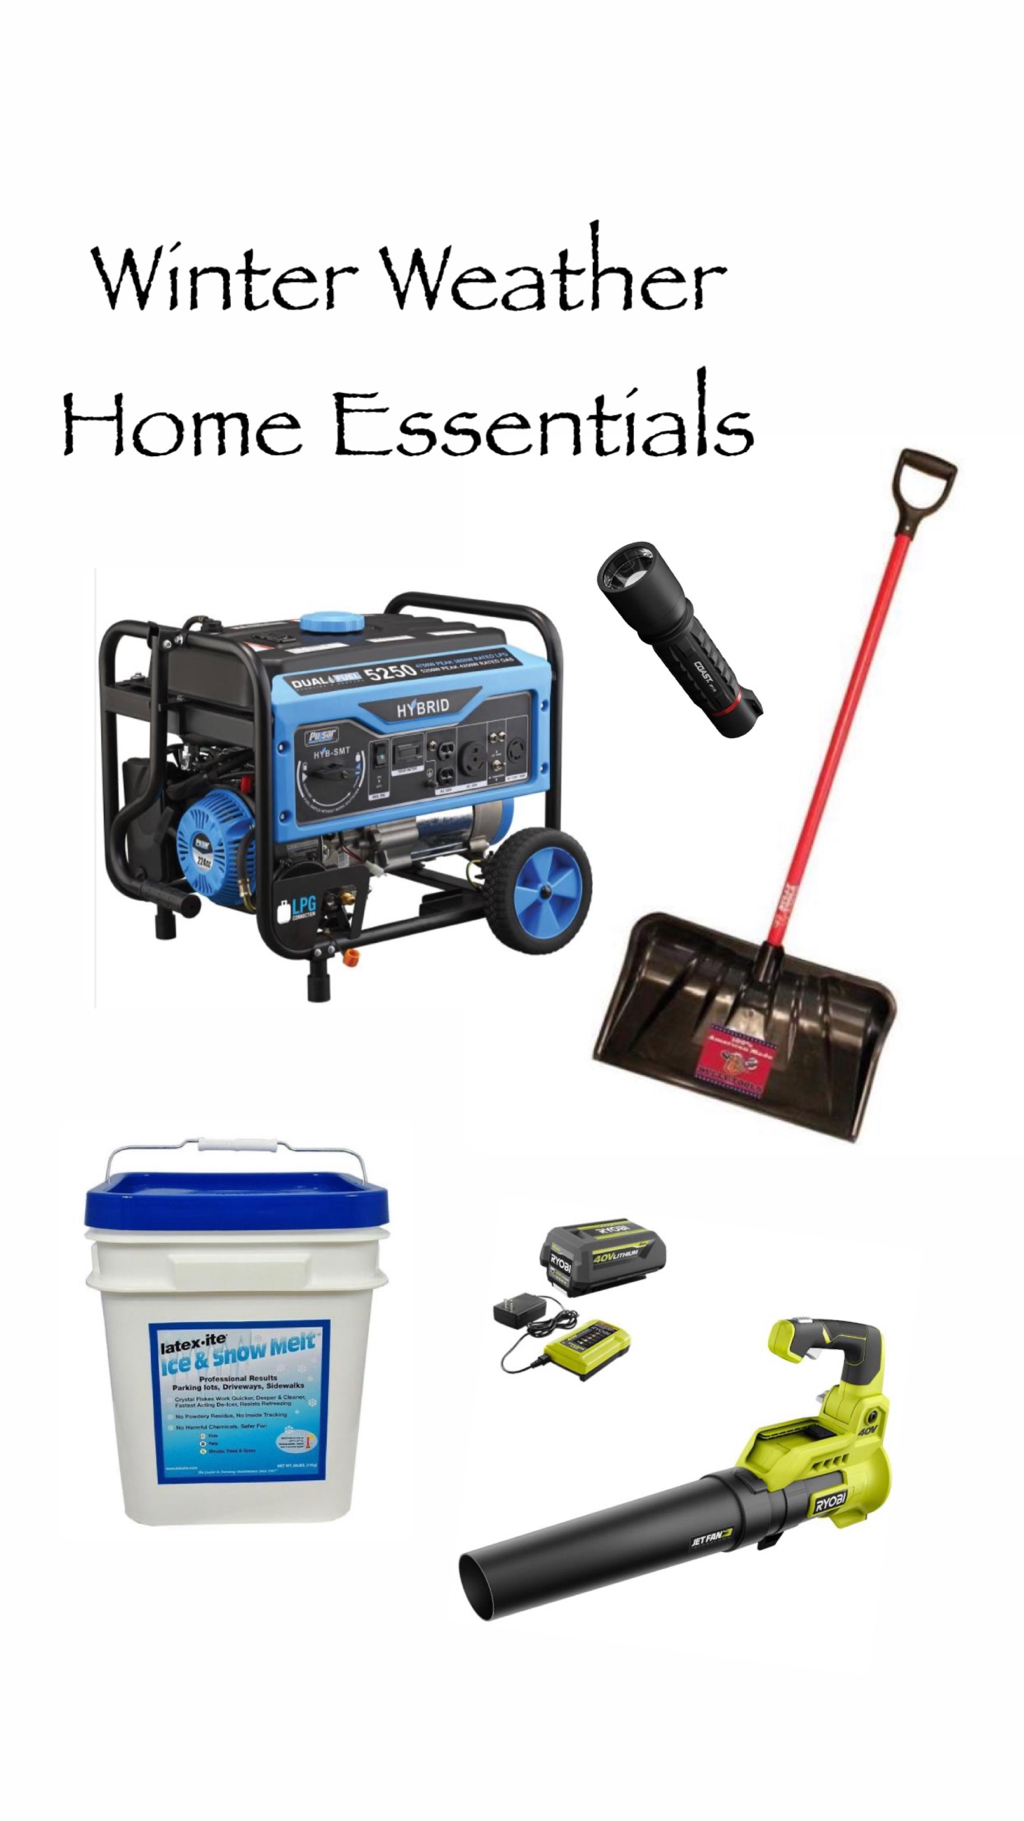 Replace Your Air Filter(s)It is recommended to change the air filter in your home every 60-90 days and I know how easy it is to forget and let it go longer, especially during the craziness of summer fun. A good rule of thumb is to at least change it seasonally. This is even more important to do frequently if you have pets and/or suffer from allergies. Set reminders in your phone or get yourself on a schedule to change seasonally at the least. Consider switching out your bedding.Typically fall is the beginning of the cooler season. You may want to consider switching to a thicker sheet, possibly flannel, adding an additional blanket to your bed, or swapping for a thicker comforter set during the cooler months. I personally tend to use the same sheets and comforter but add/switch the blankets I layer over the comforter to a thicker, warmer one in fall colors. In addition to adding in the rich fall colors like burgundy, mustard and orange, adding texture like a chunky knit blanket or faux fur are popular for fall and winter months. 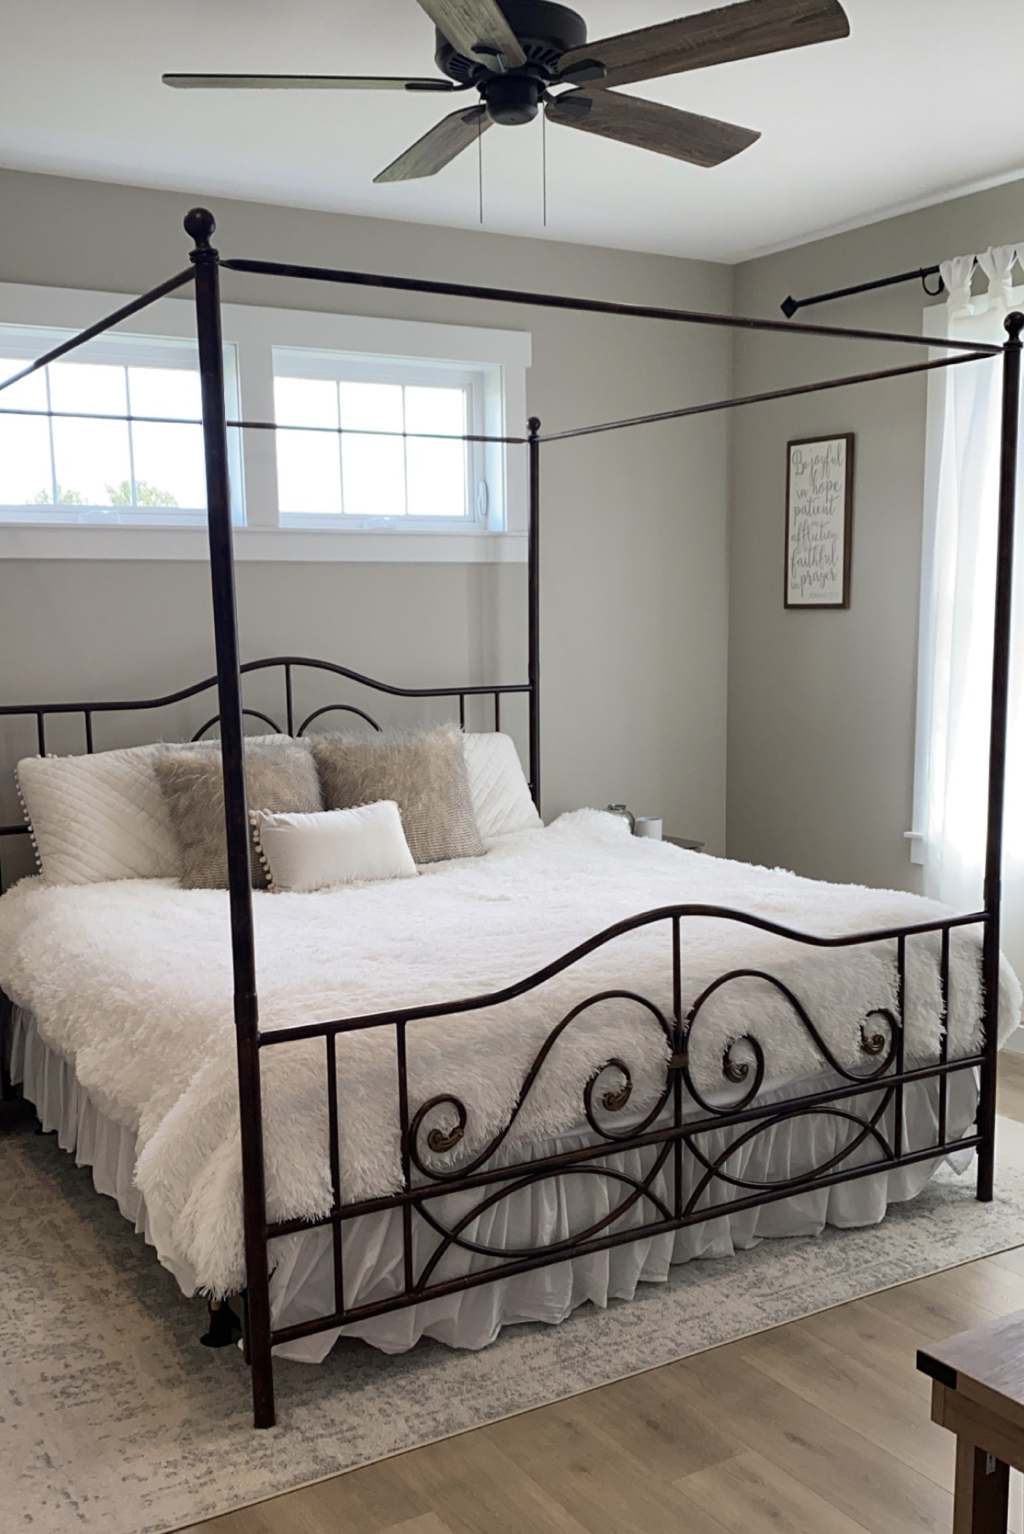 Swap throw pillows.This goes for bedroom pillows, living room, outdoor and more! Regardless of the weather where you are located, it’s time to tuck away the items that scream summer and embrace the beauty of fall!  Add fall decor to your tables.This can be anything from faux (or real!) pumpkins to displays of candy corn. A little can go a long way. I love placing neutral colored seasonal decor throughout my home tying into each season. Traditionally autumn colors in general are warm and deep; as are Thanksgiving colors but lately neutrals have been increasingly popular as well. If you enjoy decorating for Halloween the most common colors for that are of course orange and black as well as white, purple and bright green. 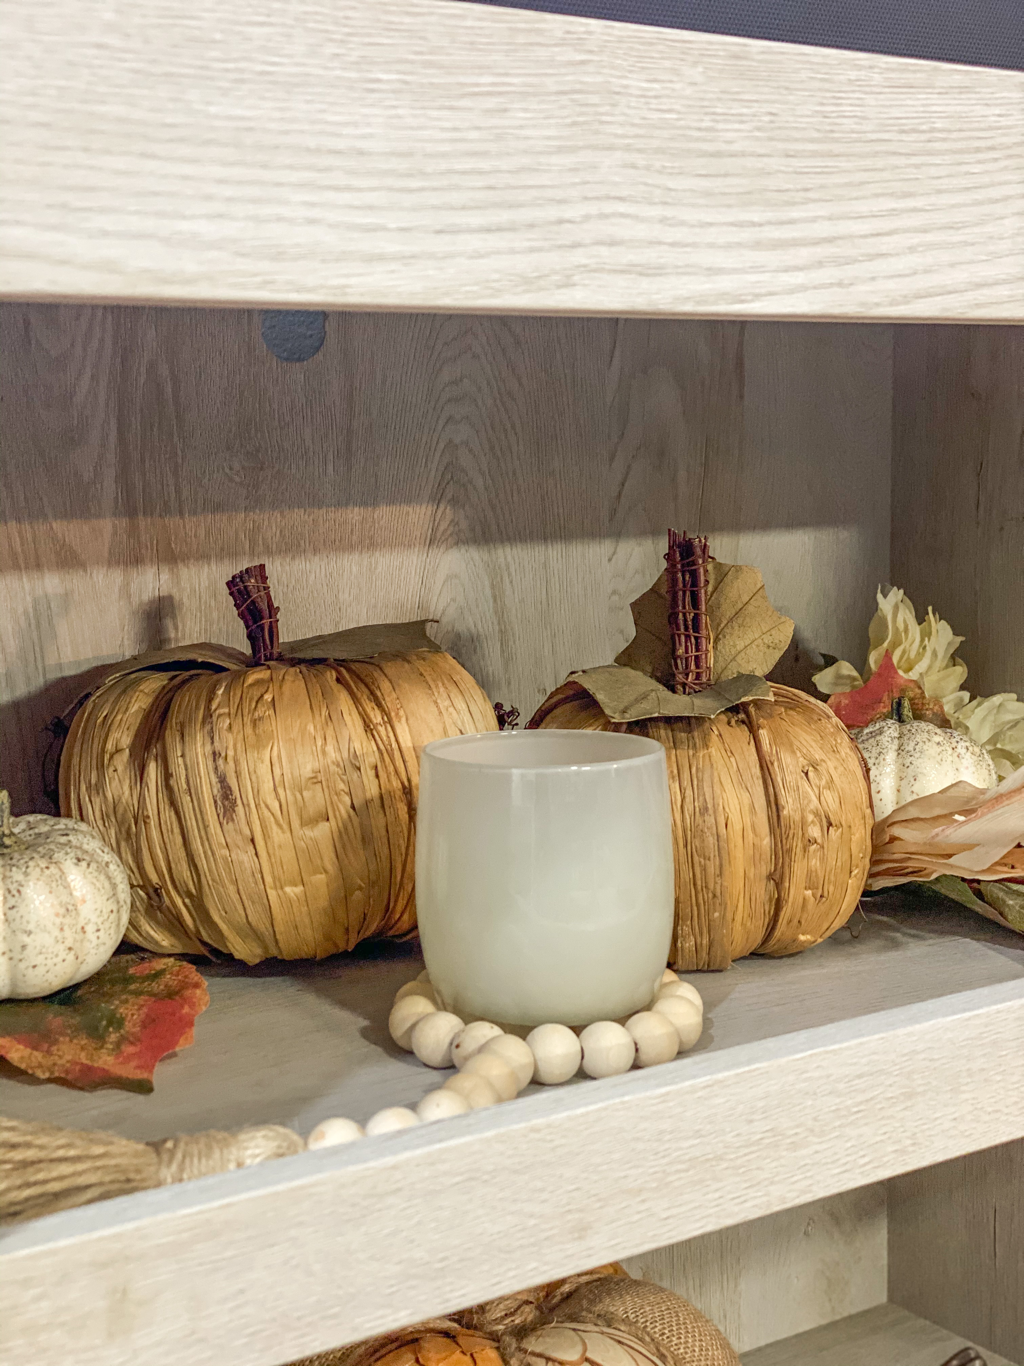 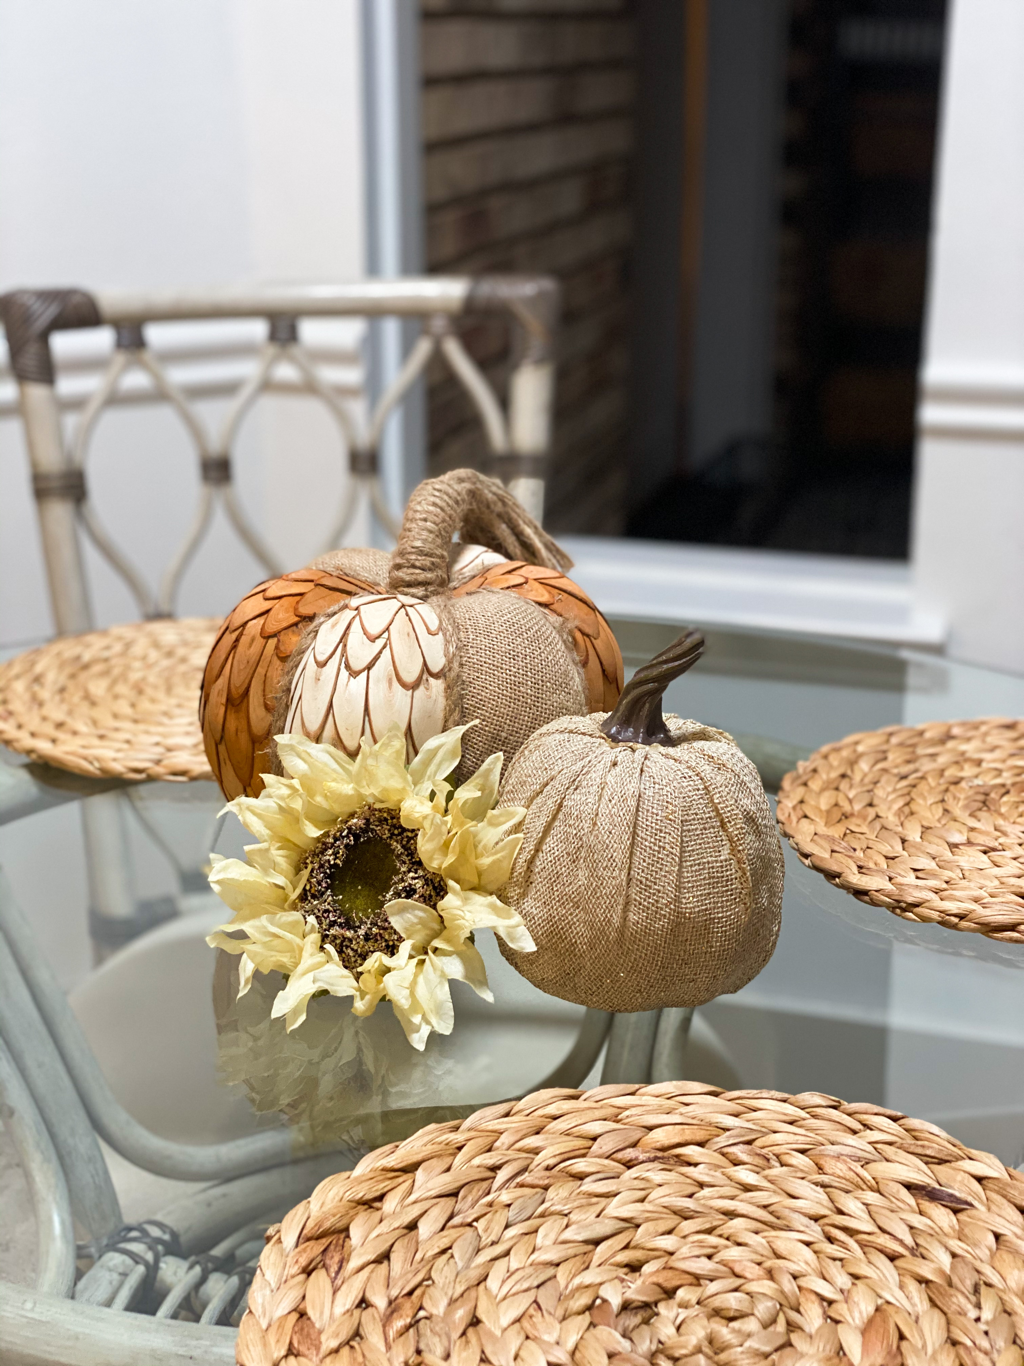 Decorate your front door for fall.Now is the time to take down your summer wreath and replace it with something for fall. Wreaths full of leaves in various fall colors or faux pumpkin wreaths are a lovely choice as are eucalyptus wreaths if you prefer something green. Trending fall front porch decorations include corn stalks, pumpkins and gourds, a fall inspired sign and even fall themed door mats have been a common decor option the last few years. 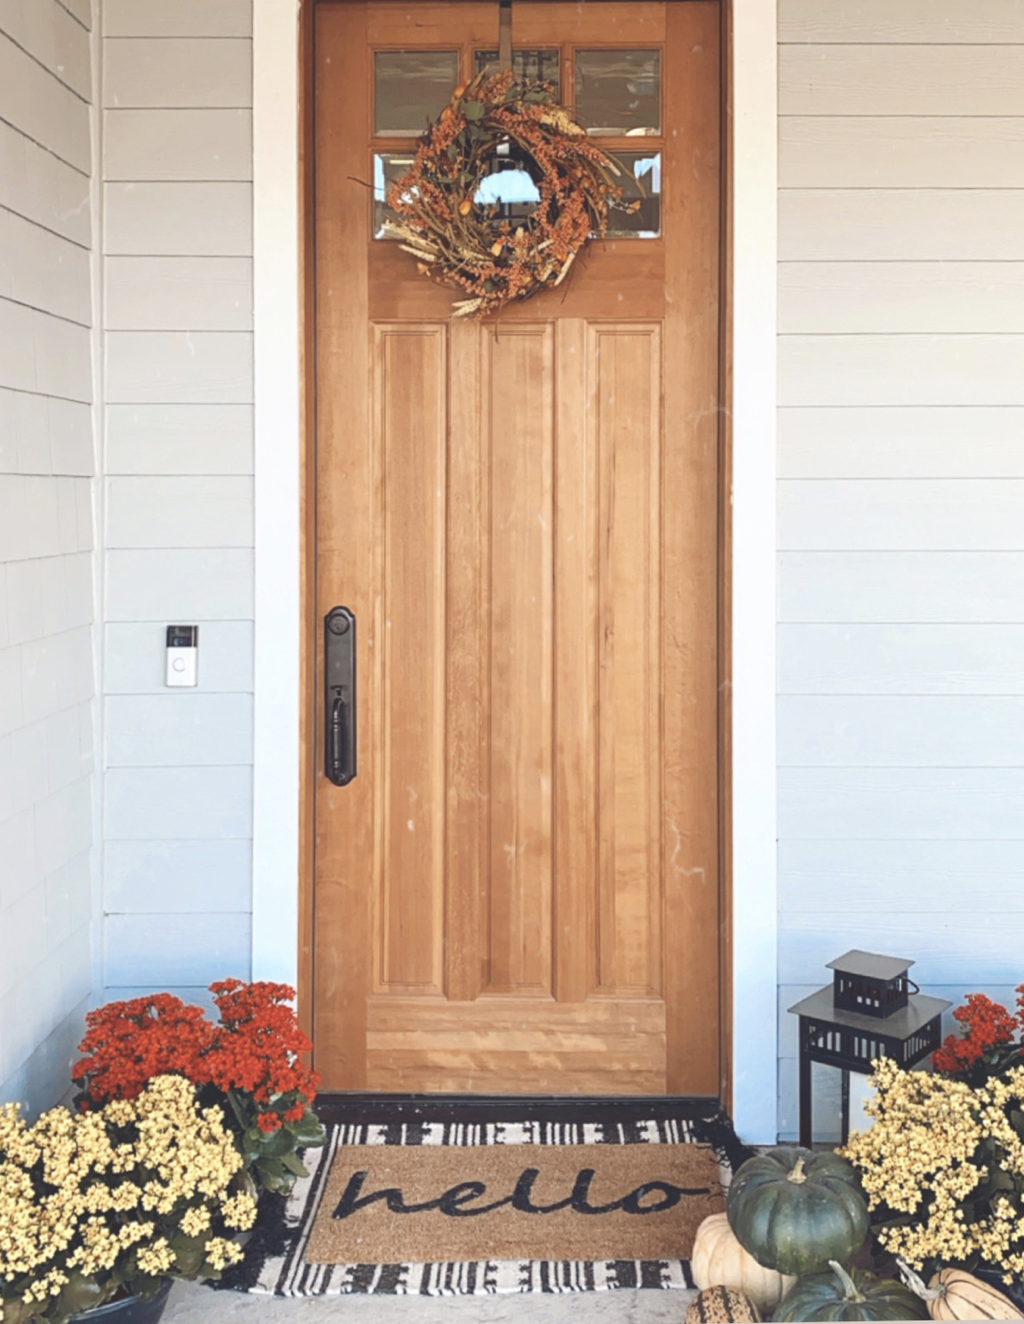 Switch out scented candles.I personally love a good fall scented candle. Spiced pumpkin, warm apple pie, apple cinnamon, farm fresh peach, salted caramel...all fabulous scent choices!  Go Through ClothesDepending on where you live, it may be time to pack away the shorts and sundresses (or at least move them away from the front of your closet) and replace them with warmer, thicker clothes. Taking the time to reorganize the closets in your home can go a long way. I’ve noticed in my household at least that it makes our mornings in particular much more relaxed and easier when we can quickly find the pieces we wear frequently this season. While going through closets, it’s a great time to make sure everyone has what they need for the season. This is especially important if you have kids; we all know they grow so fast and there is a good chance that last year’s fall pieces may not fit this year! Try on rain boots, warm boots, snow boots, rain jackets and coats and make sure you know where items like beanies, gloves and scarves are located. What do you do to prepare for a new season and the changing weather that goes with it? Let us know in the comments if there’s anything we should add! This post was written in partnership with The Jerry Blankers Team and is published at www.jerryblankers.com/blog. All opinions are my own. If you are in need of a realtor in Whatcom County, WA, we used them for our most recent land purchase and home sales and I highly recommend them! You can give them a call at 360-410-1297 or email [email protected] or [email protected]. Instagram: @blankersrealestate
So you made the decision to put your home for sale. You’ve worked with an agent, had photos taken and a listing published, had showings and finally accepted an offer. Now what?  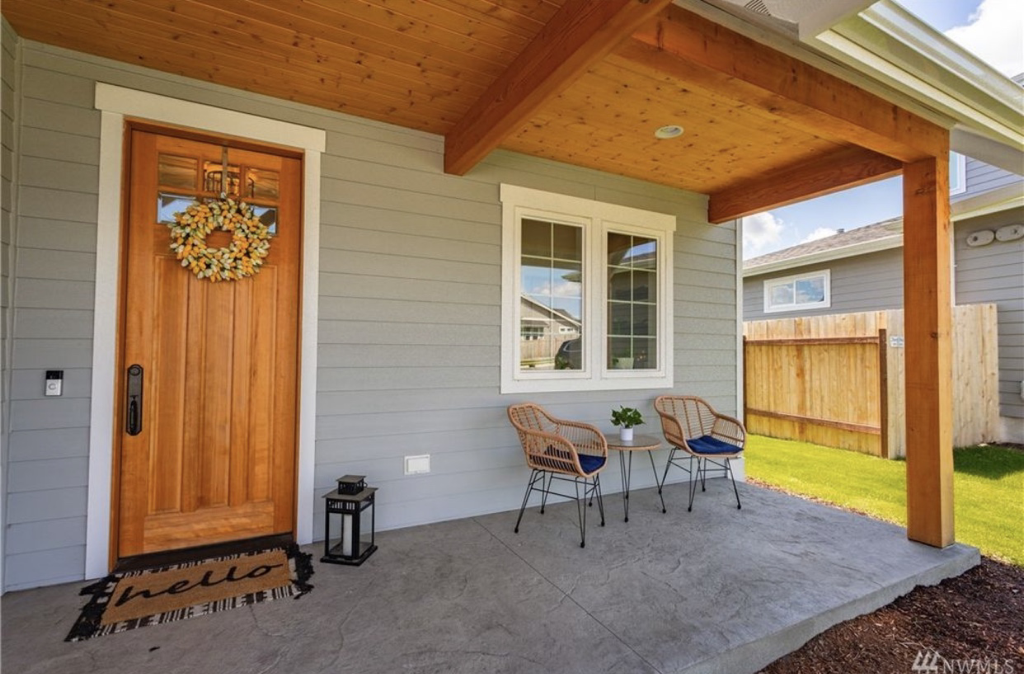 To be quite honest, this is just the beginning! After coming to a mutually accepted offer with buyers there is still much more to be done before the sale is complete. No need to worry though, you will have some time to get it all straightened out. A typical home sale takes 30-45 days to close and you will have until then to complete the tasks and move out of your home. We have sold three homes in the last six years so you could say we have a good amount of experience with it! I’ve laid out the basics for you to reference here. PurgeNow is the time to get rid of or sell items that you did not remove prior to listing. This can be done through a garage sale, listing for sale on Facebook, donating to charity, etc or a mix of the methods. Deep CleanOnce you have packed up everything you will be taking with you upon moving and sold or donated everything else, it’s important to deep clean for the new owners. I have personally done all of it myself one time and hired a professional cleaner to help the last two times. Depending on your abilities, availability and stage of life, determine what is best for you. I find it to be much less stressful to hire help if you can. You will be so busy packing and organizing that it is a huge relief having someone help you. I usually do the basic cleaning such as vacuum bedrooms myself to minimize the cost a bit but bring in the professionals to deep clean bathrooms and kitchen especially. The refrigerator and range can be incredibly time consuming and the professionals know how to get them looking their best. 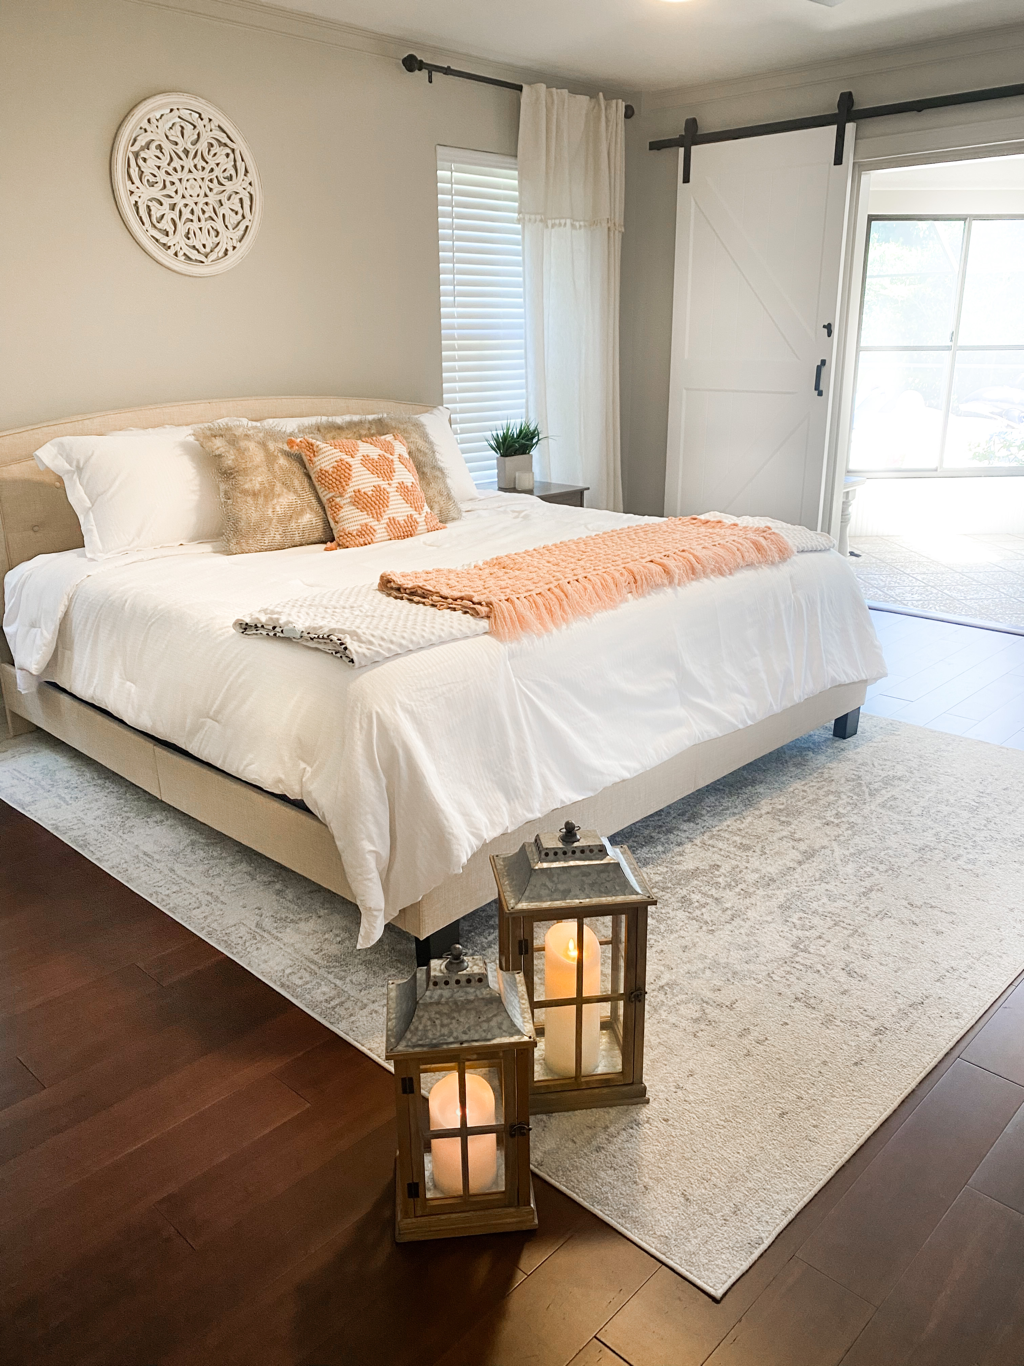 Switch UtilitiesRemoving your name from the utilities is one of the last tasks to complete but it is an important step. Be sure to call the companies that provide you water, sewer, electric, gas, cable, internet, and garbage, etc so that they stop charging you for the services one you have signed the home over to the new owners. Request that you make the home sale closing date your final day for charges and provide them with your forwarding address if requested. Oftentimes the billing system runs behind usage so don’t be surprised if you see one last bill a few weeks or a month later. Set Up Mail ForwardingSetting up mail forwarding is quick and easy. If you are living in the US, simply go to your local Post Office to request the form or go online to the USPS website here and provide them with your information. It will cost $1.05 to verify your identity with the online submission (as of August 2021).  Closing Day: Sign at the Title CompanyTypically sellers will sign closing documents at the title company on the same day that they will be required to be completely out of the house but this can change on a case by case basis. The closing documents finalize the sale with a notary present. You will need your Drivers License or other government issued ID with you to verify your identity. This generally takes 30 minutes to a hour and a half but is typically quicker for sellers and longer for the buyers. 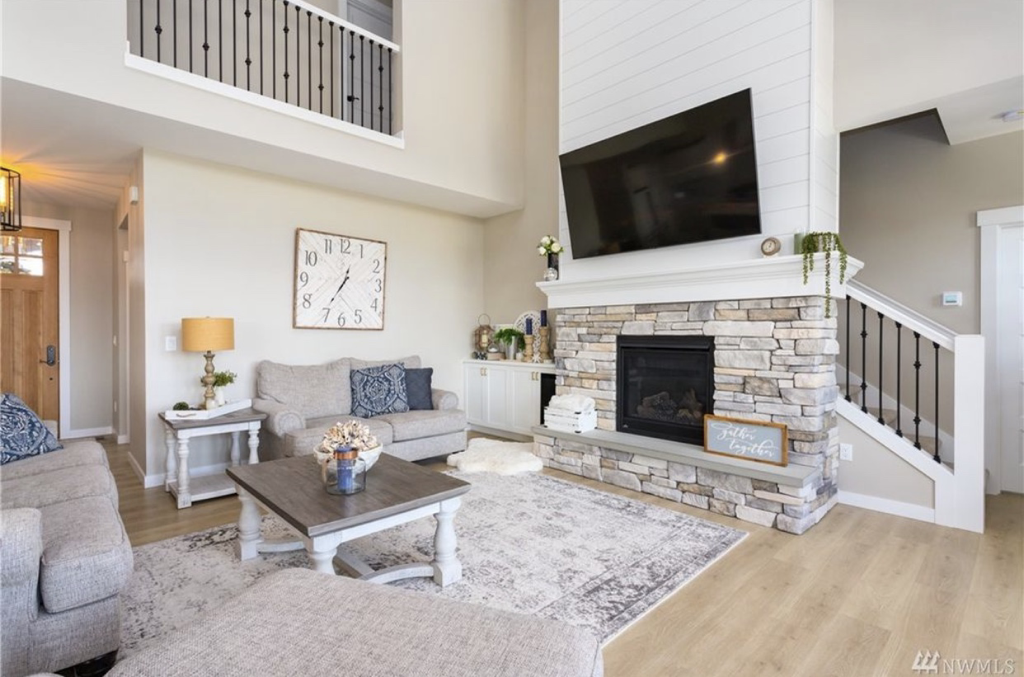 Cancel Homeowners InsuranceOnce your home is officially sold and out of your name you will want to be sure to contact your agent to stop your homeowners insurance. This way you will stop getting charged for the insurance costs going forward. Usually a quick email or phone call will do the trick. Keep Settlement Documents These documents will be needed at tax time so be sure to hang on to them! So I just BOUGHT a home...now what?!Very similar steps apply for those buying a home. You will still want to keep settlement documents from the title company, switch over your mail, utilities and homeowners insurance. Depending on how the seller left the home you may not have to do a deep clean as most will have already had that done for you though another round of cleaning never hurts, especially if weeks have passed since the seller moved out. You’d be surprised how quickly dust and bugs can show up. Hopefully you thought ahead when packing because now it is time to unpack. I like to start with the clothes, shoes and toiletries that are used often, if not daily. Be sure to know where medications and first aid equipment, flashlights, phone chargers, etc are the first day. Basic kitchen items such as plates, silverware, and drinking glasses should be a priority as well. It can be easy with all of the excitement of finally being in your new home to get carried away and focus on decorating but it will be far less stressful for you getting the basics out of the way first.  Be prepared to get rid of more items too. No matter how much you got rid of prior to moving there is a good chance you will feel differently about a number of items after unpacking them, especially if they have been stored for a while. Once you are done unpacking, take the boxes to your local recycling center or post on Facebook or Craigslist to see if someone else can use them. The last thing you need is a pile of cardboard boxes in your way for weeks. Have you moved recently or have any tips to add? I’d love to hear about them in the comments below! This post was written in partnership with The Jerry Blankers Team and is published at www.jerryblankers.com/blog. All opinions are my own. If you are in need of a realtor in Whatcom County, WA, we used them for our most recent land purchase and home sale and I highly recommend them! You can give them a call at 360-410-1297 or email [email protected] or [email protected]. Instagram: @blankersrealestate
We just sold our third home and are now pending on home #4 (surprise)! I can’t wait to share the details and what I’m most looking forward to about this home, but I’ll save that for another day! Having had three homes, two of which were custom builds and required us to move in (and out) with family between each build, it’s needless to say we have a lot of experience with moving in the past 10 years. It can be incredibly exhausting and frustrating but along the way we have found ways to make the packing, loading and transitioning stages easier.   Before You Begin PackingBefore you can even begin to start thinking about packing I highly recommend you look around and see what you can get rid of. This is great to do before even listing your home for sale. The less clutter you can have on your countertops and in cabinets and closets, the better it will show and the easier it is for potential buyers to envision your home as theirs. Plus the less you have to pack, the less headache and expense it will be. Go through your clothes, shoes, kid’s toys, home decor, holiday decorations, tools and more to see what you can do without going forward (or easily replace after moving into your new home). When it comes to getting rid of items I prefer to take my family’s clothes and shoes to a local second hand store or I send them to ThredUP. Though you don’t get the highest payout with ThredUP, it is incredibly easy and saves me so much time. You request a bag, they deliver it to your door, you fill it and then schedule a time for USPS to pick it back up off of your doorstep; shipping is free for you! You can claim a $10 off coupon to shop at ThredUP with the link HERE. I have had great success selling our household items on Facebook Marketplace and if you have a lot of various items, garage sales are still a great option. Advertise them on your personal Facebook pages, group selling pages, Craigslist, in your local newspaper and/or with signs. We just did a last minute garage sale with only Facebook advertising about a month ago and just about everything sold! Packing TipsWhen packing, I like to start as soon as possible to limit my last minute chaos and stress. I prefer to do a little bit here and there as time allows until it is crunch time at the end. I always pack less frequently used items, things we can do without for a month or two, first so that they can easily be out of my way and will not be missed by us in the last weeks/months. This includes items such as: formal dinnerware, holiday decor, family photo albums, the kid’s baby books, paintings and home decor, extra bedding and linens, clothes and shoes that are out of season and won’t be needed until in the new home, etc. Another benefit of packing over time and eliminating the less frequently used items first is that it leaves the items you use daily or a couple of times a week for last so that they can all be packed close, if not together, and easy to access first once you are unpacking at your new location. I usually leave our coffee pot, silverware, toaster and personal items like body wash, shampoo, etc to pack at the last minute.  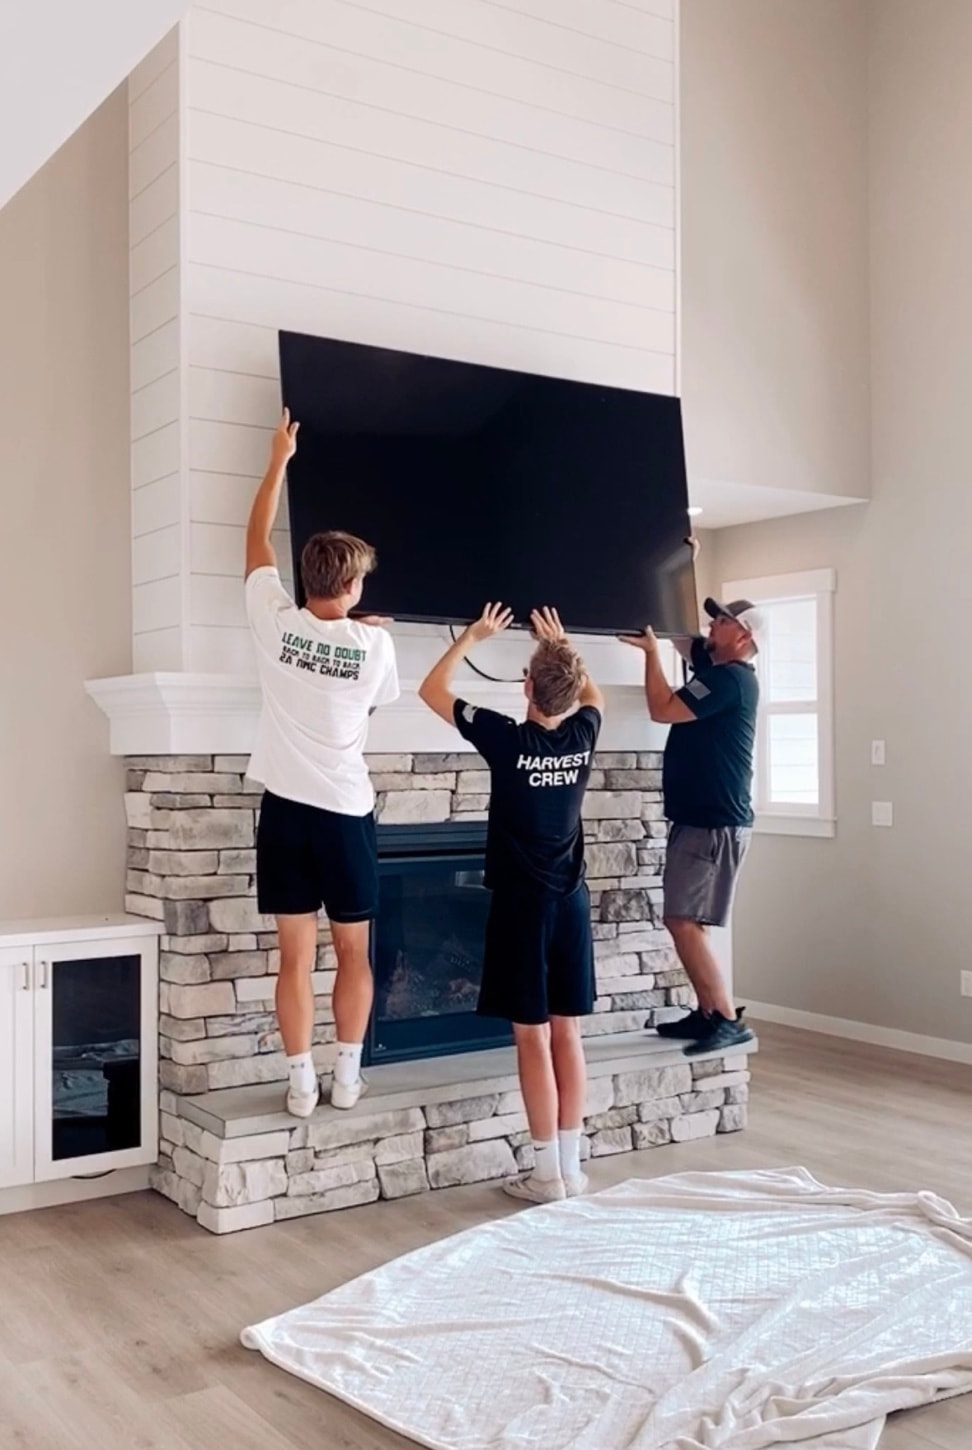 I like to get creative and pack our items in nontraditional ways to save money and space in the moving truck or storage box. For example, if you are bringing suitcases with you to your new home, pack items into the suitcases to make the best use of your space. Pack spices inside of your crockpot, etc. and don’t forget to use your towels/blankets as packing materials to prevent items from rubbing against each other and getting scratched or broken. I used our beach towels to wrap around our fragile home decor when packing into boxes this time. I needed to pack the towels anyway and saved space and money by using them instead of purchasing bubble wrap. When loading a moving truck or storage container we find it best to pack all boxes and other more linear shaped items such as dressers first. We have found that we make the best use of our space by doing so and saving odd shaped items such as exercise equipment and bikes for last. Be sure to stack the boxes all the way to the top and start with heavy boxes on the bottom and lighter as it gets to the top to avoid heavy items falling off of the top and breaking.  Label, Label, Label!You may think it will be easy to remember what you packed where but after all of the stress and chaos involved in moving and selling/purchasing/renting homes these details can escape your mind. Trust me! I like to boldly label a box with what room it is for (ex. KITCHEN, KIDS BATHROOM, etc) then in smaller font underneath include a few of the key items inside of that box (ex. silverware, crockpot, wine glasses, etc) to make it easier to get to the items that I need and want first upon arrival in the new home.  Additional Tips & Reminders•Keep clothes on hangers; pack sections into garbage bags •Label breakables in large bold writing: FRAGILE! •Use paper/styrofoam plates, that you may already have on hand, between your plates/dishes vs. purchasing packing material •Check grocery and liquor stores for free boxes (I do prefer purchasing boxes that are all the same size, making packing a truck or storage container much easier, but I know many that do this, especially for close moves!) •Set up/make appts for utilities, cable, internet, etc •Make sure bedding is easily accessible One last thing: be sure to keep track of your moving expenses! Save receipts; some of your expenses may be tax-deductible which can be a huge benefit and save you money when completing your annual taxes! Have you moved recently? Any tips that you would add to the list? This post was written in partnership with The Jerry Blankers Team and is published at www.jerryblankers.com/blog. All opinions are my own. If you are in need of a realtor in Whatcom County, WA, we used them for our most recent land purchase and home sale and I highly recommend them! You can give them a call at 360-410-1297 or email [email protected] or [email protected]. Instagram: @blankersrealestate
Transforming your house into a home can be so fun and rewarding, but it can also become incredibly expensive! Adding character and charm, color or unique pieces can quickly blow your budget. If you are looking to customize or update your space but have limited funds to do so, here are a few ideas of changes you can make that will beautifully change your space on a budget. More details and tutorials can be found for each of these by searching Pinterest or YouTube!  1. Frame Your TVThis is easy to do and is a quick way to change the look of any room. Purchase a frame large enough to go around your TV or build your own to instantly dress up the space. 2. Widen Your BaseboardsWide baseboards make a statement but tearing out all of your old baseboards and purchasing new to replace it can be very costly and time consuming. Instead add a thin piece of molding an inch above your baseboards, fill in with caulk, and paint it all one color to give a cohesive look. 3. Paint Your Front DoorIf you are looking to add a pop of color to your home this is the perfect space to do so without feeling like it’s too much. Black is also a popular front door color at the moment and don’t forget about your options to stain too (if the door is wood)! 4. Add/Update Kitchen BacksplashKitchen backsplash is something you can do yourself and save thousands of dollars on. If you currently have backsplash and have to tear it out prior to installing new then there will of course be more labor and costs involved but either way there are many affordable options to replace/add to your space. We have purchased affordable backsplash for multiple homes and have always been happy with it. An even more affordable option is the trending peel and stick backsplash that is easier to install. 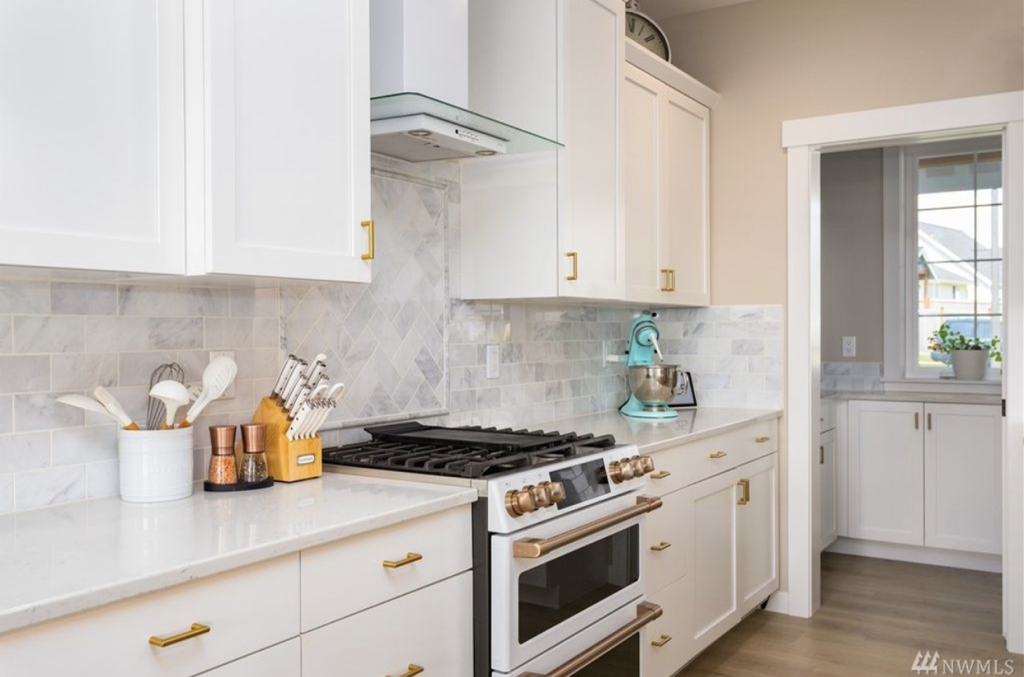 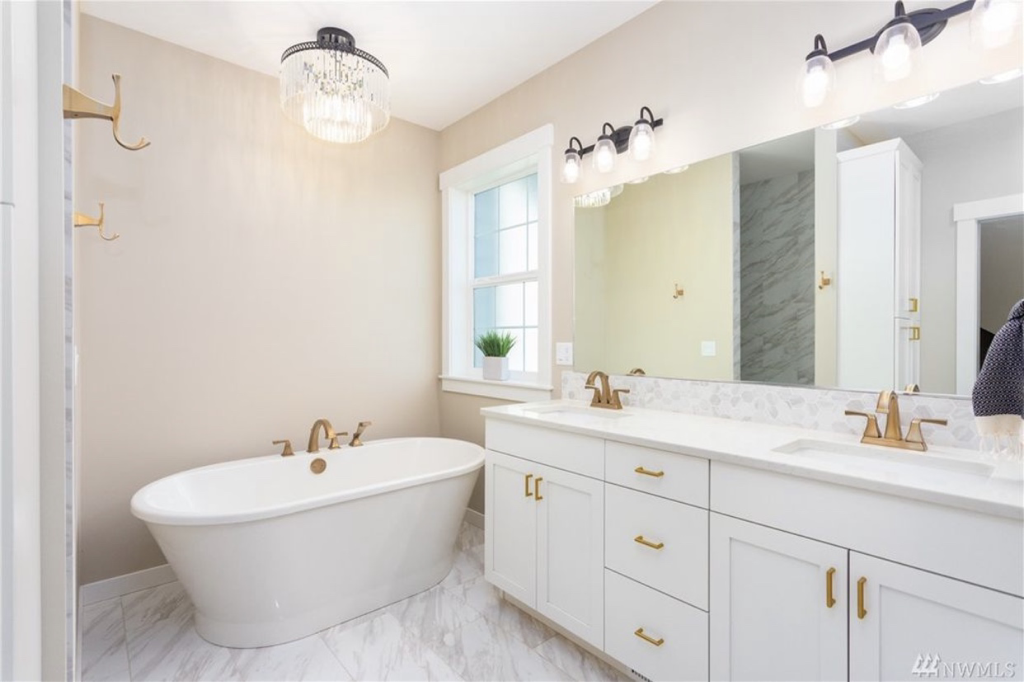 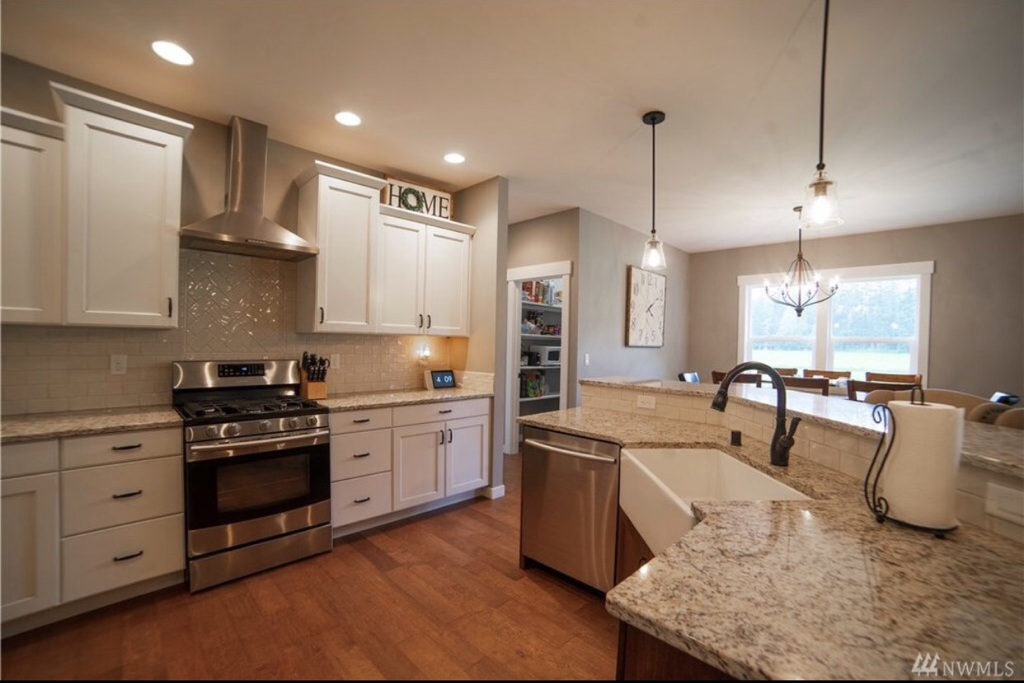 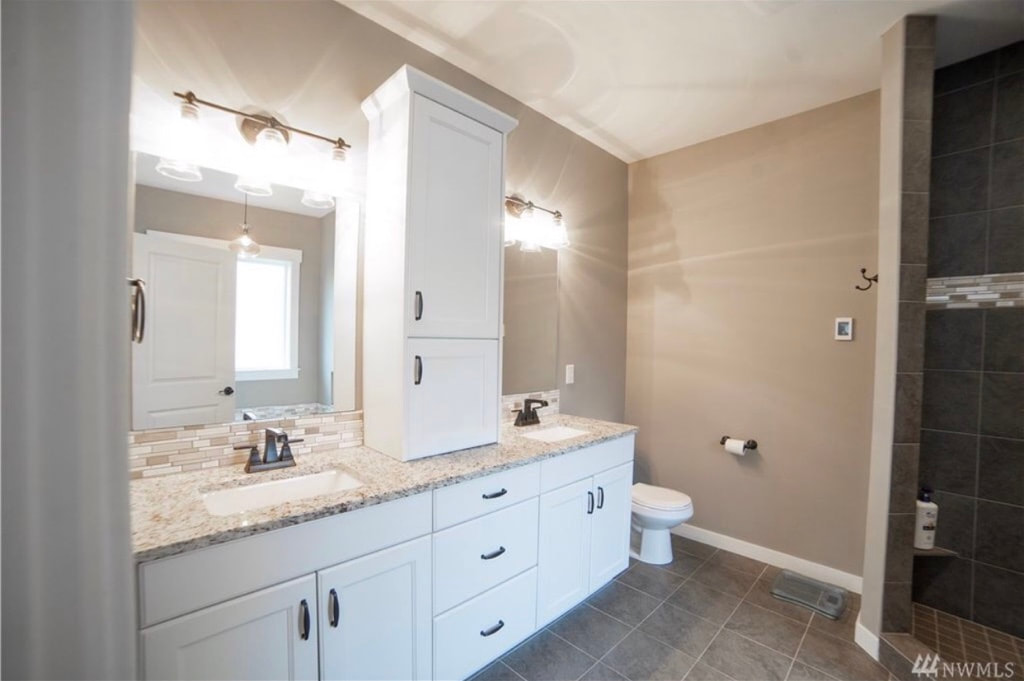 5. Replace Light FixturesMany homes come with outdated light fixtures or something generic. Through time spent walking through local stores and/or searching online you are bound to find something you love that can change the entire look and feel of your space. I highly recommend doing this in your entry way, kitchen, living space or other areas that guests and yourself frequent the most. Lighting can get expensive but try waiting for a sale or finding something similar to a more expensive piece that gives off the same overall look you love. 6. Add Floating ShelvesThere are many DIY styles for floating shelves that are easy and inexpensive. I found this particular triangular style on Amazon for a very affordable price and the black metal mixed with the brown/gray wood matches the black fixtures while adding in a cozy comfort to our white powder bathroom. 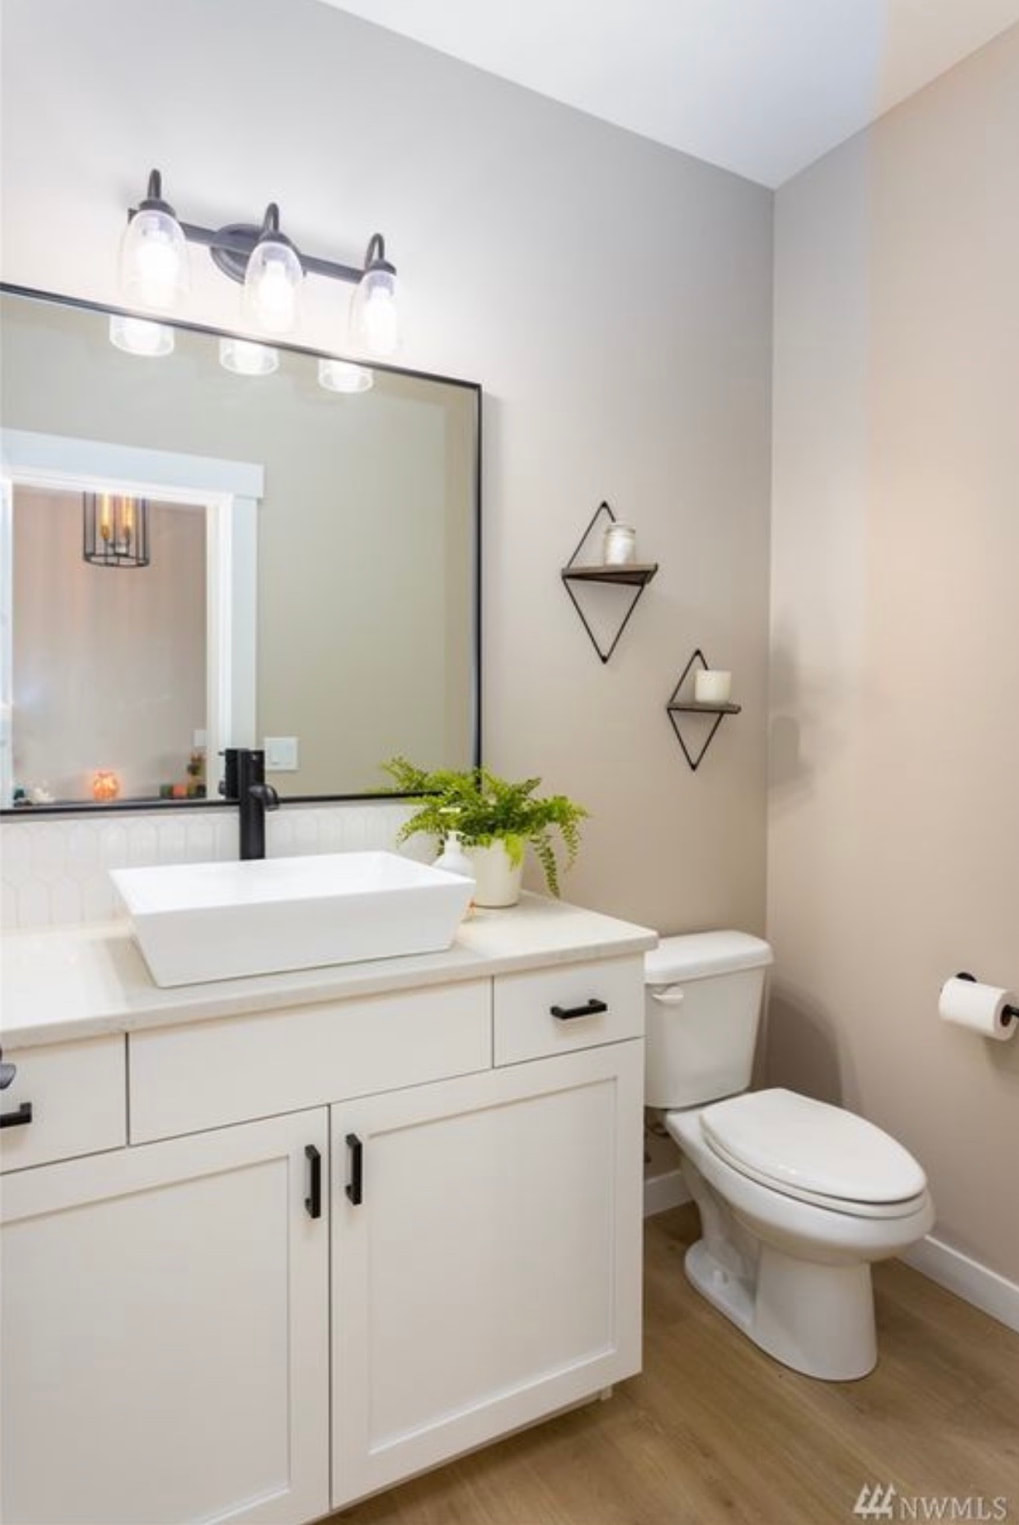 7. Replace Cabinet HardwareThere are so many colors and styles of cabinet hardware that this small change can go a long way! If you want to take the easiest route be sure to choose the same size pull/knob style so that you don’t have to drill any new holes or patch existing holes.  8. Replace Door HandlesAnother easy change just like the cabinet pulls is changing out door handles. As long as you stick with the same size it’s a project that will take little time and equipment while delivering nice results. 9. Upgrade Bathroom MirrorsJust like framing your TV, you can frame your bathroom mirror by finding a pre-made frame that fits the dimensions or by building one yourself. You can also remove and fully replace your mirrors with a framed option, easily found online or in local home decor stores. 10. Install an Electric FireplaceThis entails a bit more cost than some of our other options but still a great way to upgrade your space without the large cost of adding in a traditional fireplace. Electric inserts can be found on Amazon, come in various sizes and colors, and give a similar look as a traditional gas fireplace while still giving off heat too. Have you done any budget friendly home upgrades? Comment your experiences; I’d love to hear! This post was written in partnership with The Jerry Blankers Team and is published at www.jerryblankers.com/blog. All opinions are my own. If you are in need of a realtor in Whatcom County, WA, we used them for our most recent land purchase and home sale and I highly recommend them! You can give them a call at 360-410-1297 or email [email protected] or [email protected]. Instagram: @blankersrealestate
Last week The Jerry Blankers Team went to Lynden Paint and Flooring to speak to owner Trey Vogt and hear about their services plus offer you a chance at a $100 gift card to spend there. Be sure to check out the Instagram post HERE to enter! Duane Bode opened Lynden Paint and Flooring back in 1980 and Trey started working there in high school in 2016. Recently Trey became the owner when the opportunity arose.   Facebook: Lynden Paint & Flooring Address: 417 Front St. Lynden, Washington Website: www.lyndenpaintflooring.com Phone: 360-354-5858 Lynden Paint and Flooring has a wide range of products and services. They can help you with your paint needs, flooring (vinyl plank, hardwood, tile, etc) and even have an in house interior designer, Pam, available to help you design the space of your dreams. Pam has over 40 years of experience designing homes. Painting is a great way to transform and update a space such as a kitchen. Trey informed us that the main tools you need are a roller, a good brush to cut in, and painters tape. Current color trends are whites and greys though some brighter colors are popping up as accents. 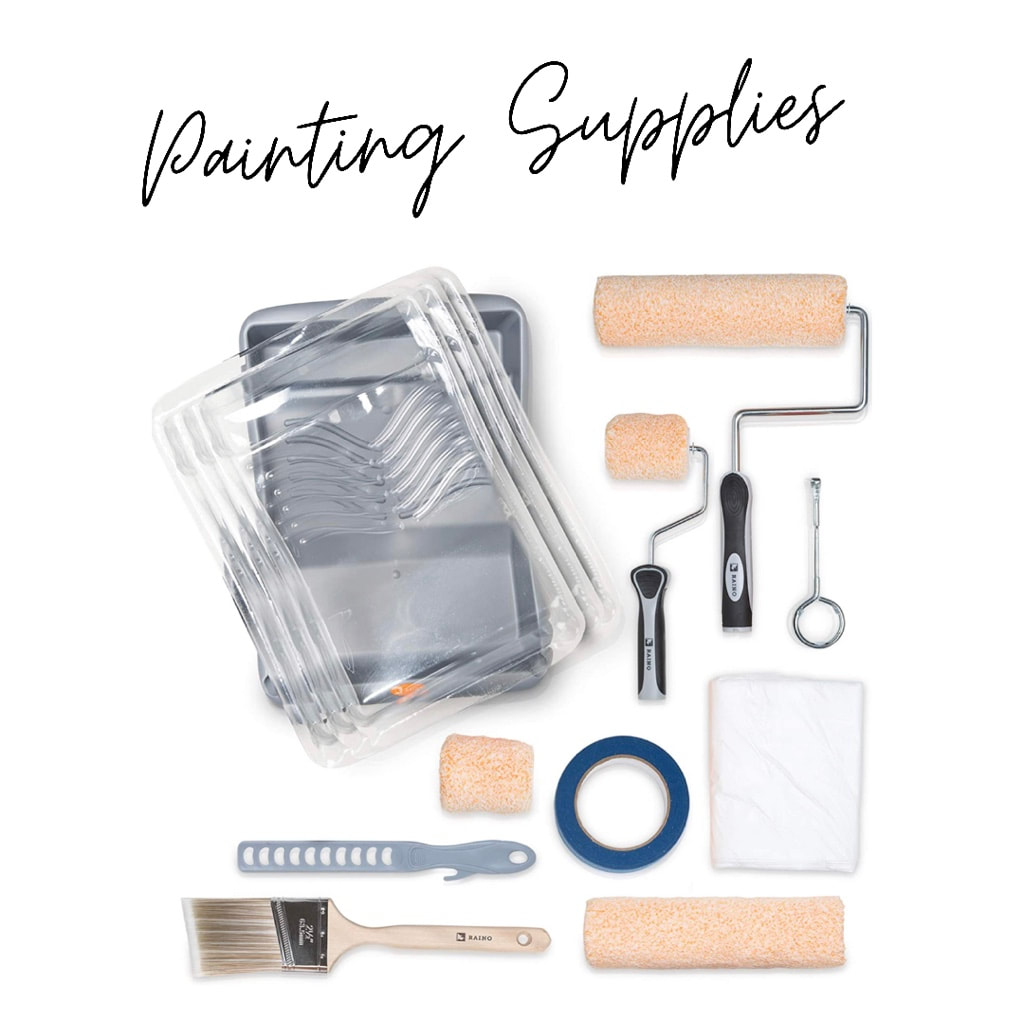 A personal favorite color of mine that has been trending for the last few years is Revere Pewter by Benjamin Moore. It looks beautiful in homes with white painted cabinets and woodwork as well as homes with light wood, dark wood features and just about everything in between. We chose to paint all interior walls of our home Revere Pewter and are incredibly happy with how it looks in all lighting variances, different angles and room sizes. 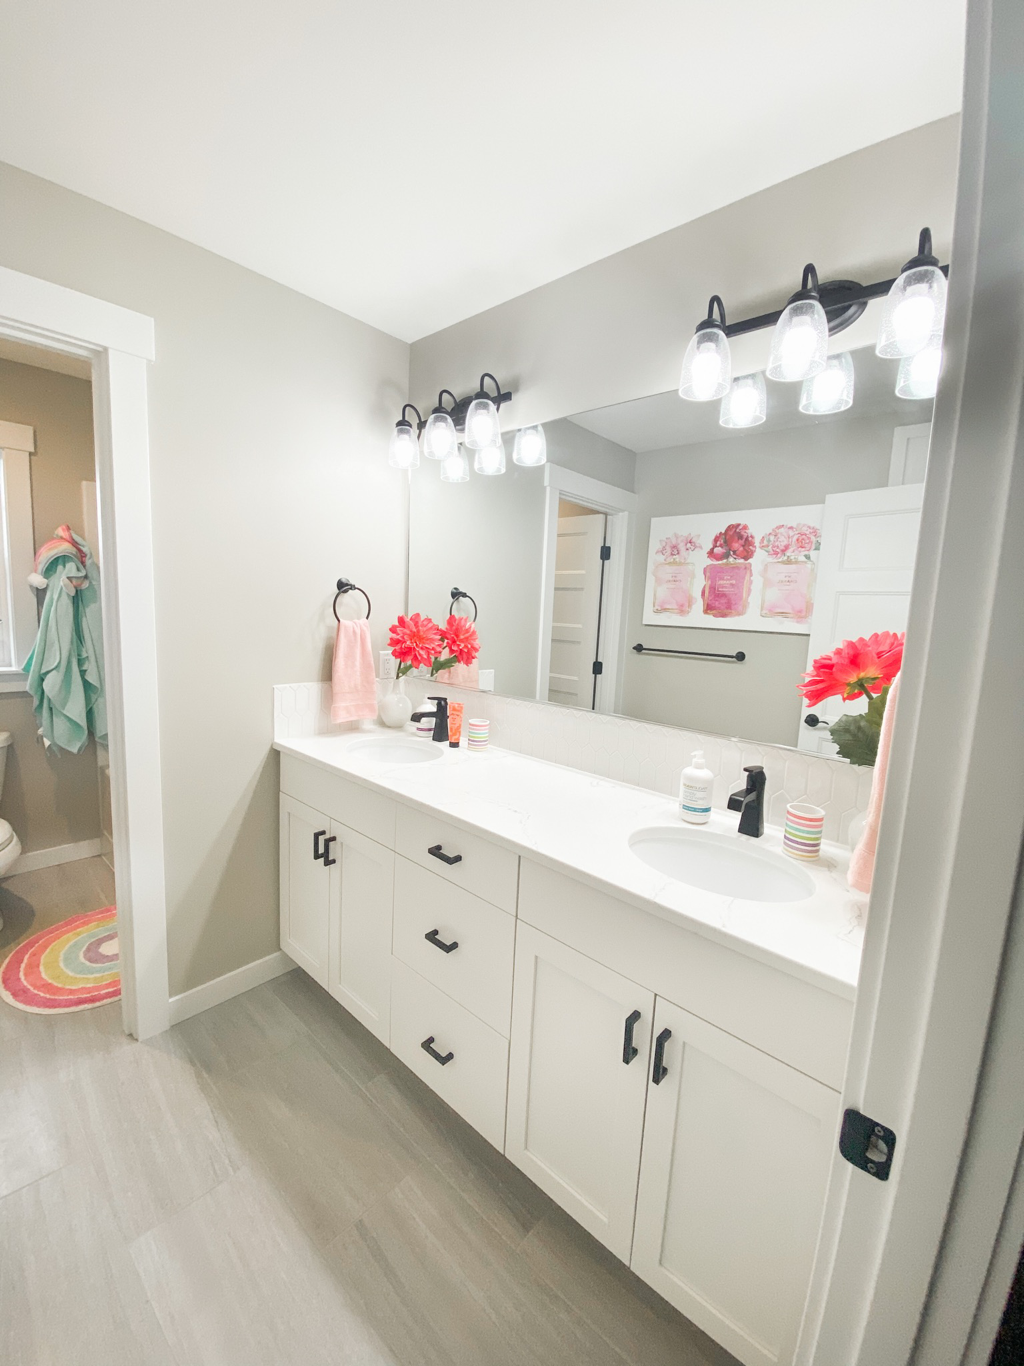  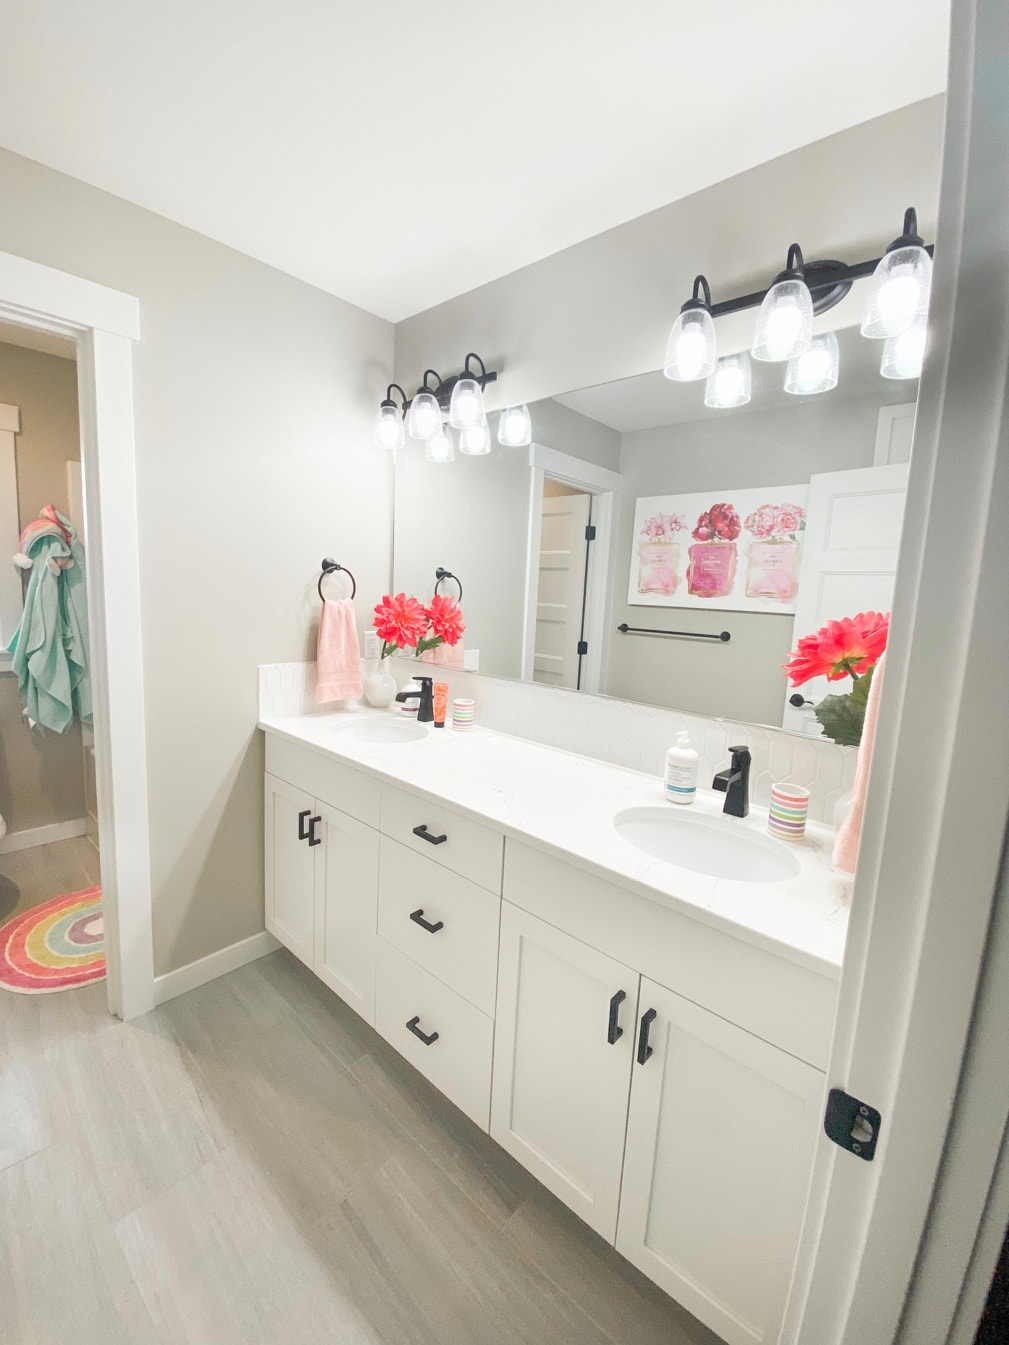 The Benjamin Moore color of the year for 2021 is Aegean Teal (below) which is intriguing, balanced and soothing. Have you painted your home recently? If so, what color(s) did you chose?! Don’t forget to enter the giveaway HERE! This post was written in partnership with The Jerry Blankers Team and is published at www.jerryblankers.com/blog. All opinions are my own. If you are in need of a realtor in Whatcom County, WA, we used them for our most recent land purchase and home sale and I highly recommend them! You can give them a call at 360-410-1297 or email [email protected] or [email protected]. Instagram: @blankersrealestate
Now that spring is in full force and we’re seeing more and more beautiful days, I’ve been working on refreshing my outdoor space. It’s important to me that it’s comfortable and inviting and after months of wind, snow, rain, etc. my outdoor furniture and decor can always use a little TLC. 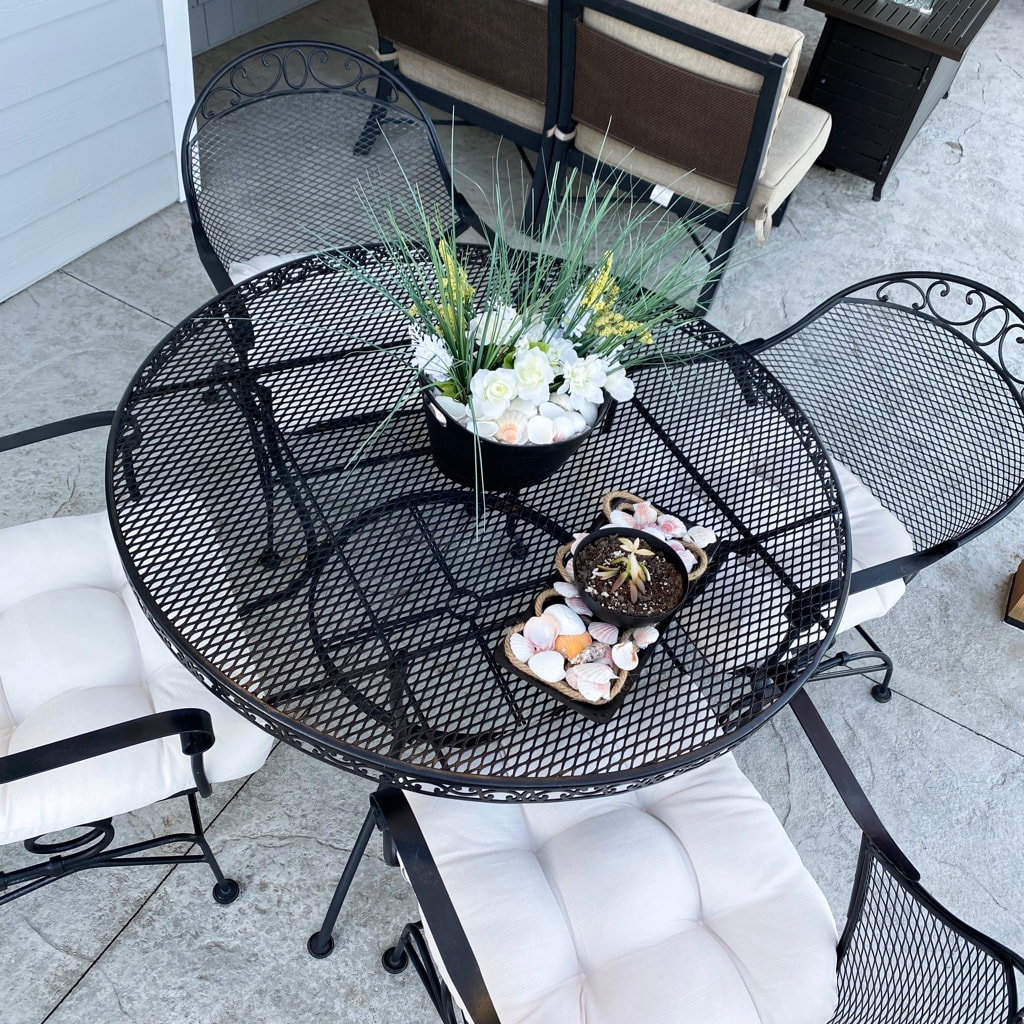 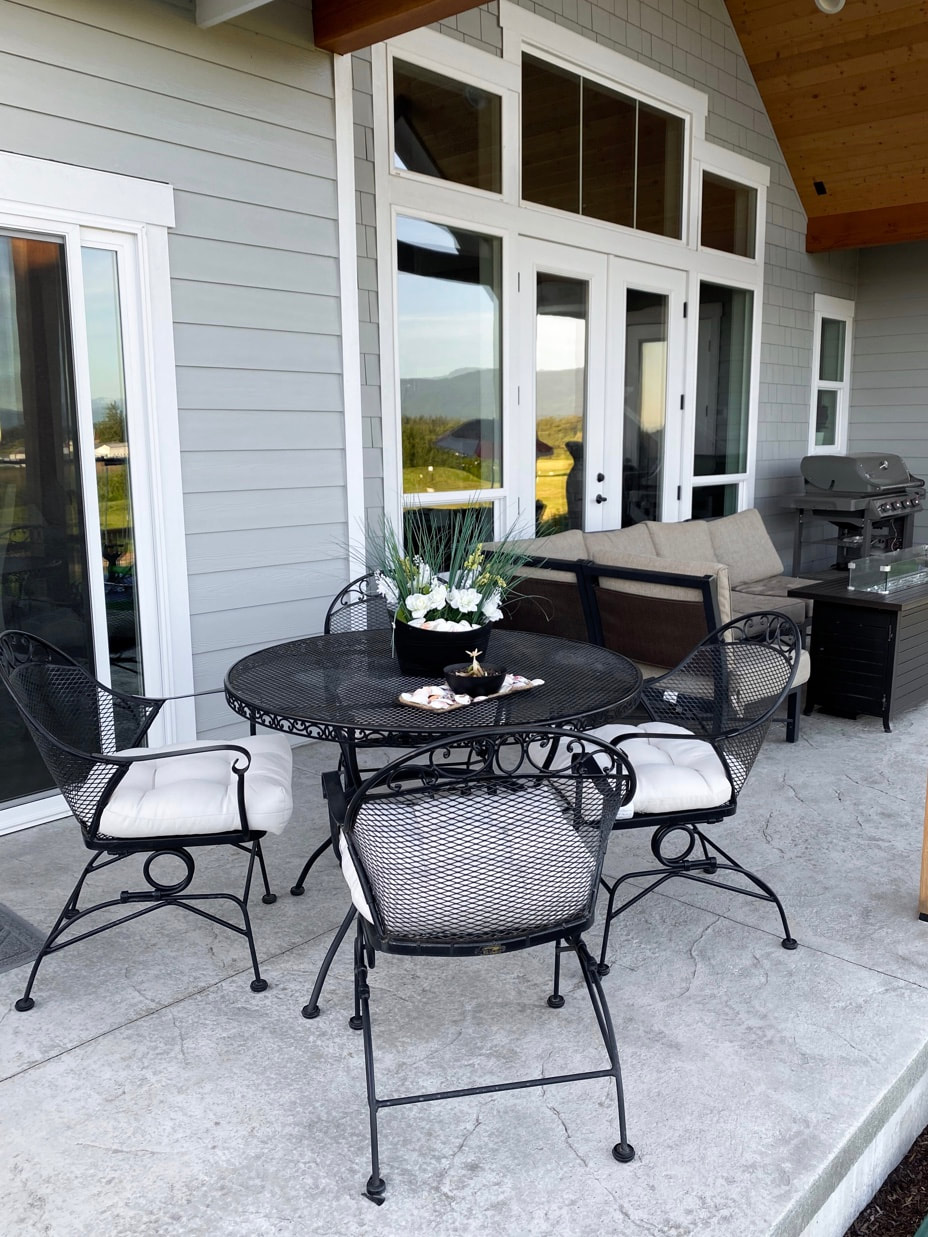 We have had this outdoor patio table and chairs for years. It is metal but after spending so much time in the weather it’s not only dirty and has rust spots but the color isn’t looking as fresh as it did years ago either. A great, inexpensive way to refresh patio furniture is with spray paint. Spray paint is quick, easy, inexpensive and gets into all of the small grooves and edges. Sure you could go buy a new patio set but that would cost you hundreds of dollars (or more!) where a can of spray paint can be found for $5-6. You may need 2 cans or more depending on your furniture size and number of pieces. This is the brand I used (below). I found it at a local paint store which offered a large variety of colors. I thought about really changing it up and doing a different color but ultimately decided to stick with black so that it continues to flow well with the rest of our patio furniture. This is a paint plus primer and works on plastic, wood, metal and more while also being great for both indoor and outdoor use (a must for my patio transformation)! I prefer the look of flat black for our patio furniture but they also offered glossy if that is more your style! 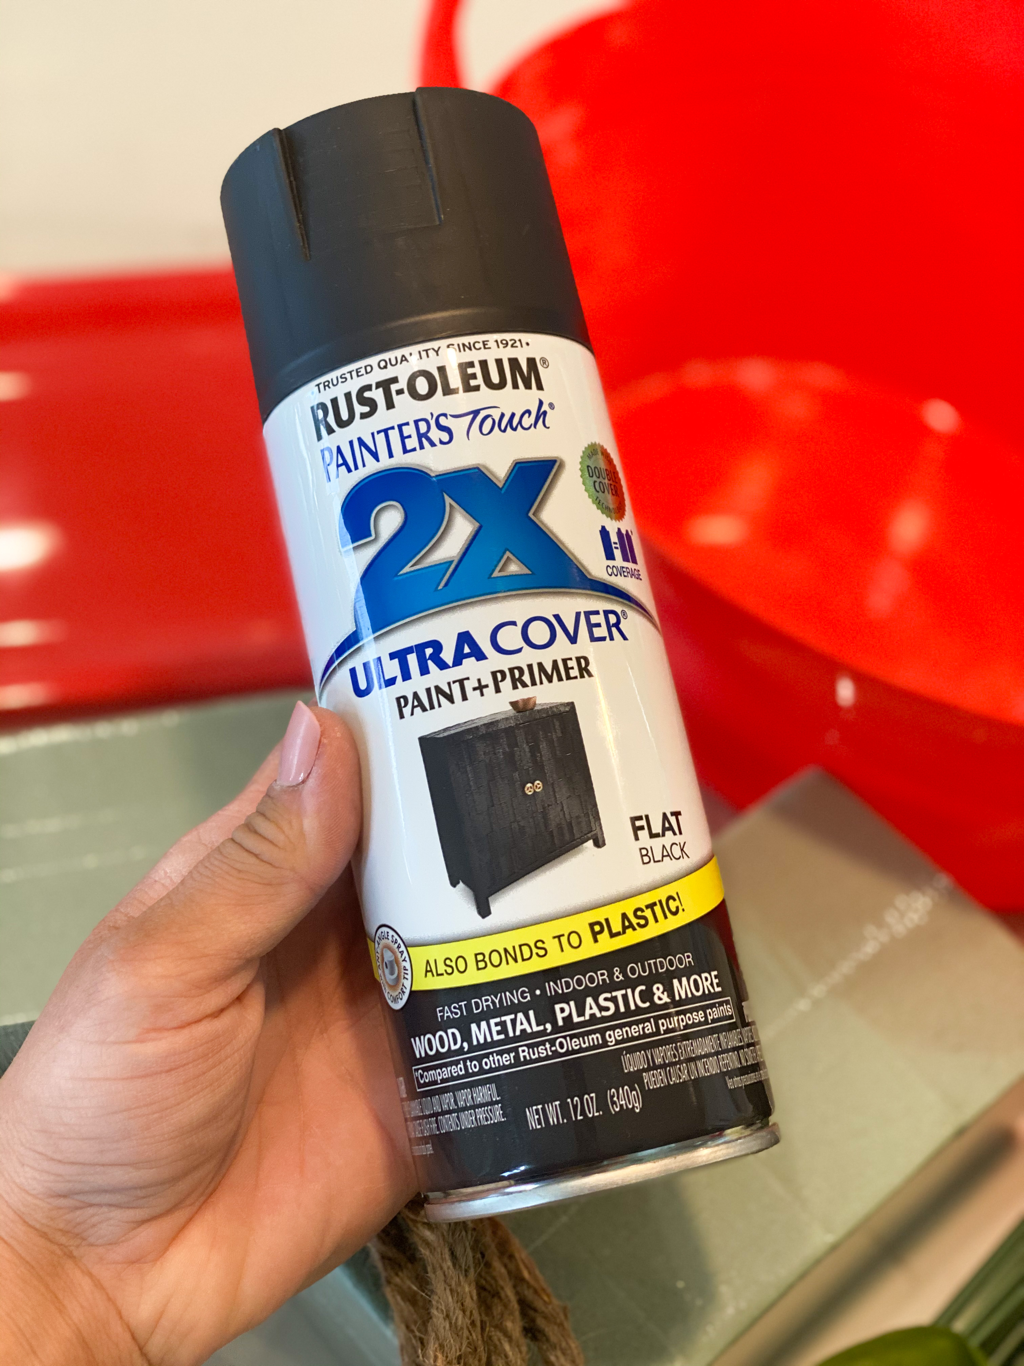 Since I was in need of some new patio decor and already had the spray paint, I decided to visit my local dollar store as well to look for any buckets or bowls that I could use to decorate. Typically I only find bright colors there which doesn’t fit with my current decor vibe but I easily transformed the plastic red pieces I found by spraying them with the flat black spray paint as well. I also grabbed a couple bags of crushed rock to put in the bottom of the plastic containers as they are lightweight and can easily blow away if they are not weighed down. I then added shells, succulents, etc to the pots. 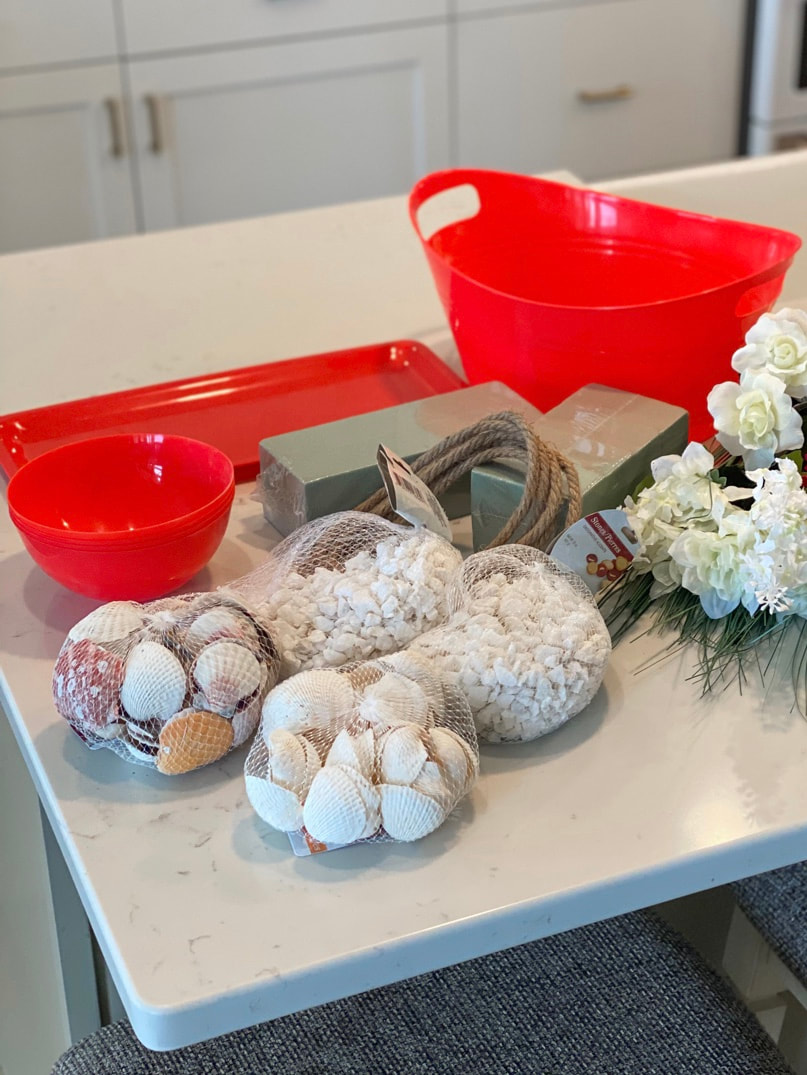 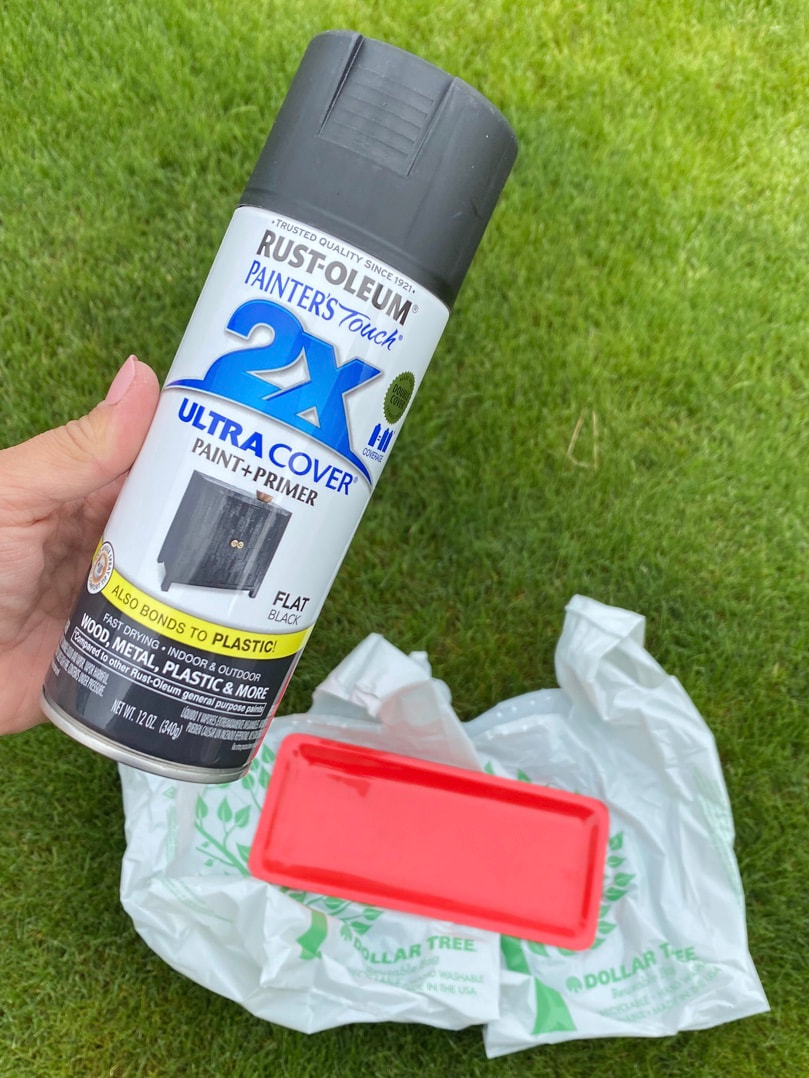 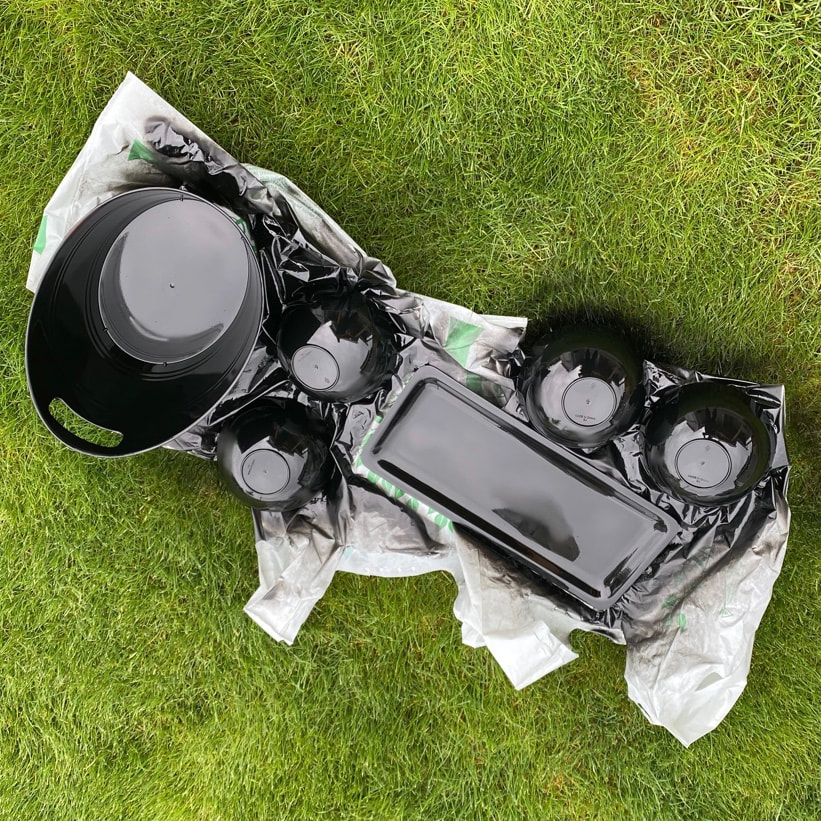 Now, when it comes to spray painting the furniture and decor there a few basic practices that will help you have a smooth experience but it’s something even a first time painter can complete well and with ease. Spray Painting Tips & Tricks•Clean your items prior to spraying. Wipe off any dust, bugs, etc and sand (if needed). •Avoid painting in the direct sun. This can cause bumps. Aim for a dry and moderately warm environment. This may include thinking ahead as it can take a while for paint to dry. I usually spray outdoors on the grass and put plastic down first but if the weather is an issue consider spraying in carport or garage with the garage doors open. Be sure to first move/cover your car and any other objects you don’t want to get any paint on. In my experience, the cans don’t overspray much but you can never be too cautious. •Spray thin layers. This will help prevent cracking and will allow you to create a more uniform look overall. •Avoid spraying vertically to avoid drips. Lay items down and spray down onto the side that faces up, allow time for that to dry completely, then turn it over (repeat as necessary). Consider changing whatever you have laid down under the project, such as a drop sheet, so that you are not setting the finished side onto potentially wet paint on the sheet. Often the drips on the drop sheet are thicker than the layer of paint you sprayed on your piece so even though your piece is dry, they will not be. •Shake your can well prior to spraying to ensure an even color. While I was at it I decided to switch out our patio chair pads with a neutral, plush option that fits our current style better. We love them! Small changes like that can really make such a big difference in the overall look and feel of your space. I hope you found these little tips and tricks helpful when it comes to refreshing your patio furniture and decor with spray paint. Have you ever used spray paint for a project? I’d love to hear your experiences and advice! This post was written in partnership with The Jerry Blankers Team and is published at www.jerryblankers.com/blog. All opinions are my own. If you are in need of a realtor in Whatcom County, WA, we used them for our most recent land purchase and home sale and I highly recommend them! You can give them a call at 360-410-1297 or email [email protected] or [email protected]. Instagram: @blankersrealestate
This post was written in partnership with The Jerry Blankers Team and is published at www.jerryblankers.com/blog. All opinions are my own. If you are in need of a realtor in Whatcom County, WA, we used them for our most recent land purchase and home sale and I highly recommend them! You can give them a call at 360-410-1297 or email [email protected] or [email protected]. Instagram: @blankersrealestate After what feels like a long, cold winter it can seem intimidating to cleanup and start prepping for a spring garden but now is the time to get started if you haven’t already. Whether you are planning to plant annuals, perennials, trees or shrubs, or grow fruits, vegetables or herbs I recommend walking around your yard to plan before heading to the store. Take note of when and how much sun/shade each area receives to ensure you choose not only a product that looks appealing to you but something that will thrive in each particular location as well. Knowing these facts ahead of time will reduce your stress and overwhelm, plus allow the experts at the store to help you make decisions. Other things to consider: how much time will you dedicate to upkeep? Be realistic and know your limits. There’s nothing worse than overcommitting and being stuck with an overgrown, unkept space shortly after. When in doubt, less is more. When it comes to edible plants such as fruits, vegetables and herbs, if your family doesn’t eat it or use it in any form, think again and see if it’s something you really want to add to your yard as you may want to dedicate your efforts elsewhere. “The best thing for your garden is your shadow.” - unknownYou’ll want to prep the area before heading to the store so that you can get right to planting after purchasing your products. This entails picking up fallen leaves and branches, removing debris, and fixing any damaged fencing, edging, etc. If the project seems too overwhelming start by dedicating a bit of time, even 15 minutes, each day to cleanup or stick to focusing on one section at a time. Click Here for our detailed Spring Yard Cleanup Checklist!Another important step is to replace and/or ready your garden tools. The tools needed can vary based on the type of garden you choose (trees and bushes require different prep and upkeep than a vegetable garden) but some desired items include a watering can, weeding tool, gardening gloves, gardening knee pad, hose, rake, shovel, garden shears, hedge shears, loppers, wheelbarrow, heavy-duty hand pruners, hand rake and a hand trowel. If you will be growing a vegetable garden additional tools include a digging fork, spade, raised garden beds, and garden fencing.  We recommend going to Van Wingerden’s Home and Garden located at 8210 Portal Way in Blaine, Washington, for all of your gardening needs. Their friendly staff can answer your questions and assist you in determining what is best for your space. Check out our fun giveaway with them HERE! Van Wingerden’s Home and Garden is family owned and operated. In addition to your exterior garden needs you can find houseplants, home decor and more! We dropped by and spoke with Jen, manager, and she answered a few questions for us. Full video can be found HERE.   Jerry: Okay, Jen, I’m ready to plant some plants on my patio. Am I better off with annuals or perennials? What’s the difference? Jen: For hanging baskets and planters you’re better off with annuals. They’re going to flower for you all season long. The trees, shrubs, perennials, those will come back every year but they usually have a shorter flowering season; they’re great for garden beds, etc. Jerry: (Being at the end of April in PNW Washington) Is it too early to plant? Jen: We’re right on that verge of being okay to put everything out but I would be cautious putting out stuff like your tomatoes, peppers, squash, things like that. Even a hanging basket, you don’t want it to get too cold. Usually around Mother’s Day is the perfect time to get all of that. Jerry: Speaking of Mother’s Day, what do you have for Mother’s Day here? Jen: Hanging baskets are always the best seller for Mother’s Day. We also have planters, it’s always great to get Mom a really nice shrub like a hydrangea or rhododendron. We have lots of options for different ideas if you don’t want a hanging basket. Jerry: Are there certain plants that thrive here better than others? Jen: I personally am not the expert on that but I have people here that can help you. What we carry here is usually really great for this region and we are sure to tell you in the case that it’s not. Van Wingerden’s Home and Garden is open Monday-Saturday from 9am-5pm with extended hours until 6pm currently for a short time. Don’t forget to check out our giveaway for TWO premium 12” hanging baskets from Van Wingerden Home and Garden HERE!  As spring and warmer weather begins, it’s hard to ignore the unkept flower beds and scruffy edges along the yard. April is usually the month that I start to notice and think about this aspect of homeownership again. It is weather dependent and can vary from year to year as well as region but I recommend waiting until the snow and freezing temperatures have passed to start your spring yard cleanup. One thing I’ve learned is that getting through the cleanup aspect of yard care it all is a task in itself, and an important one to complete prior to planting new flowers and bushes. BEFORE Spring Yard Cleanup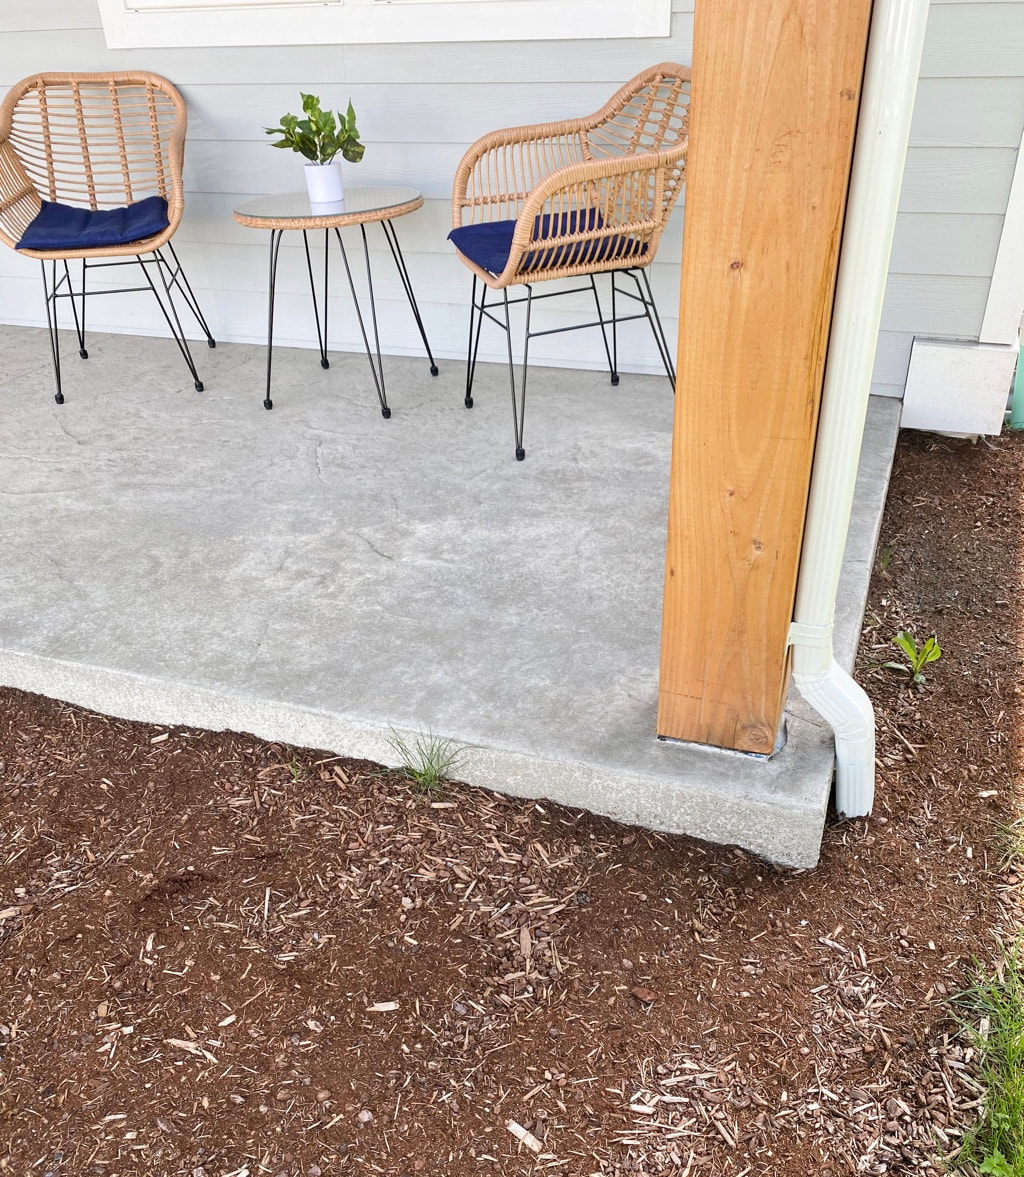 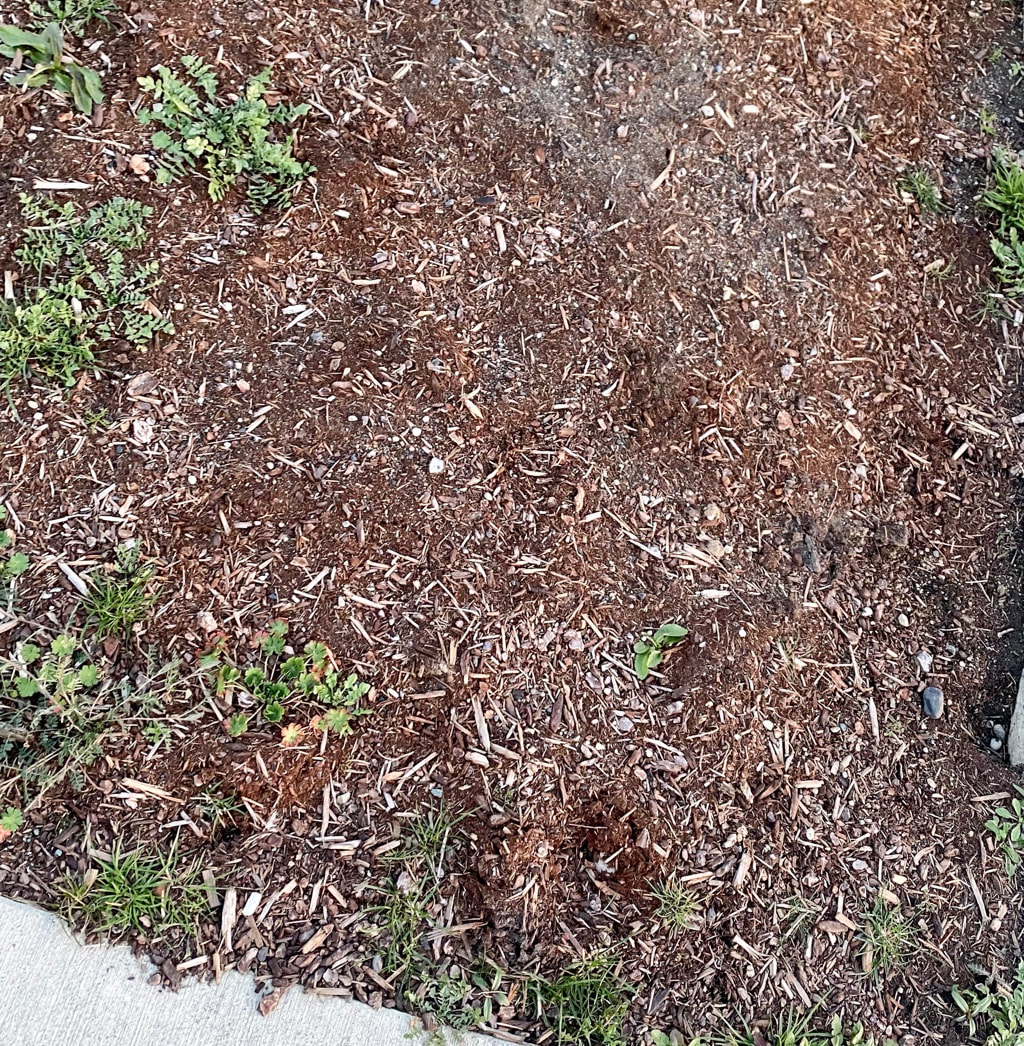  We moved into our home at the end of last summer and decided to wait until the following spring (now) to add plants or flowers to our flowerbeds. We topped the flowerbeds off with fresh bark last year but since laying it a good portion has blown away and it has become discolored; definitely not at its best. There are so many things to do when cleaning up your yard in the spring that I’ve created a simple checklist to help you get started. Spring Yard Tasks•REMOVE fallen branches, pine cones, dead grass. •RAKE leaves. •DISCARD pet waste. •TRIM. Cut back any overgrown trees or shrubs. PRUNE. Remove and discard dead and damaged branches from trees and shrubs. •PULL WEEDS. Try to pull out down to the root versus breaking. •REFRESH. Gravel, bark, wood chips, etc. •STONEWORK: check for cracks and frost heaves •IRRIGATION. Check sprinkler system, drip lines and soakers. •STRUCTURES. Inspect and clean arbors, outdoor heaters and fire pits, fences, sheds, decks, patios, etc. Repaint or stain if needed. •VEGETABLE GARDEN: remove vegetable remains from last season, add a new layer of compost, seed. •PULL any dead annuals. •REMOVE dead growth and divide perennials (wait until soil has thawed, but before they start their spring growth) •MULCH. Loosen bark mulch and plant matter to allow water and air to flow to the plant roots. •EDGE along flowerbeds to keep grass from growing in them and refresh your lines. •LAWN: seed bare spots, apply spring fertilizer •OUTDOOR FURNITURE. Wash, touch up with paint, bring cushions back outdoors, etc. •CLEAN GRILL. Check that everything is working on it. Get a new propane tank if needed. **A few more exterior projects you may want to think of at this time include cleaning gutters of debris, sealing your driveway and replacing or cleaning doormats. Handy Tools for Spring Cleaning Your Yard•Garden shears •Hedge shears •Heavy-duty hand pruners •Gardening gloves •Garden kneeling pad •Loppers (for thick branches) •Watering can •Weeding tool •Hand rake •Hand trowel •Rake •Shovel  AFTER Spring Yard Cleanup After weeding and adding new plants and bark mulch our flowerbeds are looking much better. I’ll be touching more on garden prep and garden tips later this month; stay tuned! This post was written in partnership with The Jerry Blankers Team and is published at www.jerryblankers.com/blog. All opinions are my own. If you are in need of a realtor in Whatcom County, WA, we used them for our most recent land purchase and home sale and I highly recommend them! You can give them a call at 360-410-1297 or email [email protected] or [email protected]. Instagram: @blankersrealestate
This week we had the privilege of meeting with Lauren, owner of Organized at Last, to discuss all things home organization. Lauren grew up in Whatcom County, WA, then married and started her family while living in a 700 square foot cabin in Alaska. Living as a family of four in this small space challenged her to think creatively to make the most out of the space. We learned a lot while chatting with her as she went over how to get started organizing when you’re feeling overwhelmed, packing tips, and easy tips to create a home office.   Organized at Last is a professional home organization company based in Bellingham, Washington. They specialize in helping you reduce clutter, simplify and minimize, and improve function by bringing life-changing order and organization to your home and/or office. Lauren and her team listen to your needs and find creative solutions without pressure or judgement. Real estate staging, helping you with moving and unpacking, and interior design and decorating services are also available. We wanted to hear more, and knew you would too, so we sat down with Lauren to discuss. We posted the full video on our Facebook and Instagram pages but summarized it here in writing as well.   Q & A with Lauren:Question (Jerry): Tell us a little bit about what you do. Answer (Lauren): We do all kinds of organizing. Home organizing, office spaces, garage, anything to do with the home. We also do commercial office spaces, staging for real estate, interior design and decorating. Sometimes it all comes in together; sometimes I’ll do everything for one client. If somebody is moving we can pack them, leave the stuff they need for staging, then help get their house sold in that way, unpack them at the new house, set up...we’ve done that. The whole nine yards. Q: Now when you’re moving, everyone just seems to have so much stuff. I’ve been here 25 years. I’m overwhelmed; where do I start? A: With the moving I would say you start and you don’t hesitate. Just start collecting boxes, start collecting wrapping, and just room by room go through. Get the pictures off of the wall. Anything that you’re not going to need to live with. I would say start with a room so that way you don’t have to think about the whole house as one big project. Really just think of it as room by room if it really is starting to feel like that that big, huge, overwhelming project. And then when we pack for people what we really like to do is rather than when we pack a box writing a big paragraph of everything that’s on the box, if this is Box #1, we write 1. And say you’re packing your bathroom, write bathroom. So that all that’s written on the box is #1 bathroom. And then you have a sheet of paper and on that paper you have #1 bathroom and you write down everything that’s in that box. And then you have Box #2 and you have your paper so that when you go to your new home and ideally have moved all of the boxes that say bathroom #1 and bathroom #2 into the bathrooms that they need to be in...if you’re looking for one specific item, rather then looking through every box and trying to read every little paragraph you’re just looking at your sheet of paper and can see okay, that’s in #3. I just need to find #3. I think that’s a big thing when people move is that they can’t find any of their stuff anymore, it’s all misplaced. So starting early, trying to do it as methodical as possible and realize you’re doing yourself a huge favor by starting out that way, not just throwing everything in. Sometimes you want to do that. You want to just throw everything into a box and just get it done because it’s so much work. But really, then what you’re doing is creating even more of a headache for yourself on the unpacking side. Q & A continued below... 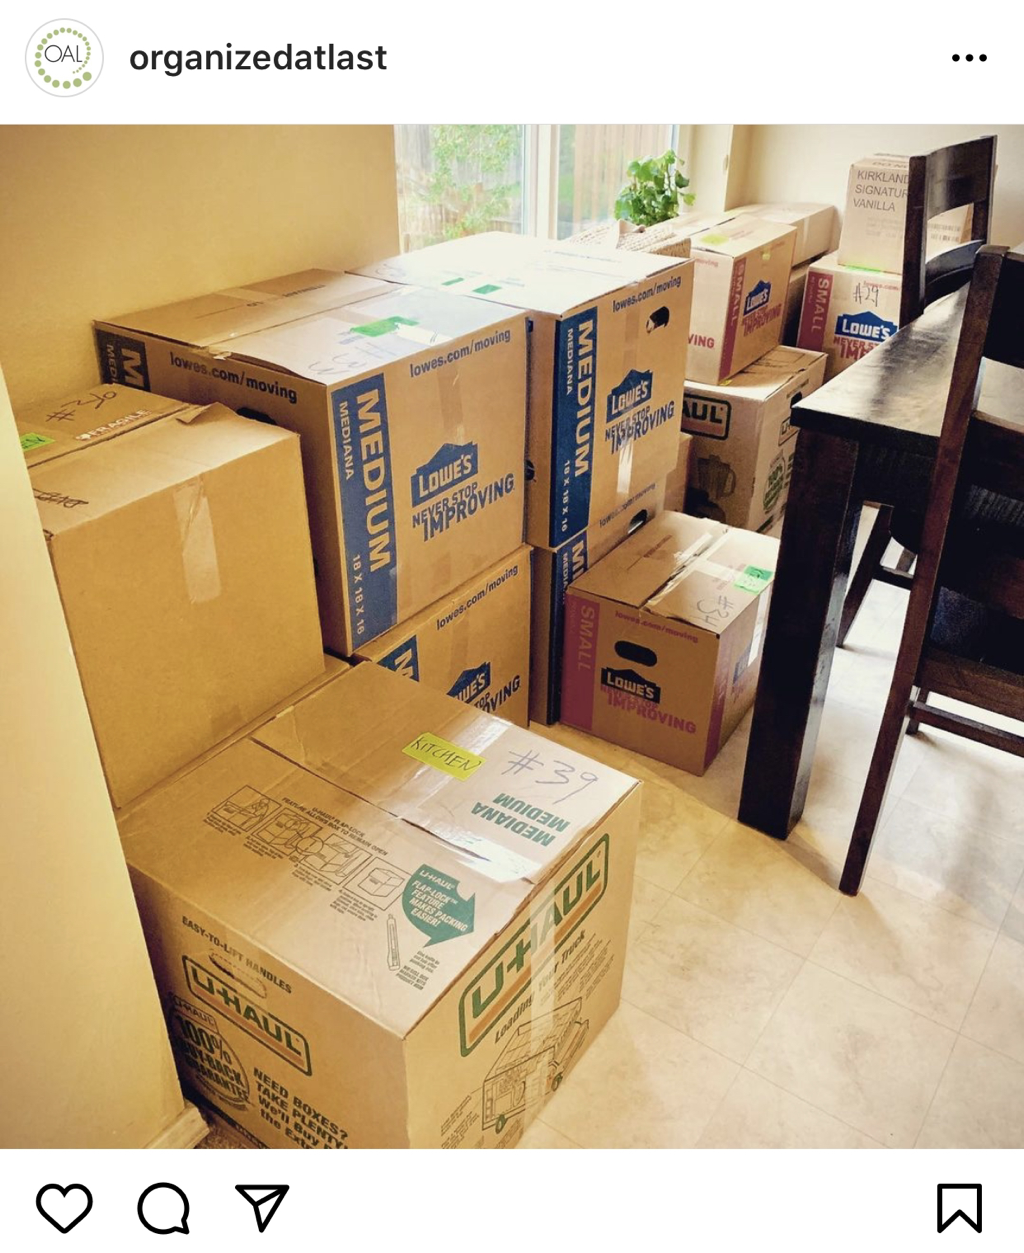 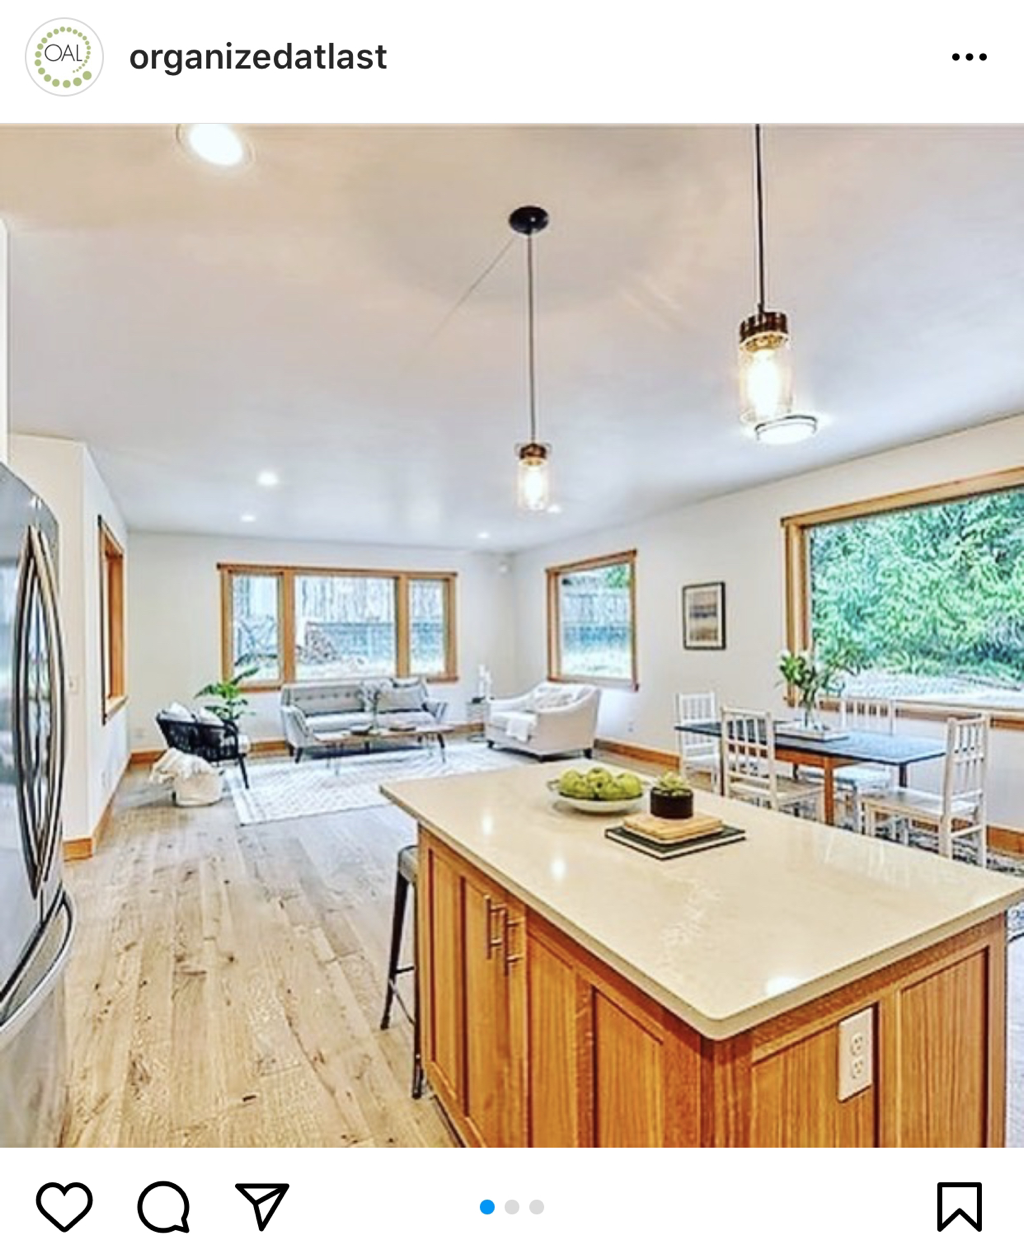 Q and A continued... Q: A lot of people are working remotely from home now. How do I organize my office at home so I don’t have all of the distractions that normally take part in a common home. A: Most of us don’t have these homes with a whole extra room that we can take everything out of and now make it our home office. If you have that it’s great that you have that space and you have it set up but a lot of people don’t have that extra space to make an office...so I would say buy a room divider. A bifold, a trifold, you can get them at Target, they’re usually relatively cheap, and just putting up that wall helps. If you’re going to be in the living room, take a corner of your living room and put up that wall so you’re not looking at your kitchen, you’re not looking at your dishes, or thinking about your laundry or anything else. I think it really helps focus on the job at hand just to put up those blinders. Thank you Lauren for sharing your tips and giving us a glimpse inside the life of a Professional Organizer! To follow along or contact Organized at Last:This post was written in partnership with The Jerry Blankers Team and is published at www.jerryblankers.com/blog. All opinions are my own. If you are in need of a realtor in Whatcom County, WA, we used them for our most recent land purchase and home sale and I highly recommend them! You can give them a call at 360-410-1297 or email [email protected] or [email protected]. Instagram: @blankersrealestate
|


 RSS Feed