|
When areas of your home are cluttered, messy and unorganized it takes longer to find items and to put them back. It can get frustrating and downright annoying having to go back and forth wondering where something went or if you even have it anymore. I’ve noticed that as I organize and de-clutter certain parts of my home, as silly as it sounds, it really helps with my mood and my efficiency in performing household tasks. If you know exactly where your cleaning supplies are, you can access them more quickly and efficiently. It also makes it easy to quickly know if you are running low on something or if it’s gone, etc instead of wondering if you just left it in a different spot this time. If you know where your extra pillowcases are, same thing. Today I’m focusing on one of my favorite areas to organize: the kitchen pantry. If you don’t have a designated pantry in your home, I highly recommend choosing an area (certain cupboards, a small closet near the kitchen, possibly add open shelving, etc) to function as one. Having pantry staples located close together is incredibly helpful when it comes to cooking, baking, and even planning a grocery list. 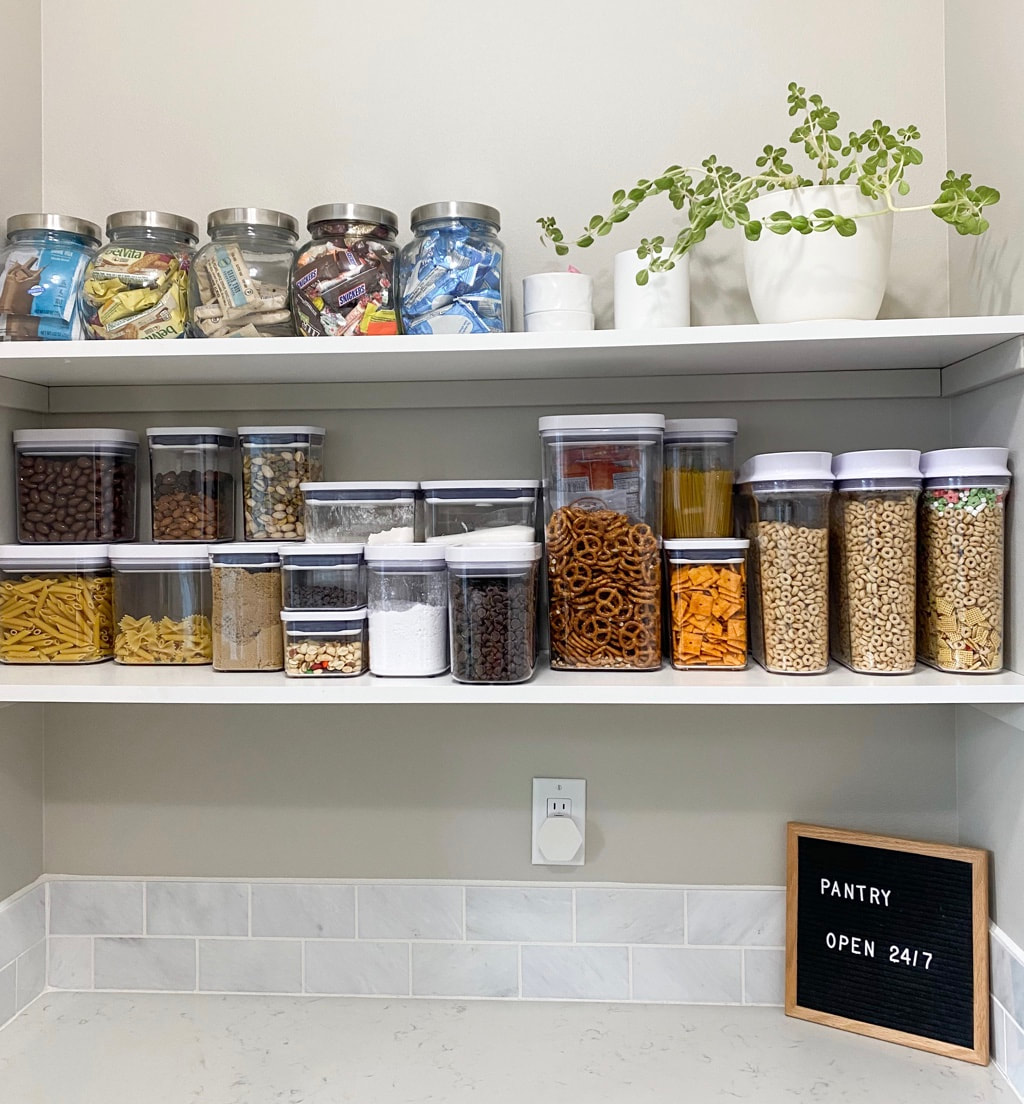 Step 1: PURGEThe first thing you’ll want to do is pull everything out of your pantry (or designated pantry area) and PURGE. Toss anything expired, put all of those random loose chip clips together, and reevaluate if any items that have sat and sat unused (but not expired) will get used by you soon or if you should consider donating them to a local food bank. Step 2: CLEANWipe down all surfaces so that you will be starting fresh. Use disinfectant if/when necessary otherwise a damp washcloth will usually do the trick. Be sure to allow ample time to dry before you refill the area (step 4). Step 3: STRATEGIZEDoes the way you had your pantry set up previously suit your needs well? Does it make sense to have the highly used salt on a shelf up high and the rarely used baking soda in arms reach? The strategy will differ for every household but take a few minutes to see what makes the most sense for you. Maybe you want to leave it how it was since you have gotten so used to that system but if it doesn’t function easily I highly recommend changing the layout. 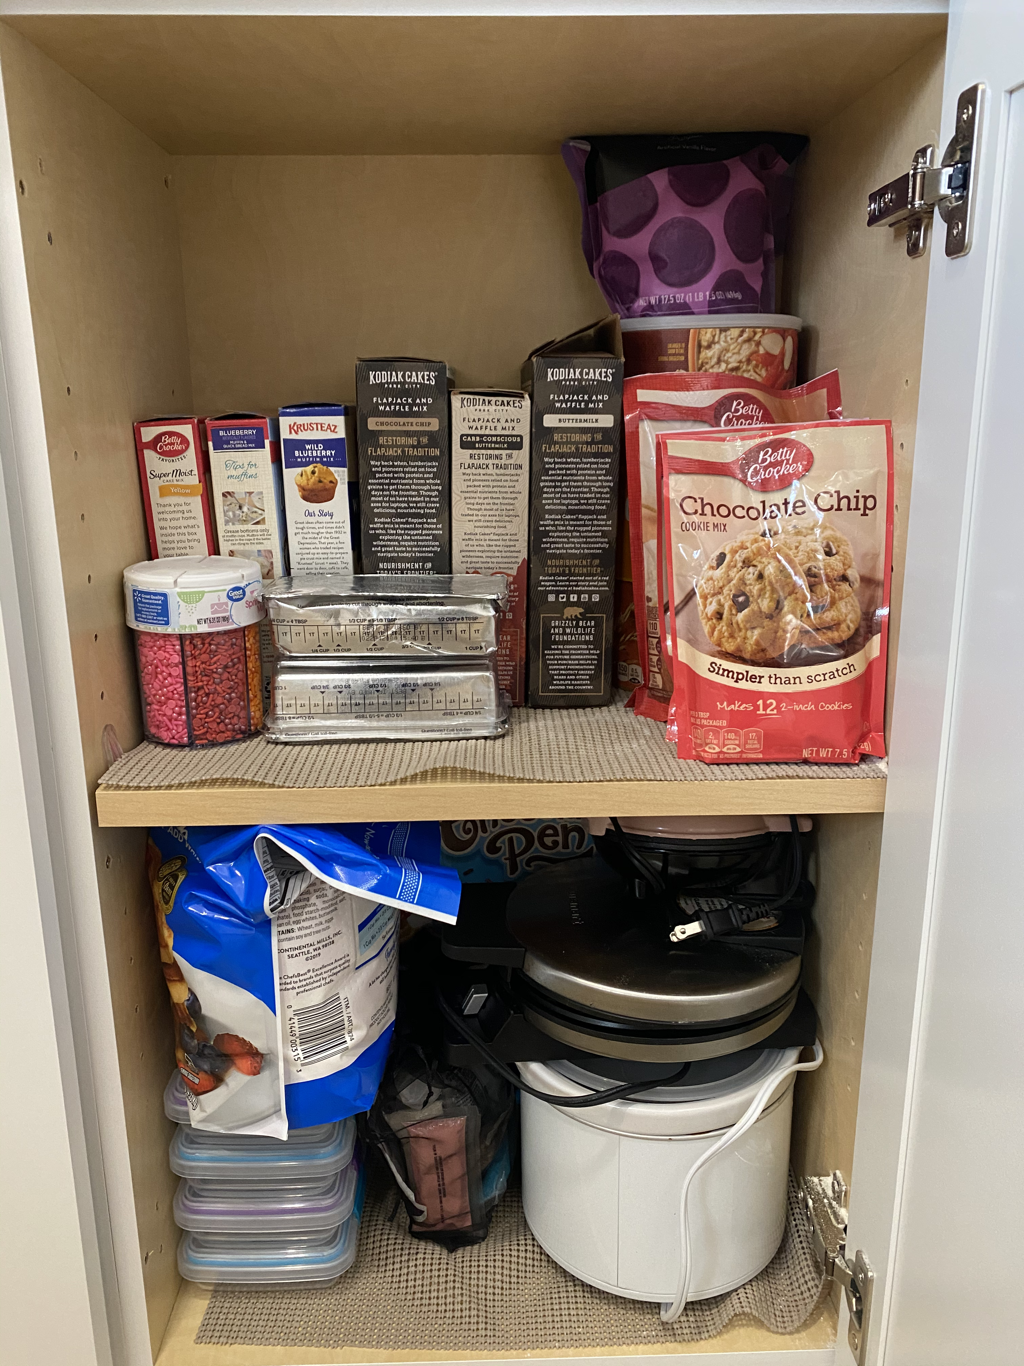 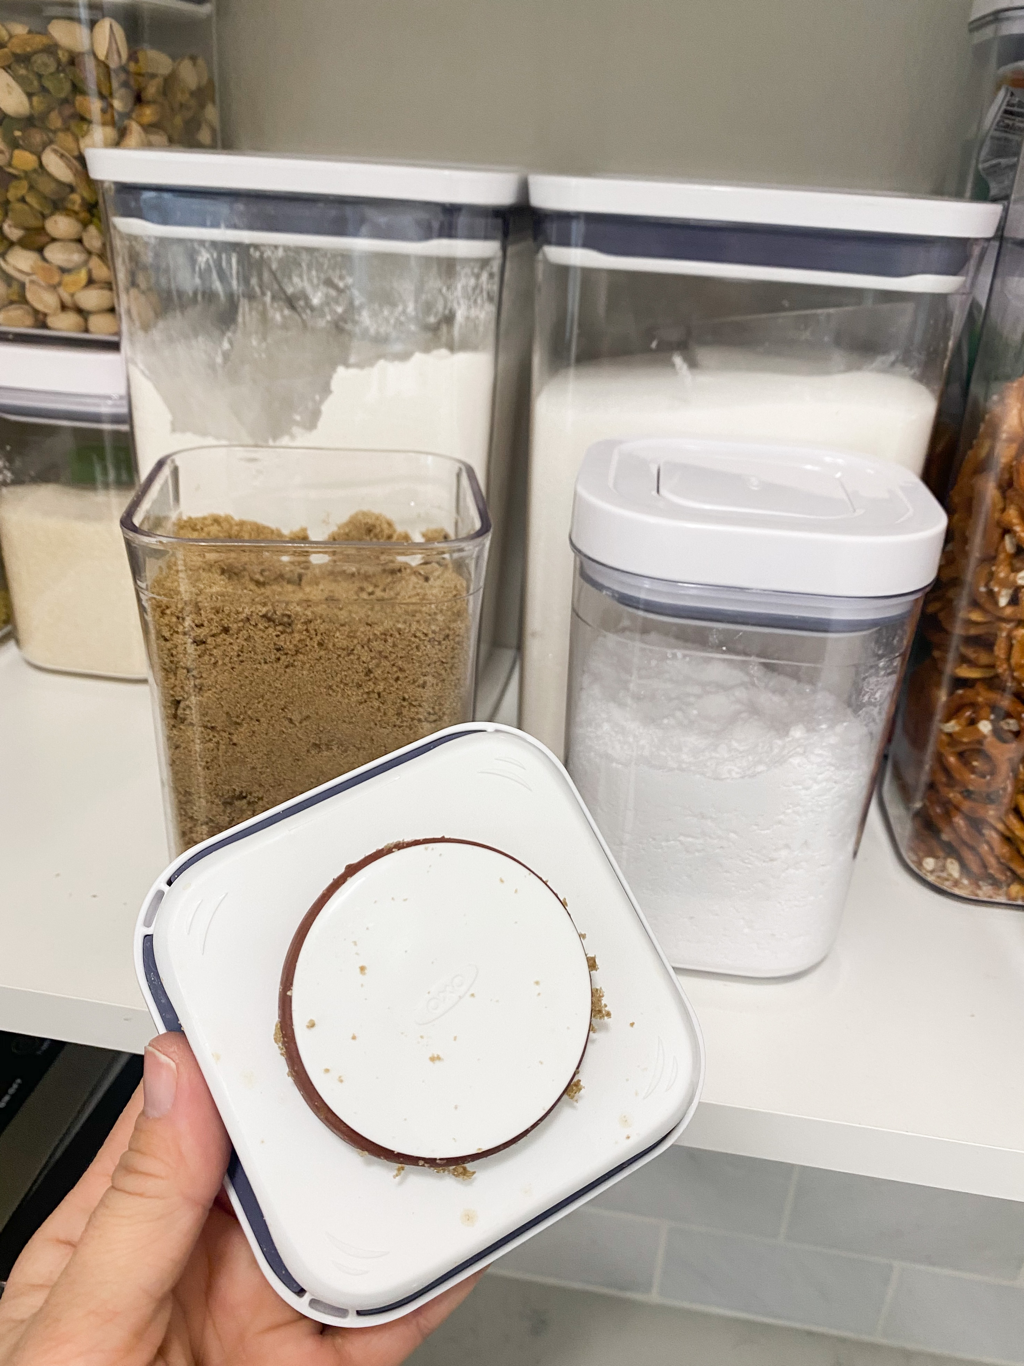 Step 4: ORGANIZE & FILLNow that you’ve purged, cleaned, and strategized, it’s time to refill the pantry! I purchased these food storage containers last year and they have made such a difference for us; I love the sleek design. Using food storage containers makes keeping your pantry neat and tidy so much easier because you are dealing with stackable, uniform pieces instead of food bags and boxes of varying sizes. They are dishwasher safe and I have also noticed our food stays fresh much longer with the push-button airtight seal. 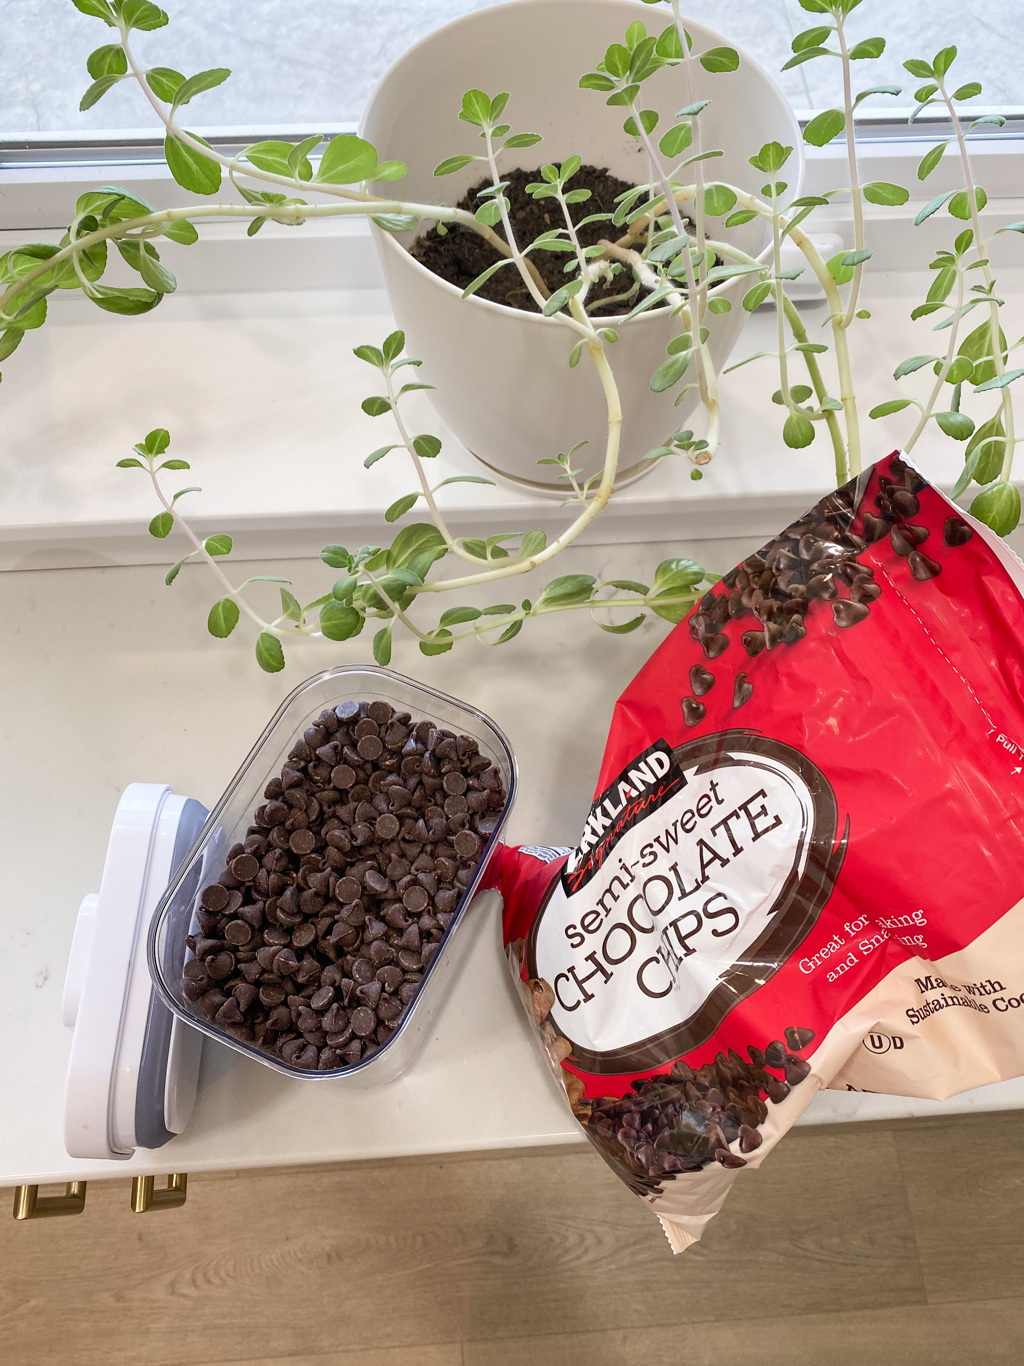 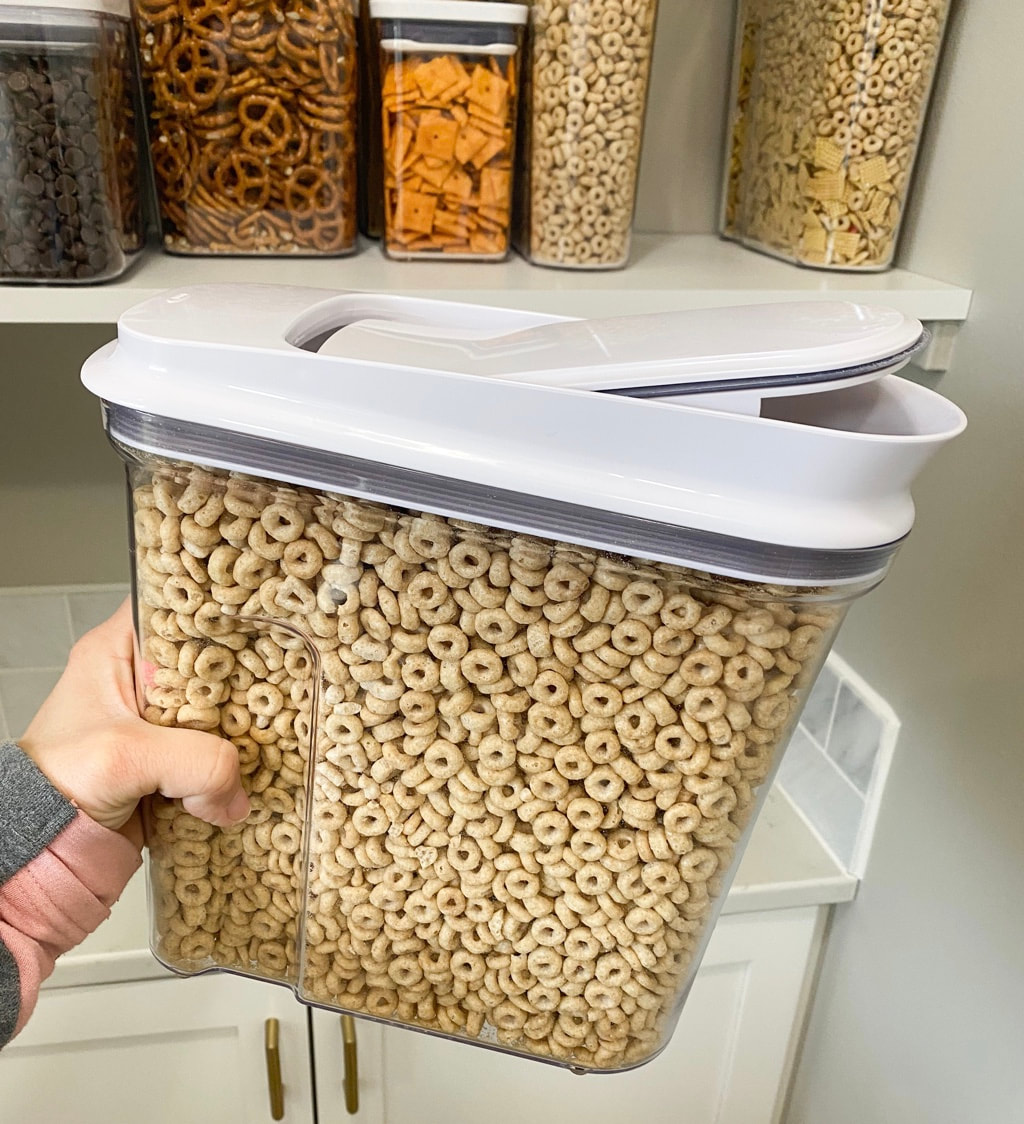 Step 5: LABELIf you want to take your pantry organization to the next level, label! You can label anything from spice jars to baking essentials and more. I purchased this spice jar set with labels from Amazon and it has made such a difference for us! It’s so easy to quickly see the spice I need and the labels do not come attached to the spice jar so you are able to decide which ones you need or don’t need and if you’d like the label on the side of the jar or on top of the lid, or both, dependent on what makes sense based on how you display your spices.  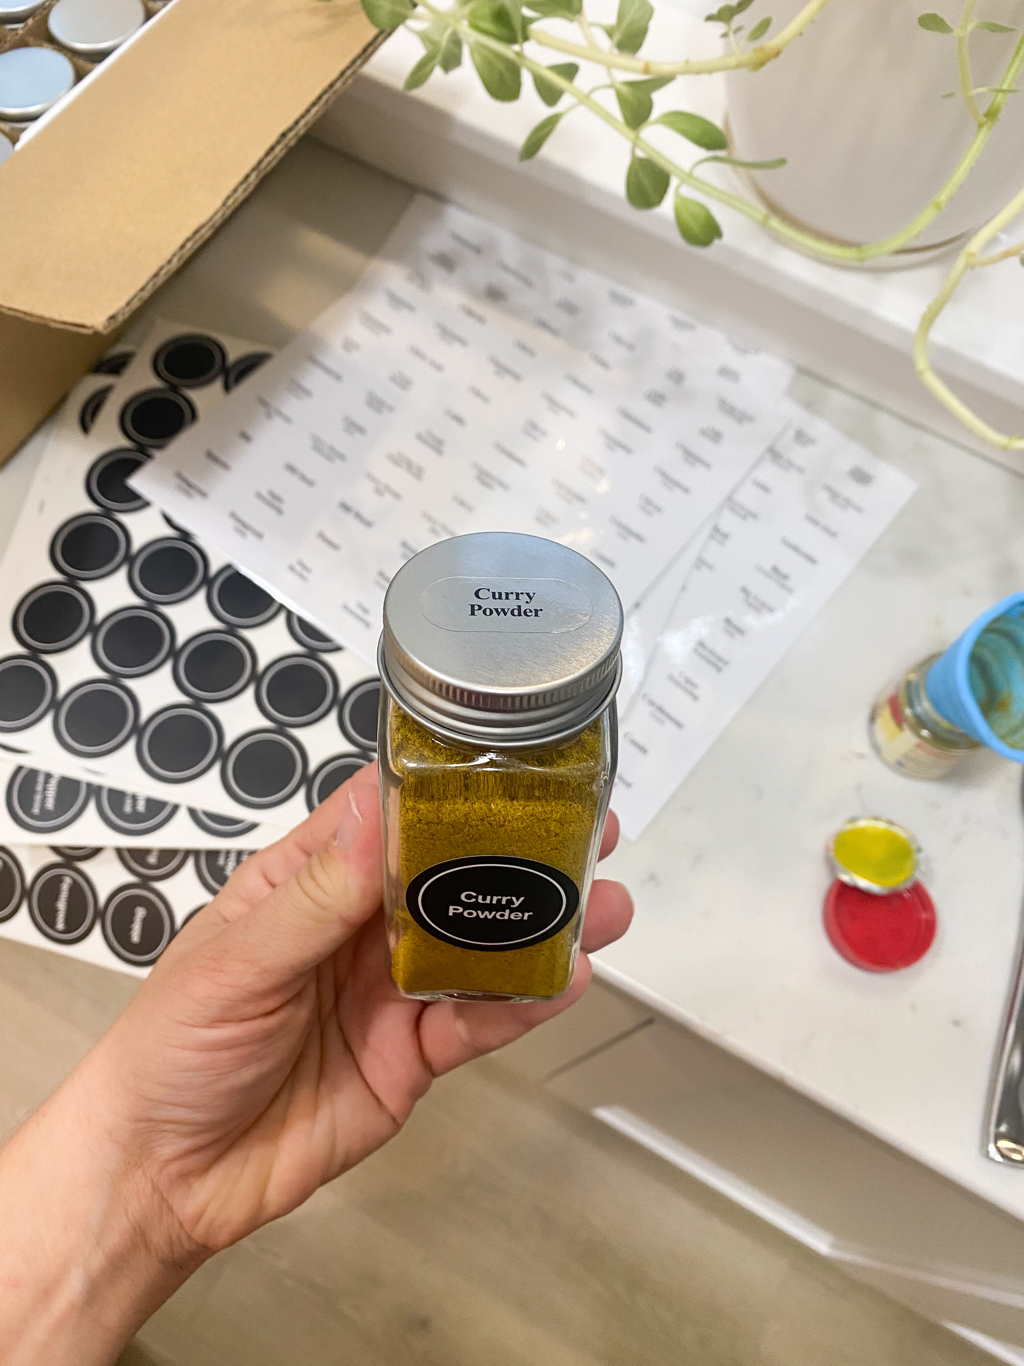 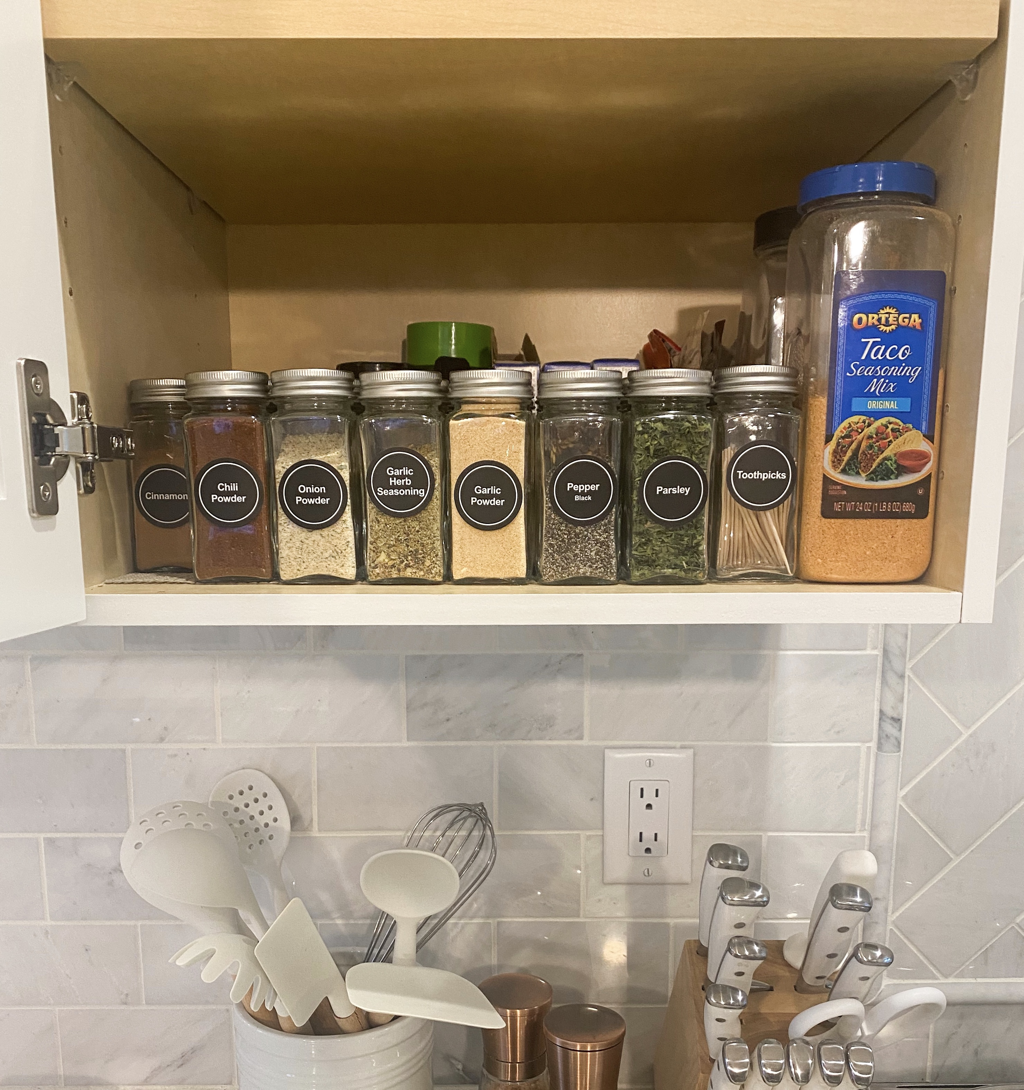 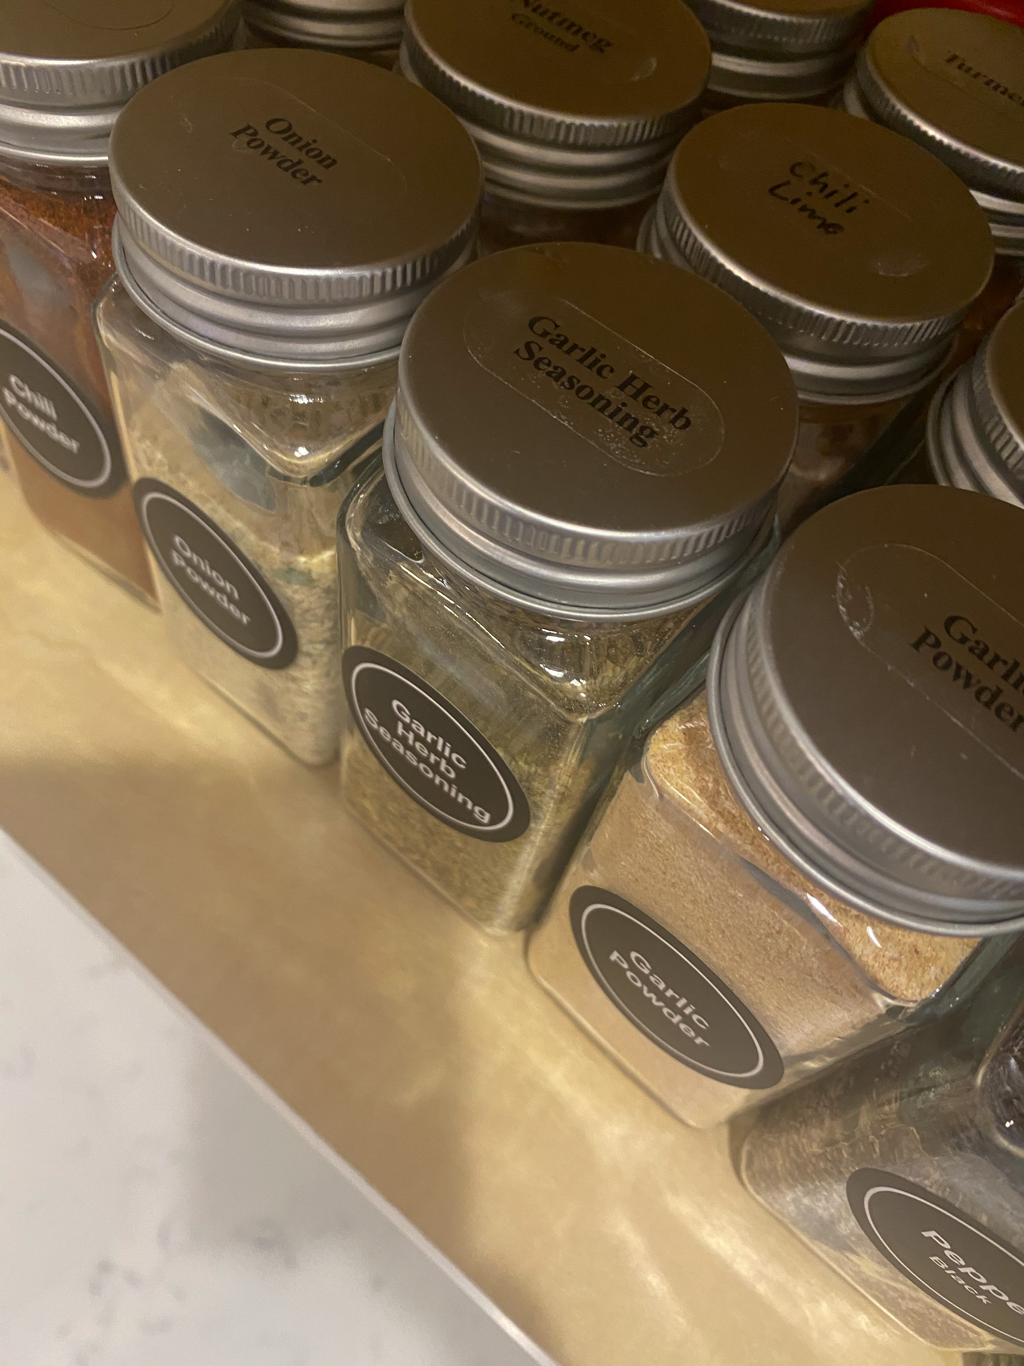 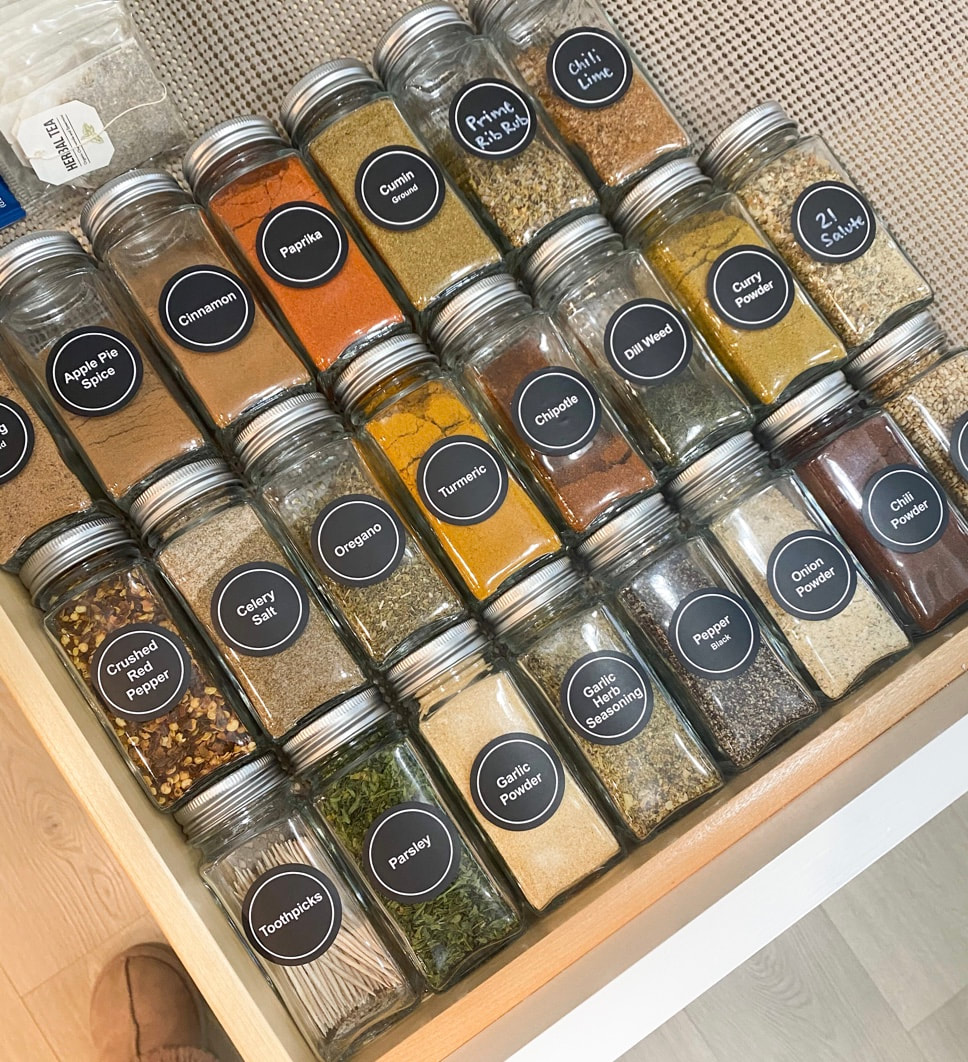 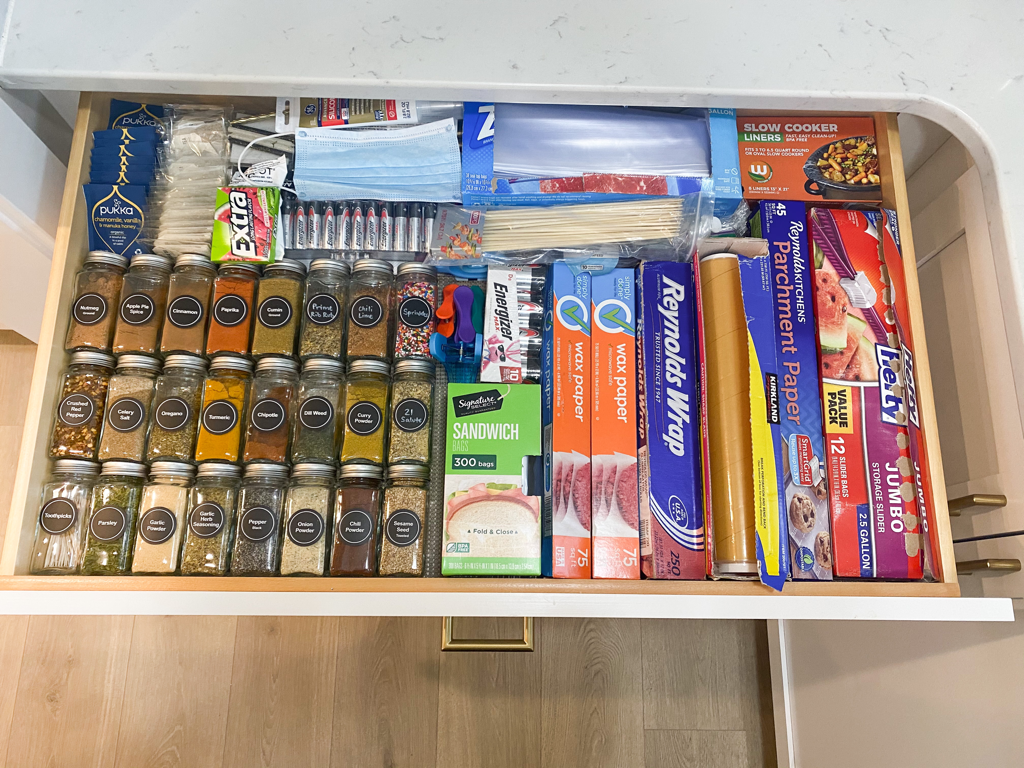 There you have it! 5 easy steps to an organized pantry that will save you time and make cooking, baking, and grocery planning much easier! When you can easily see what you have you don’t accidentally overbuy leaving you to have to toss or overcrowd your pantry. Do you have an organized pantry or will you run and organize it now? I’d love to hear your feedback and tips as to what you have done to make your pantry more efficient. This post was written in partnership with The Jerry Blankers Team and is published at www.jerryblankers.com/blog. All opinions are my own. If you are in need of a realtor in Whatcom County, WA, we used them for our most recent land purchase and home sale and I highly recommend them! You can give them a call at 360-410-1297 or email [email protected] or [email protected]. Instagram: @blankersrealestate 🌟 Other posts you may like:
➡️Kitchens I’m Currently Loving. Gold Accents, Yes Please! ➡️My Girls Rainbow + Pink Bathroom ➡️Shop the latest sales and my favorite finds
0 Comments
Hey friends! We’ve already lived in our new build for almost four months; I can hardly believe it!🤯I decorated my daughters’ bathroom right when we moved in but wasn’t quite ready to share; I felt like it needed something but I didn’t know what. Well, a couple of days ago I happened across this floral Chanel perfume bottle canvas that I’ve had for a year or so but had been having a hard time deciding where to put in our new home and I walked into the girls’ bathroom and BAM! Suddenly decided that the canvas needed to be right here above their towel bar.😆It fits perfectly and I love how the colors tie into the rainbow and pink theme. All decor, as well as our matte black bathroom hardware, vanity lights, picket tile backsplash and tile flooring, has been linked and is easy to shop by clicking the photos below. Let me know what you think! 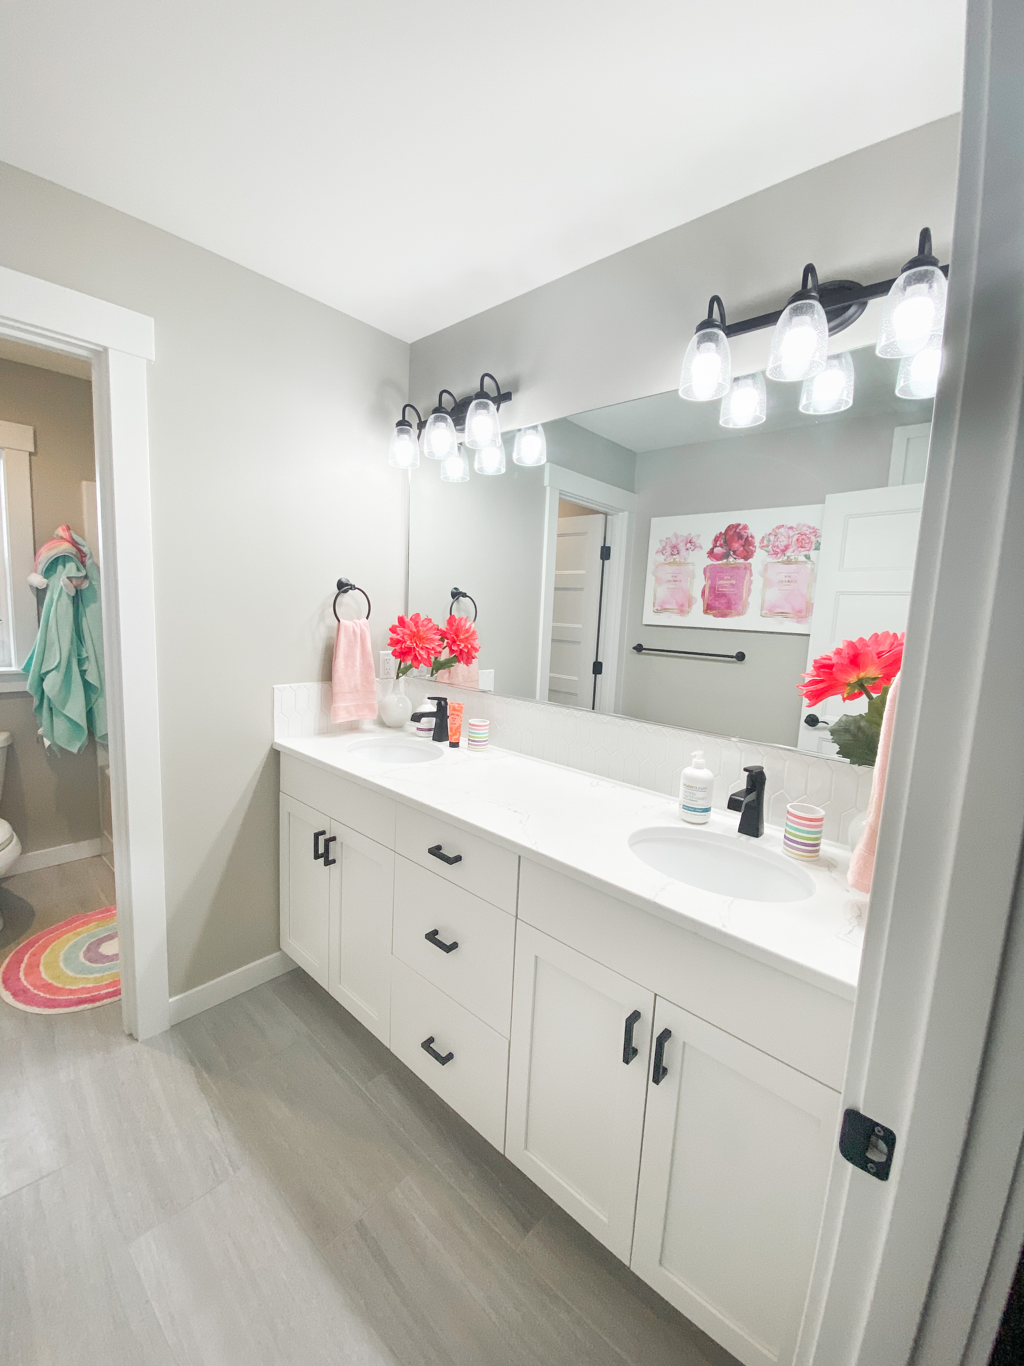  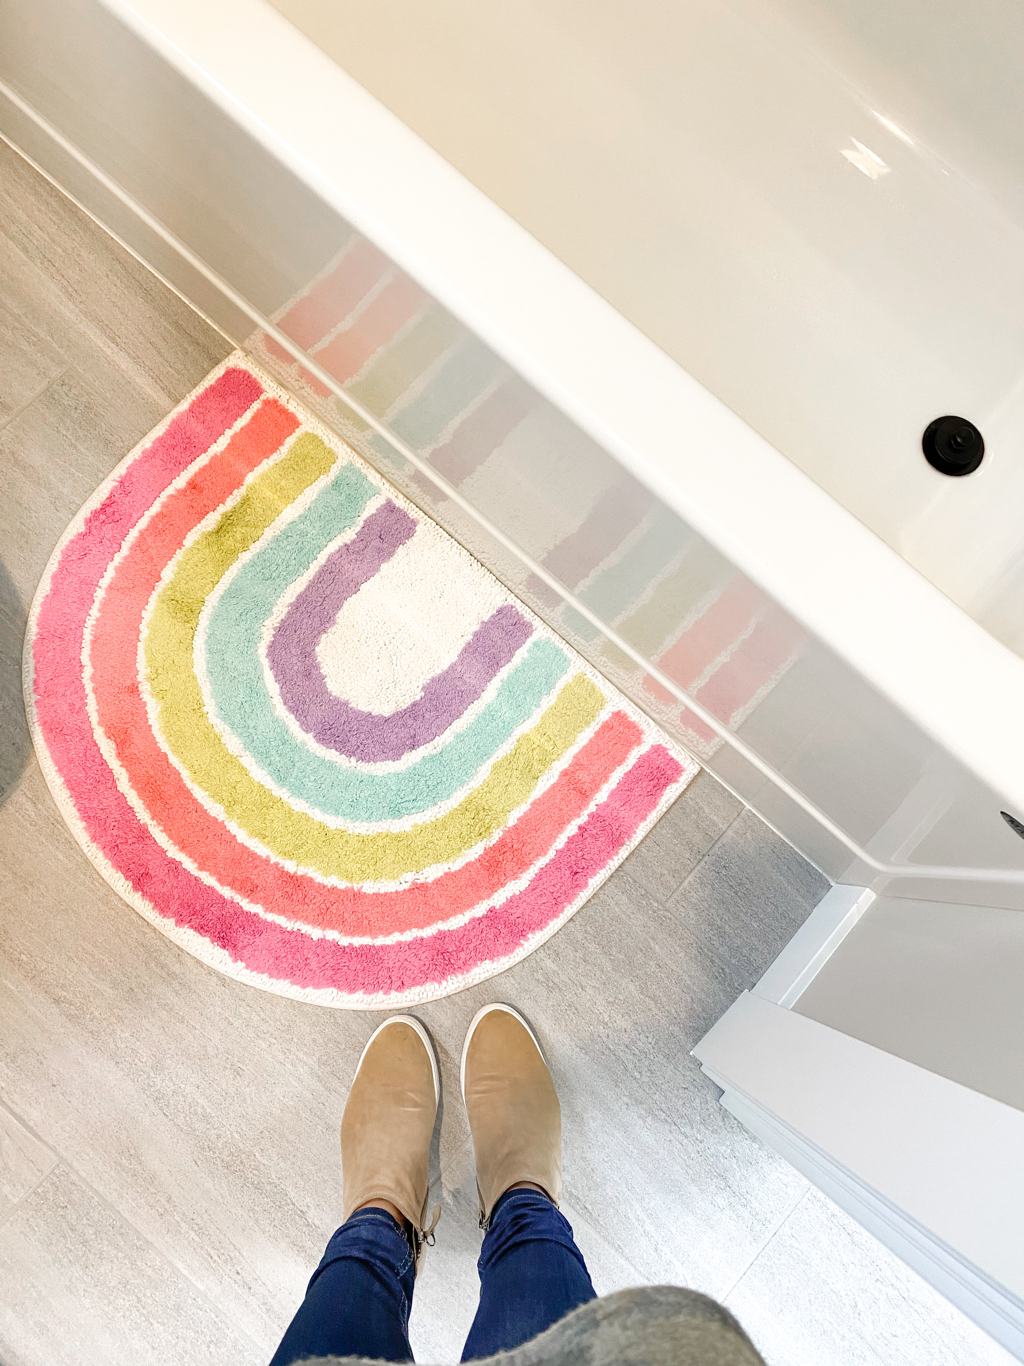 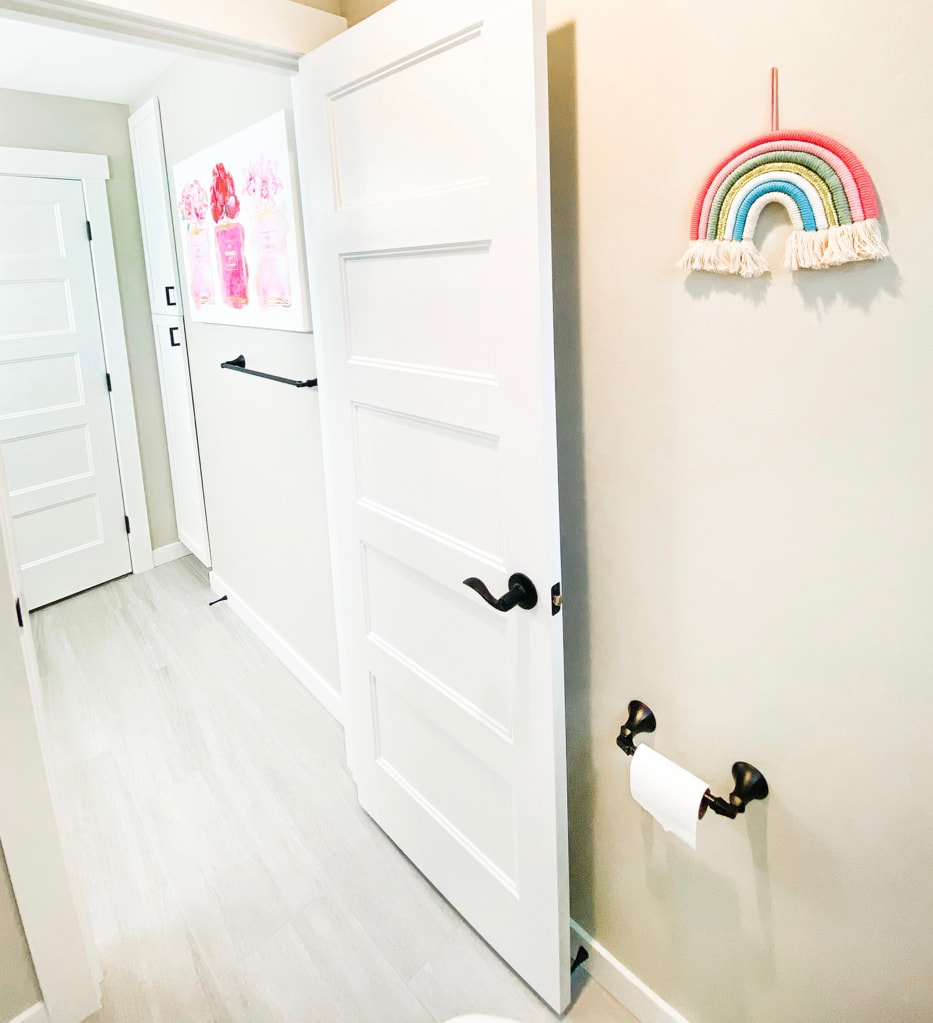 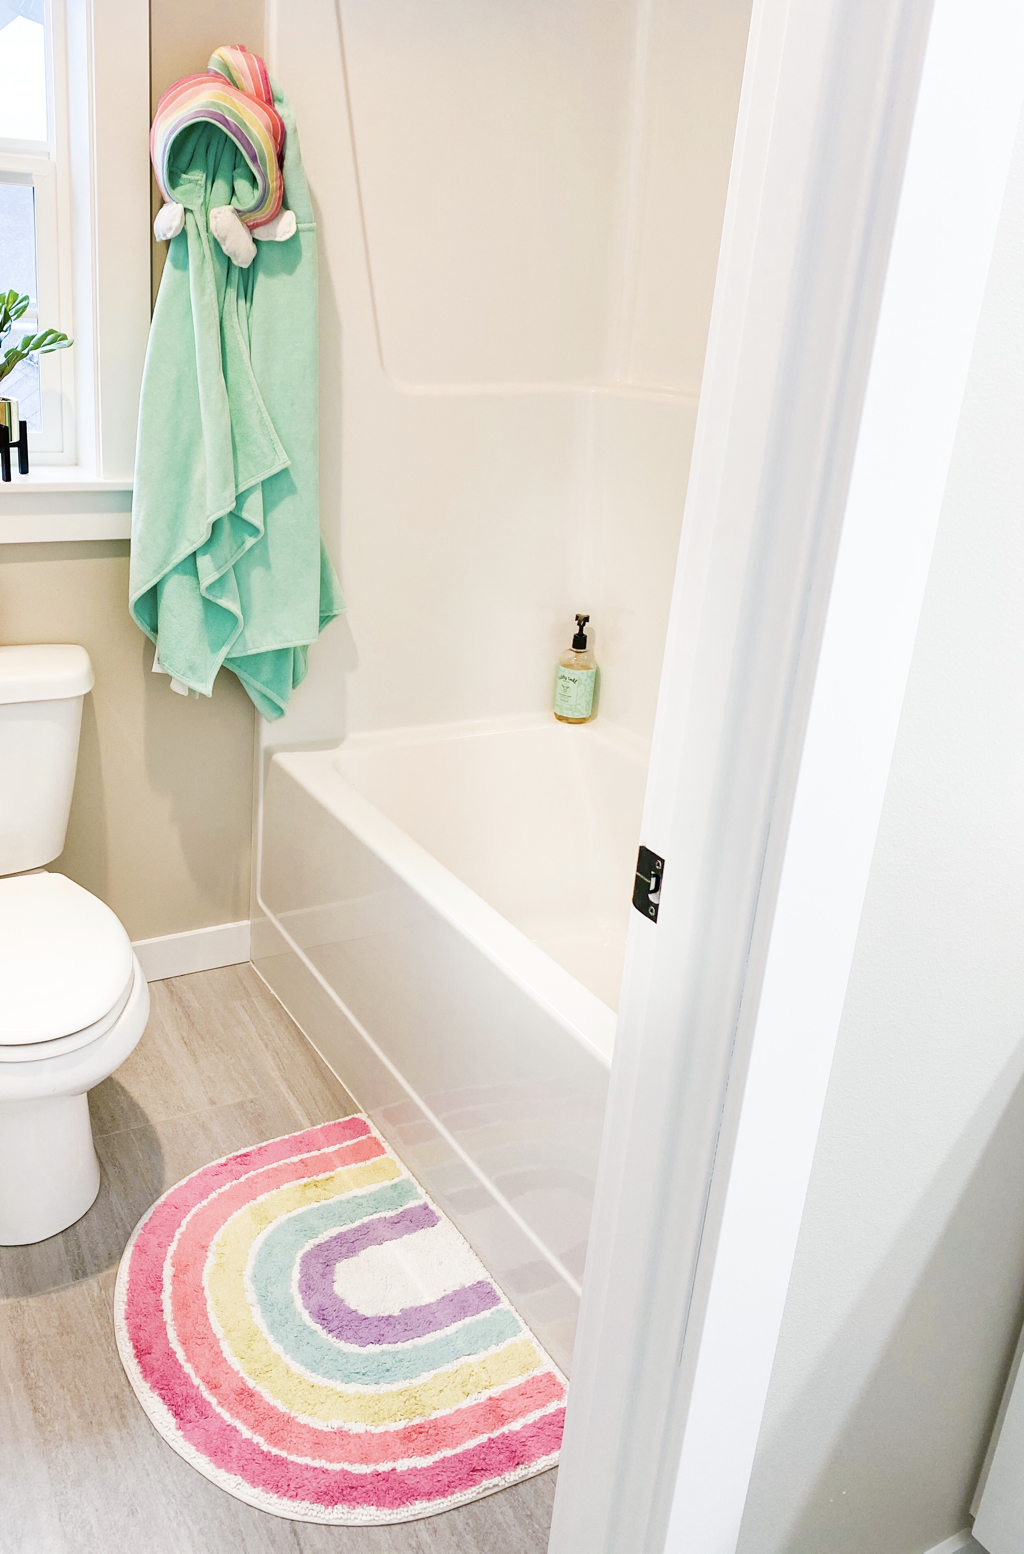 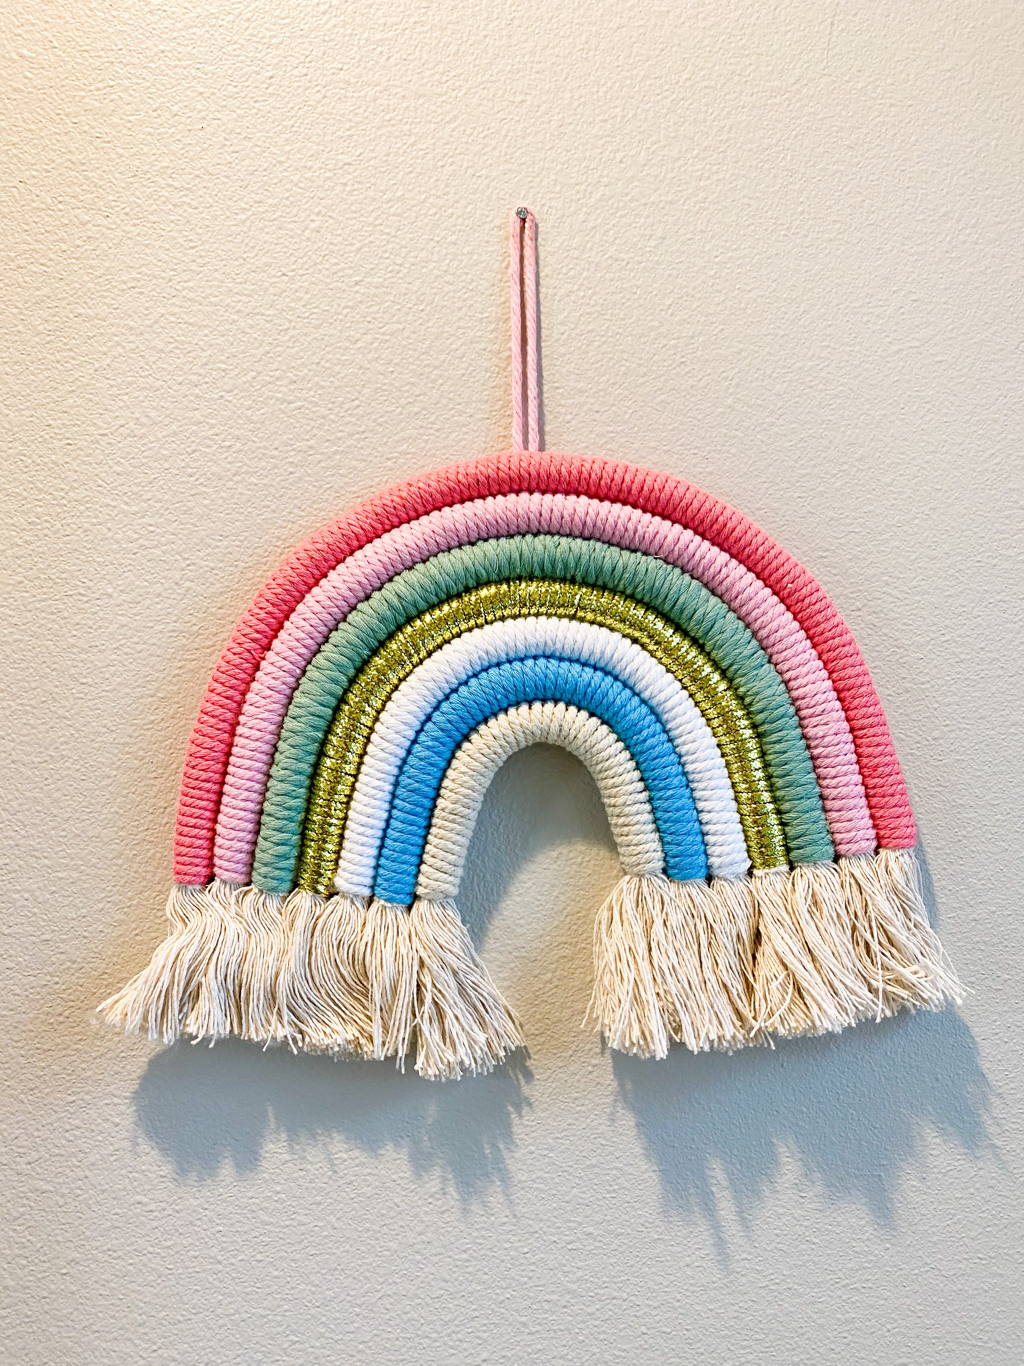 Happy Friday friends! I’ve been getting a lot of questions regarding home decor for our new house (we will be moving in next month) and I have begun purchasing decor so will be linking everything here for you! I’ll update this post as I get more and it’ll be an quick and easy place to reference it all for you guys! If you like a particular item, simply click the photo to shop! The Girl’s Rainbow BathroomFirst up, I’m sharing details of my daughter’s bathroom. They wanted me to surprise them with a theme and since they both want unicorn bedrooms I thought a rainbow themed little girls bathroom would be fun for them and tie into the unicorn bedroom themes! Here’s what I have purchased!  Little Girls Unicorn BedroomHere are pieces that I have purchased so far for the girl’s unicorn themed bedrooms. 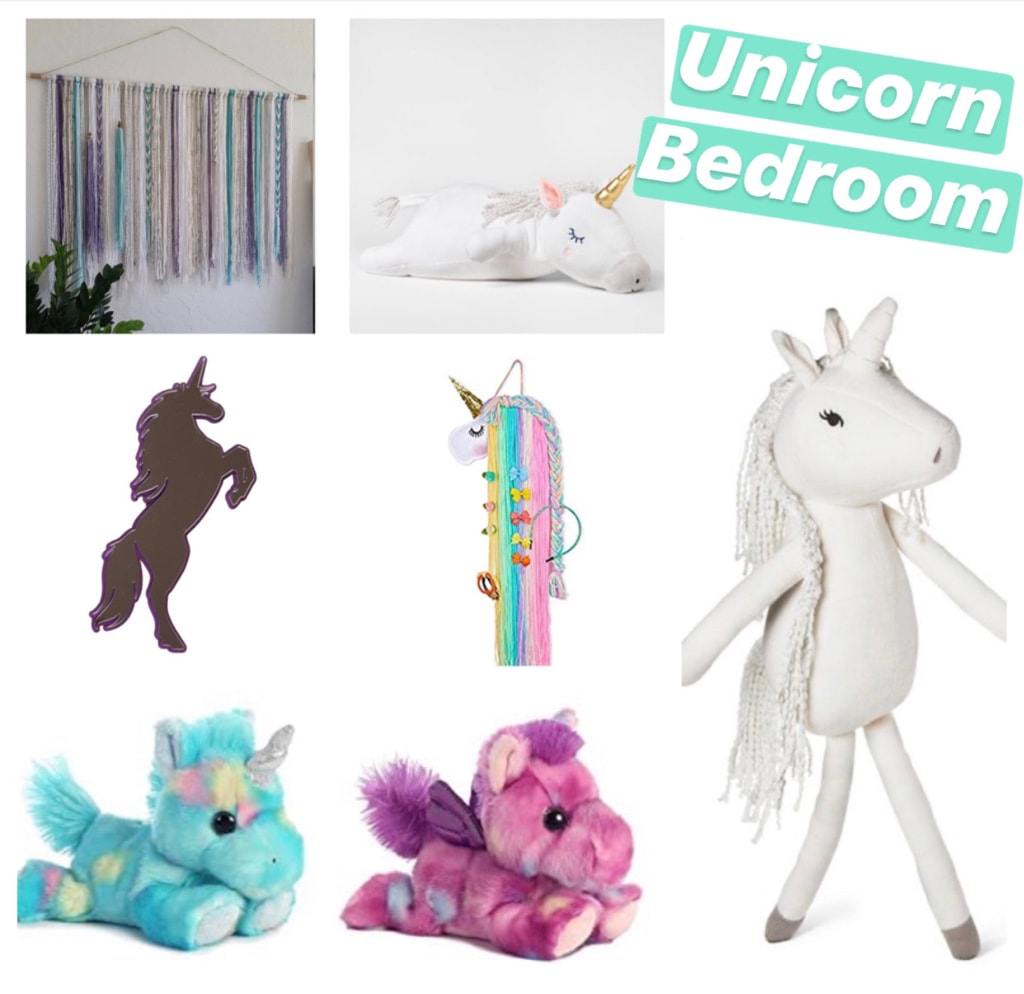  Kitchen/Dining   Living Room  Follow me in the Free LIKEtoKNOW.it App Here for daily sales & favorite finds!I’ve been getting asked a lot about the details of our new home so I’m linking all home things here! I’ll come back to this post and update it as more pieces get installed! Just click the photo for the link! 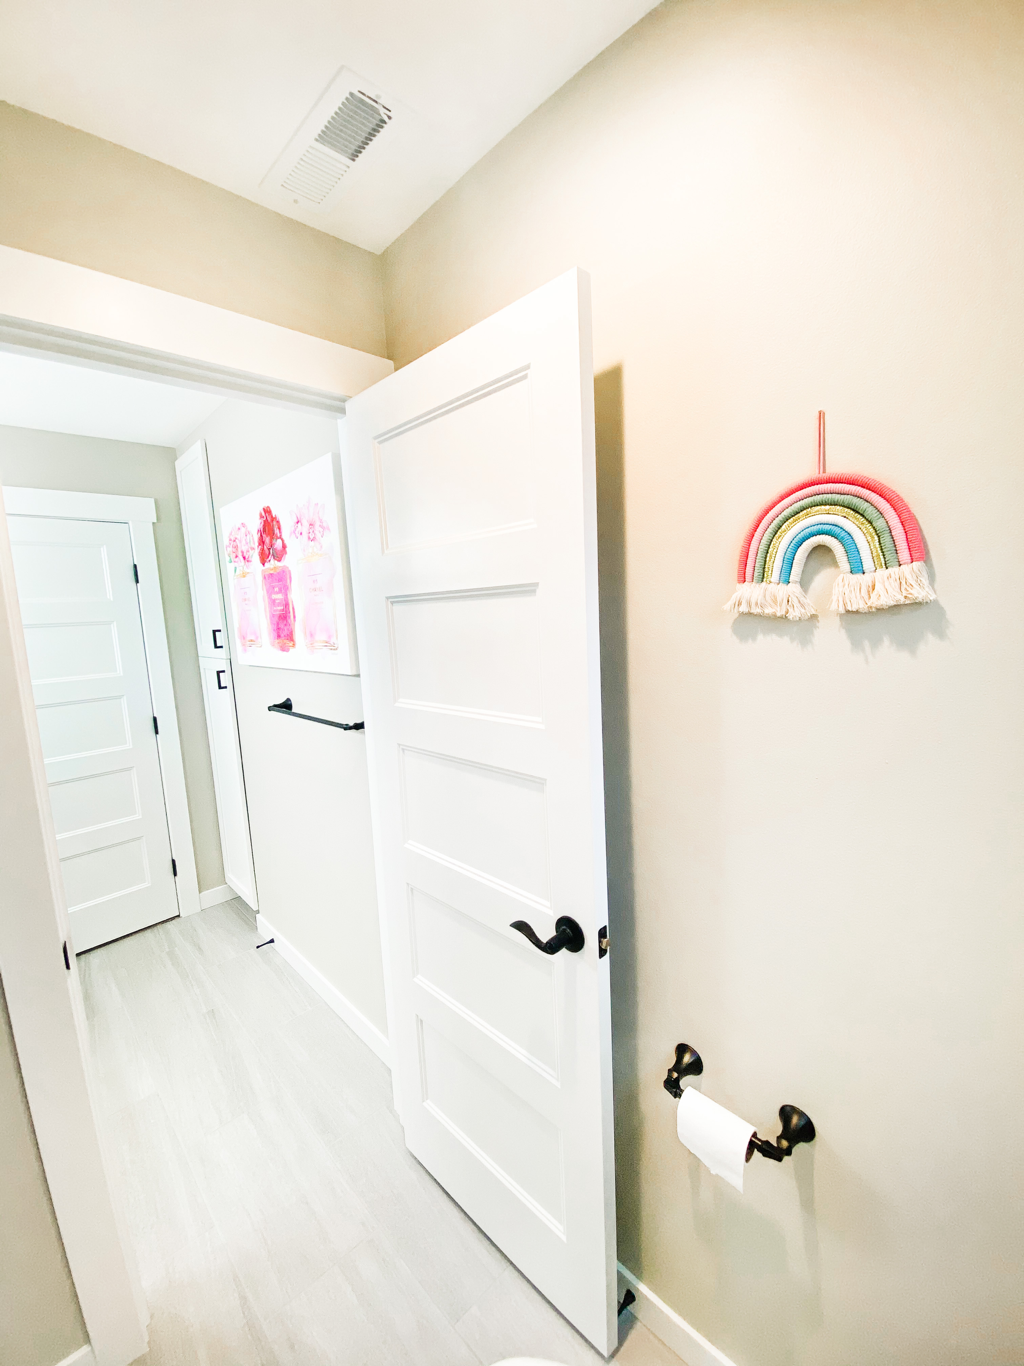 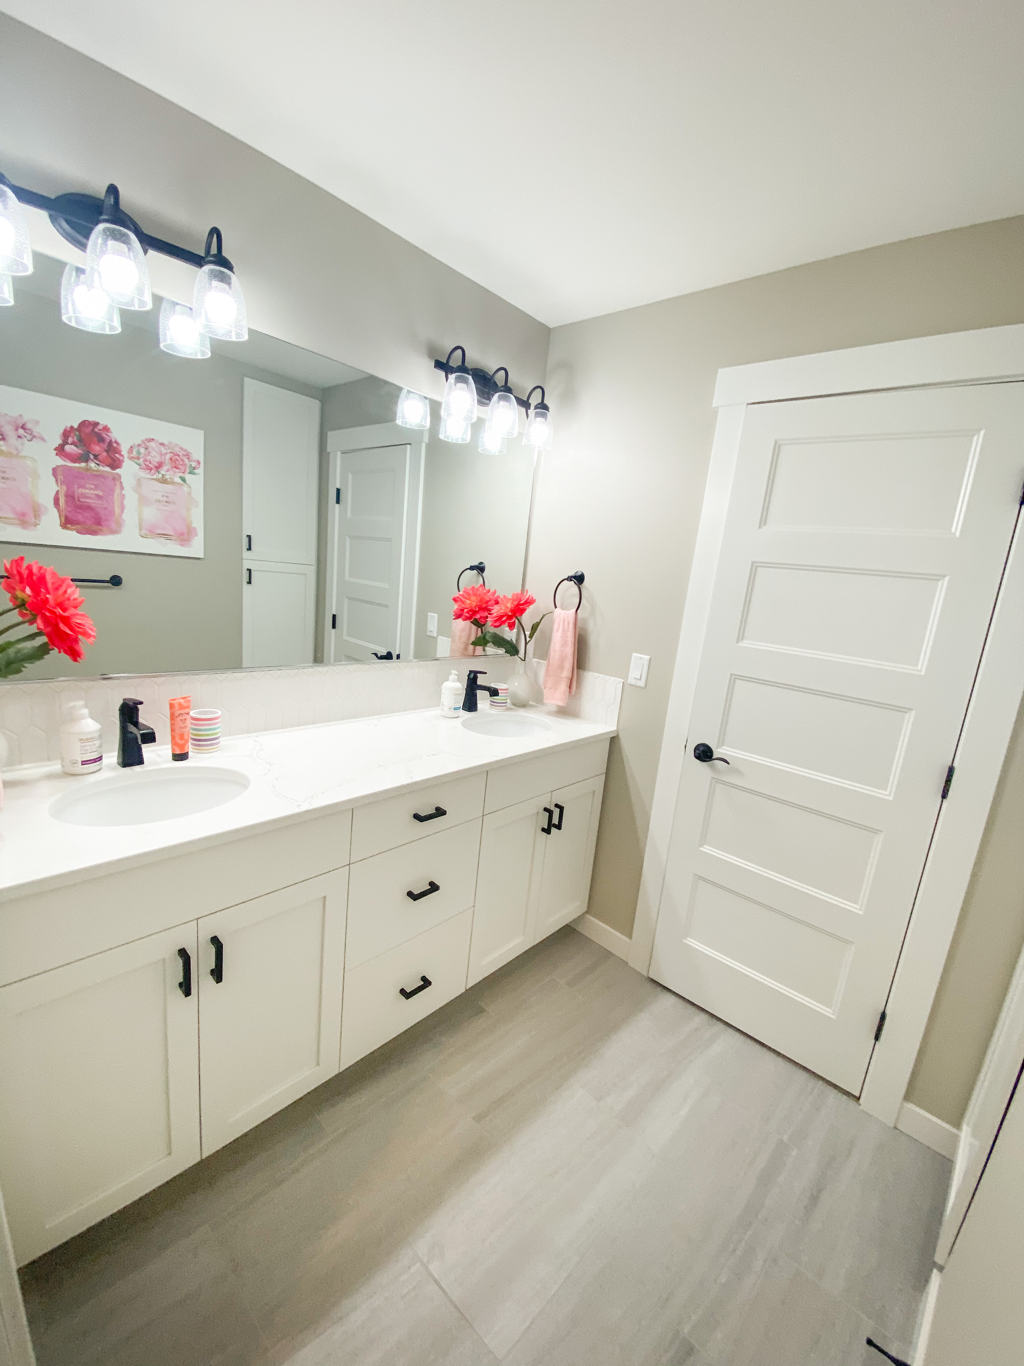   Interior paint color is Benjamin Moore - Revere Pewter 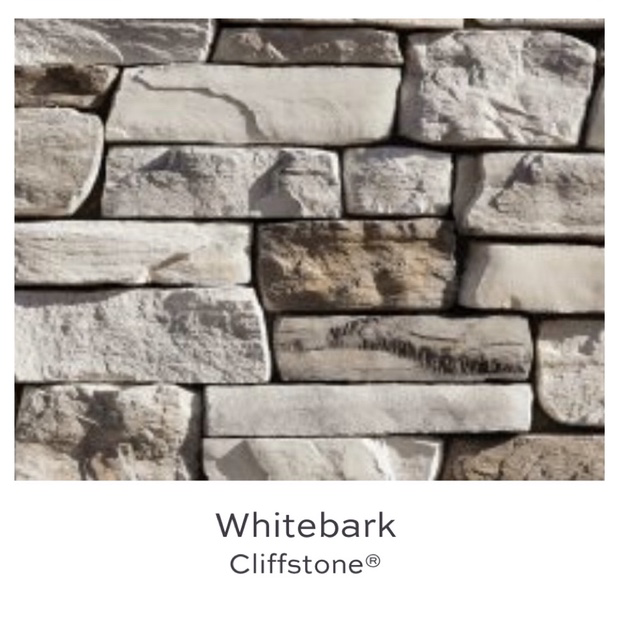  Fireplace stone is Cliffstone in Whitebark by Eldorado Stone   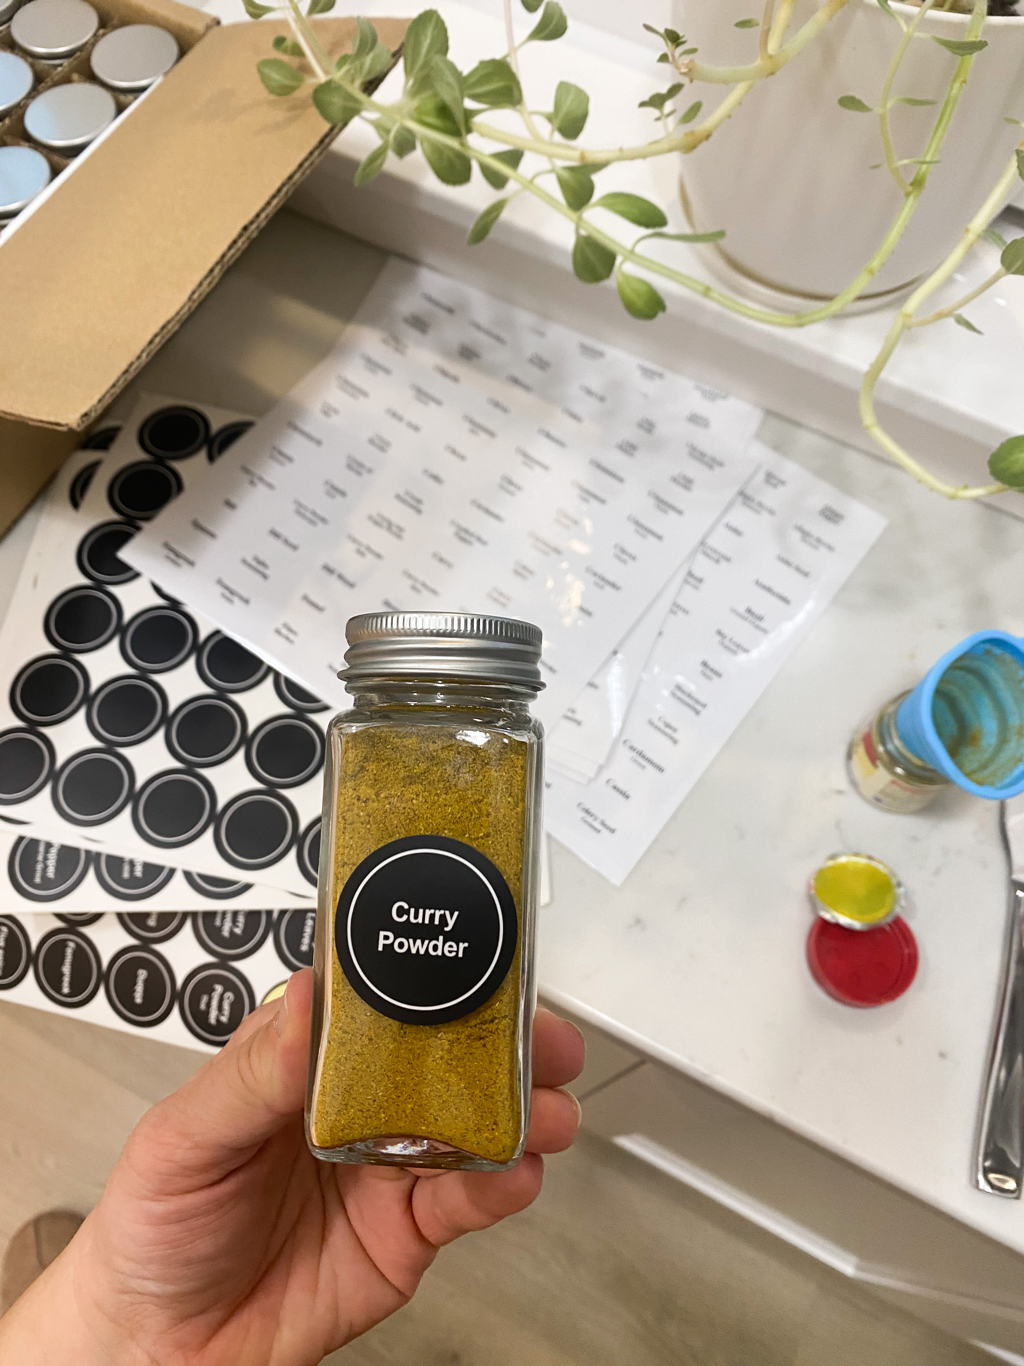 We chose this single basin white farmhouse sink for our last build and I loved it SO MUCH. When building this house, before we even had house plans, I knew we needed this sink again!😆👏🏻 Wood flooring: Mohawk Flooring RevWood Select // Boardwalk Collective in color Sail Cloth 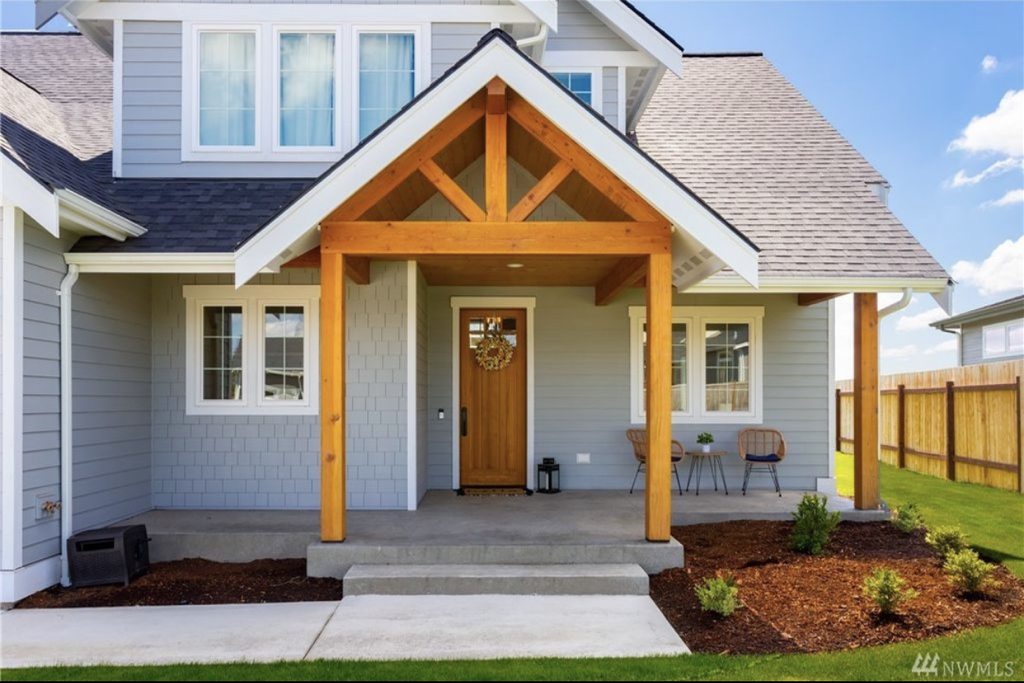 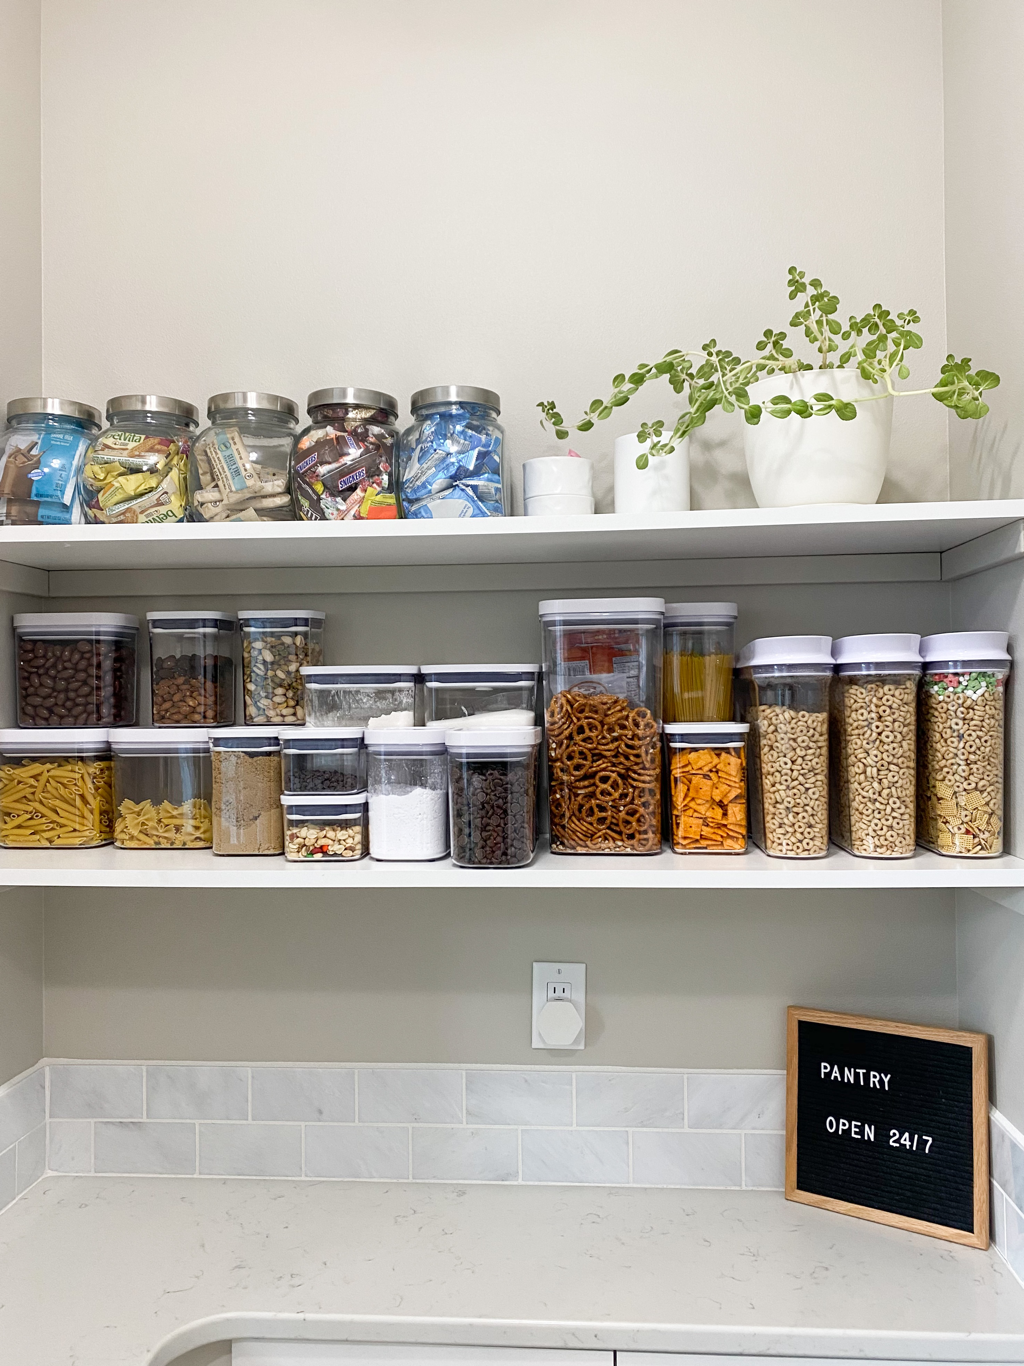 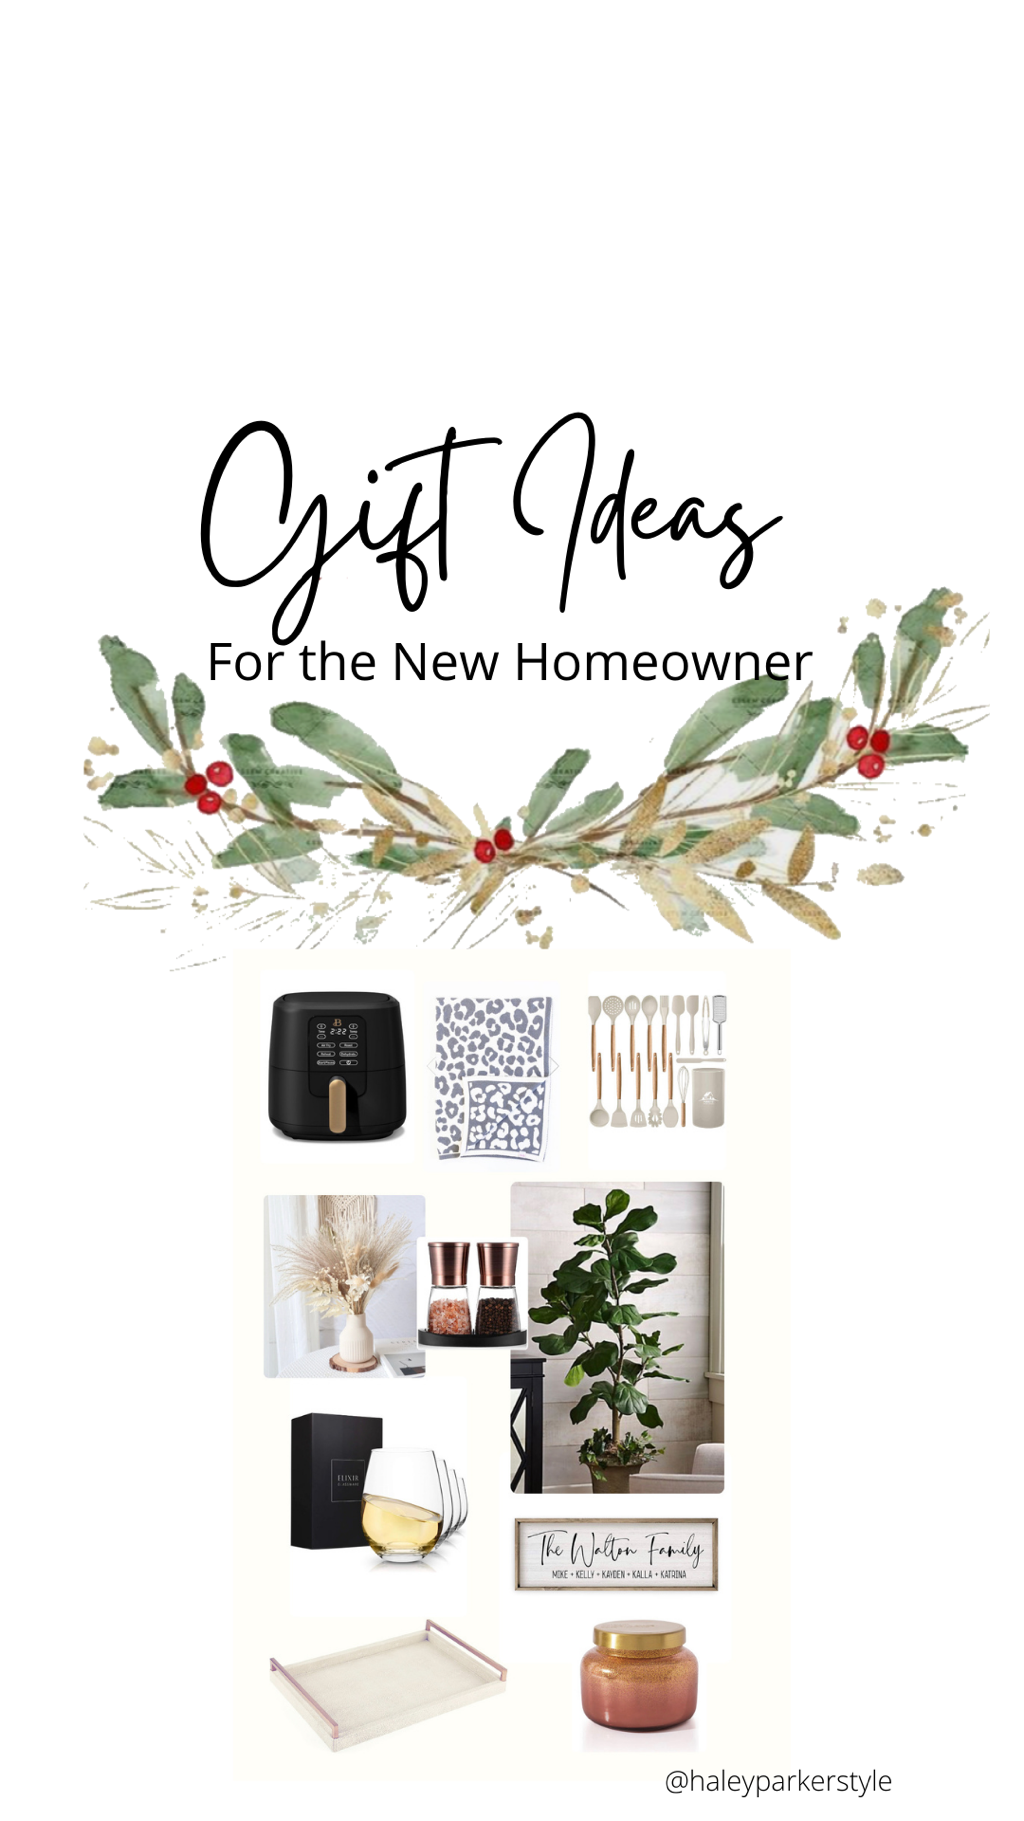  I love interior design and decorating and know that houseplants can add a beautiful dimension to this. I also know that it can be difficult and time consuming to care for a variety of plants or the space you prefer them in isn’t adequate for the amount of sun, etc. the particular plant requires, and that’s when you may want to consider a faux plant instead. There are now many gorgeous options for faux houseplants that offer a stunning, lifelike design while also offering you the ease of not having to take care of them, which can get tricky not only during a typical day but especially during vacation times! I’ve searched extensively for a beautiful variety of faux houseplants and have rounded up my favorites here. The Sill offers both faux and live houseplants as well as a wide variety of planter options. Houseplant options are The Sill include the snake plant, zz plant, bird’s nest fern, parlor palm, air plants and more (even monthly subscriptions)! 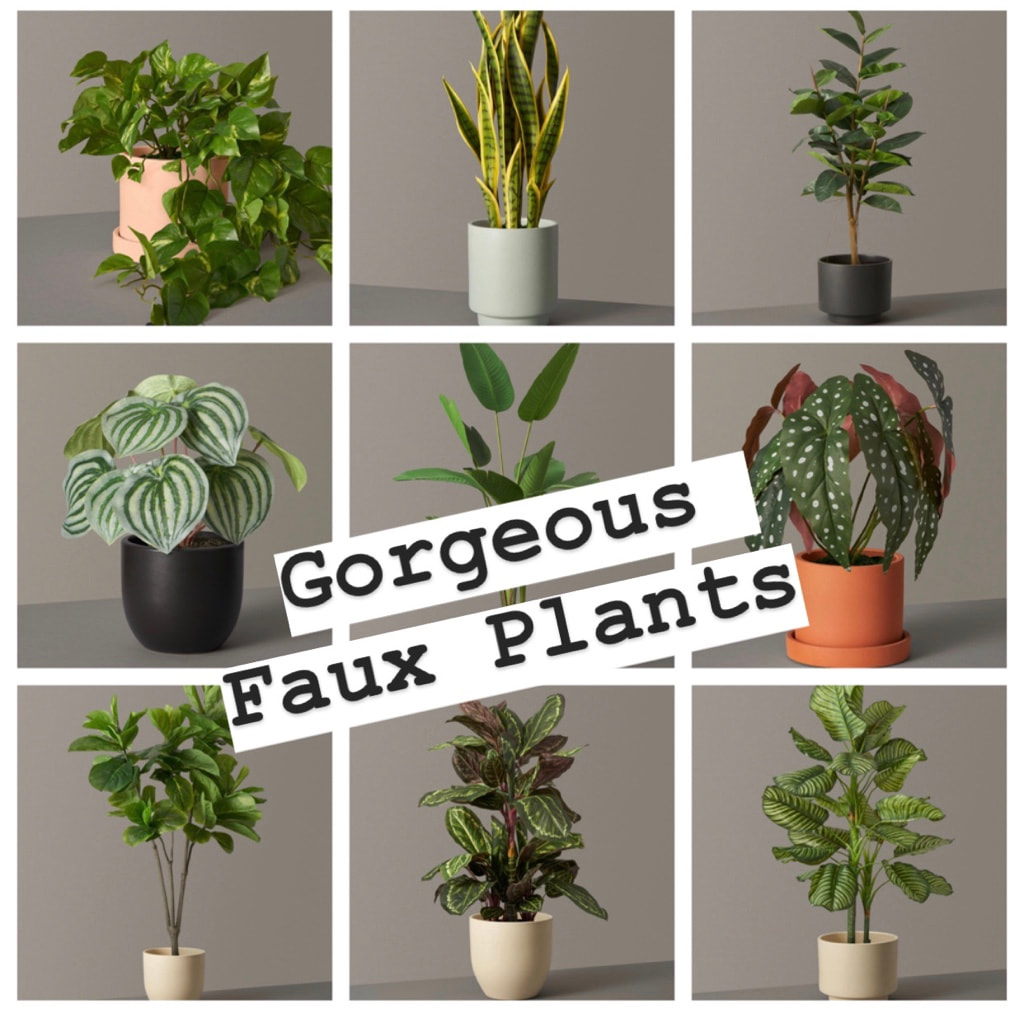 For those of you with a thumb much greener than my own😉, here are the lovely LIVE options!I think this will be my year that I attempt to add more live plants to my home, but I sure love a good faux plant that always looks like it’s same beautiful self day after day and never needs water or sun!😂A think a healthy balance of the two is perfect for most homes; what is your preference?! Shop LIVE & FAUX at The Sill here.Happy Monday friends! -Haley Suggested Posts: ⭐️Kimonos & Dusters: A Spring & Summer Favorite ⭐️The Mint Julep Summer Neutrals 👛SHOP the best sales & what I’m currently wearing Congrats on choosing to build your own custom home! It’s a big step full of excitement and stress but will be so worth it in the end. I have always been interested in the design element of building a home and suiting it to my family’s needs and preferences. My husband and I are currently on our second custom build and between this and the last build we have had a good amount of experience with the process and concerns that may arise early on. I’ve compiled these Tips & Tricks to Building A Custom Home and would love to hear feedback regarding anything you think I may have missed or that you need me to explain further.  🌟Hire a contractor/builder (unless you will be your own). Although being your own saves yourself money, it can be a headache scheduling and discussing details with subcontractors throughout the duration of the build, especially if you are working a full time job at the same time. While you can go through some of the next steps before hiring a contractor, a contractor can be a great resource to advise you through the next steps so consider speaking to one first. 🌟Location, location, location! Of course determining the property that you will be building on is a huge factor in the process but make sure you REALLY check it out. Read any HOA regulations (and find out if your HOA charges fees), and be sure to check on building restrictions in your city and county. You will also need to make sure that your dream home fits within the allowed building perimeters of the property as well. Sounds basic, but often gets overlooked when caught up in purchasing land/a lot. Check the cell service, internet options, cable options, if it is on a well for water, if you will need to add a septic tank or power, or any other detail that could hinder the way you are used to living or cost a lot to add. Is the property covered in trees? Unlevel? Be sure to factor in any extra costs such as these to make the property buildable. 🌟Choose a floor plan. I recommend browsing Pinterest for floor plans you can purchase to get a good idea of what you like and then either purchase and use it, take that floor plan idea to a local architect to draw up a similar plan and make necessary changes, or head to a local architect and take a look at their stock plans. They will usually allow you to make custom changes to stock plans which can save you money. They usually charge a set rate for stock plans and bill by the hour for any requested changes. 🌟Determine upgrades. Custom changes that may interest you: •Radiant floor heating system •Hard wired security system •Built in sound system •Extra tall front door •Fireplace (living room, master bedroom, outdoor fire pit) •Gas hookup for outdoor grill •Air conditioning/heat pump •Under cabinet lighting •Covered patio •Interior barn doors •Sink in the laundry room •Built in bench and/or shoe storage in mud room •Sprinkler system •Inner cabinet and drawer outlets •Roughed in plumbing •Multiple shower heads/rain shower •Hard wire garage for a generator hook up 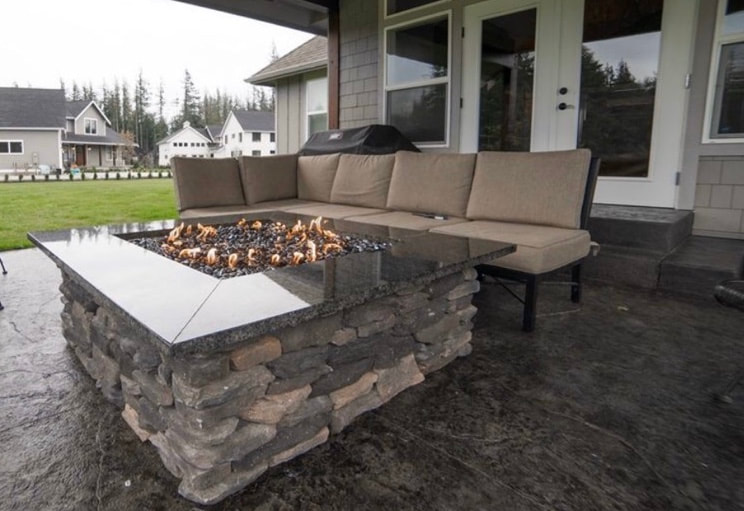 Which upgrades would you choose?! What others would you add that aren’t on my list? Let me know! -Haley My husband and I purchased our first home in 2010. We were engaged, young and excited to find the home we would start our life together at. Neither of us had owned a home before and I had never even moved out of my parents house before so a lot was new to us. We were able to purchase a new construction build right as it was completed, meaning we did not get to choose any options or colors but we were so excited and in shock that it was ours. Fast forward a few years, and there were things I started to realize that I loved about the house and others I realized I wouldn’t want again. We had always said it would be our “5 year house”. As we got close to the 4 year mark we were both thinking it would probably end up being more of like an 8 year house. Or 10. But then something changed. We noticed other similar houses selling for quite a bit more than we had purchased ours for and on a whim decided to ask a realtor to come over and take a look, let us know what he would list it at. His price was even higher than we had guessed so we decided to list it and made plans to build our next home! We sold our first home within two months of listing and spent countless hours driving the county and searching the internet for potential locations for our build. We finally chose one and a few months later, began our first build. I truly love the home building process and got so absorbed in the details last time that it was hard to “turn off” once the house was complete!😂We chose every little detail, down to the cabinet pulls and grout colors, and so much time and love went into it all. As most of you know, we sold house #2 (our custom build #1), this past summer and are currently in the process of building again. For our second custom build I am taking our favorites from the first build and adding in a few changes. I loved our last home but am excited to change up the colors and styles, as well as the floor plan, a bit this time! Here are photos of our first build, courtesy of our wonderful realtors: The Jerry Blankers Team at Muljat Group North. If you are local and are looking to buy or sell a home, I highly recommend them! I describe our first home as a rustic farmhouse. It was all one level with a large bonus room upstairs. We made sure to add a window and a closet to both the bonus room and the office so that they could quality as a bedroom if needed. We built knowing we would sell within a few years (we ended staying three years) so wanted to keep in mind things future homeowners may like or benefit from. 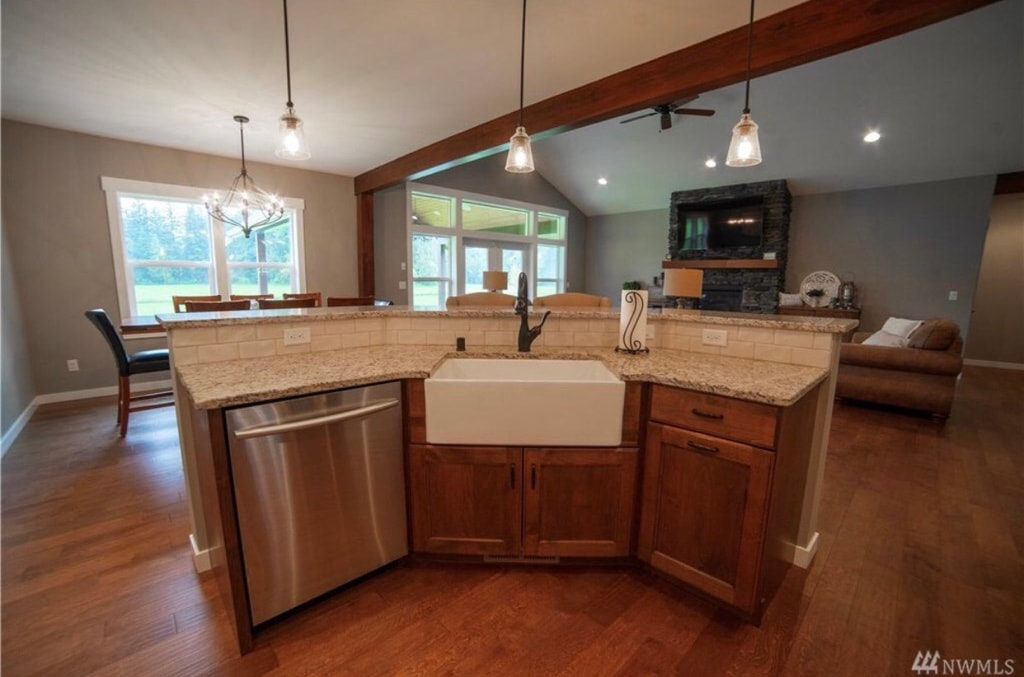 One of my favorite pieces from this home was our apron front, single basin farmhouse sink. After hours and hours or researching affordable farmhouse sinks, this is the one I went with. We loved it and I plan to use it in our current build as well. Our faucet (color: Venetian Bronze) has the touchless technology that turns water on at the slightest tap which we loved and will definitely do again. When you are busy cooking in the kitchen and your hands are dirty from touching raw chicken being able to tap the faucet with your elbow to turn it on is so nice! On the left side of the photo you see our barn doors opening up to the office. It took so long for me to find the perfect doors for this space and I ended up having them made by Whatman Barn Furniture on Etsy! The glass in them was actually from an old barn so has a bit of character and I had the maker leave them raw so that our contractor could stain them the color of our wood beams. When living here, I would get asked about this area rug ALL THE TIME! It’s super ridiculously soft, 7’ by 10’ and the perfect amount of shag. When we moved in we had a 2 year old and I was 7 months pregnant so though we had wanted hardwood flooring throughout the living space it was important to us to have a comfortable spot on the floor for us to play with the kids. It comes in multiple colors and is shaggy enough to be plush but not too shaggy that it’s difficult to vacuum; such a win for under $300! Furniture-Ashley Homestore: Sofa and Loveseat Recliner Coffee Table and End Tables (similar) I adored our white laundry room, complete with plenty of cabinets and counter space! We also enjoyed having a sink in our laundry room, a first for us, and we will be having one in our new laundry room as well. I wanted our powder bathroom to have a different, memorable sink and ended up choosing this one from Creative Stoneworks NW (all countertops are granite and from them as well). 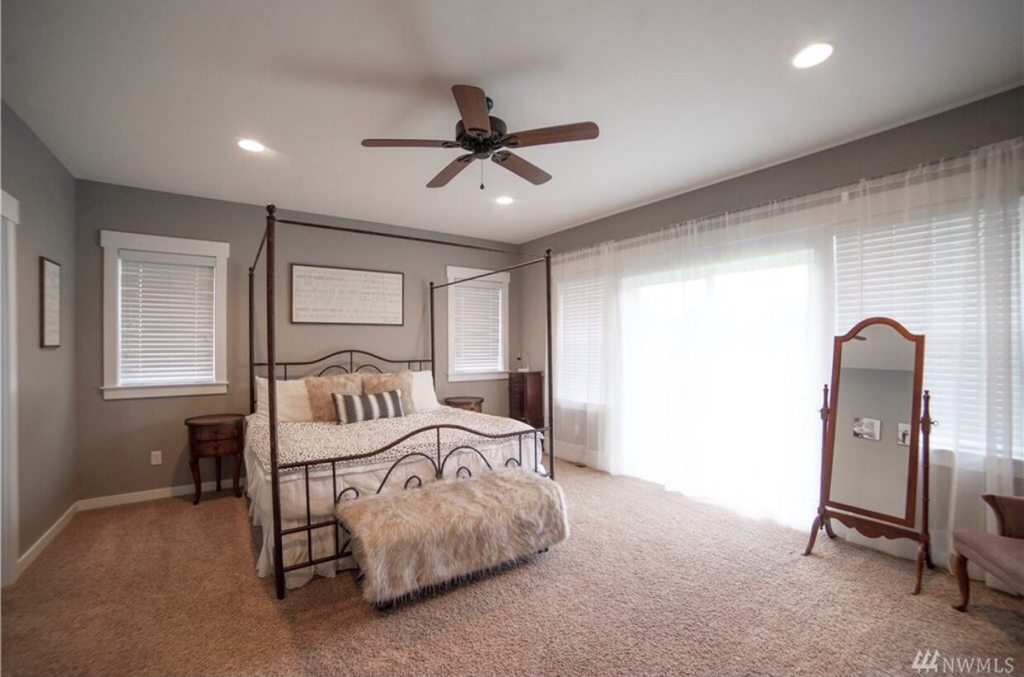 Bedding: Beddy’s - use my code HALEYP20 to save! 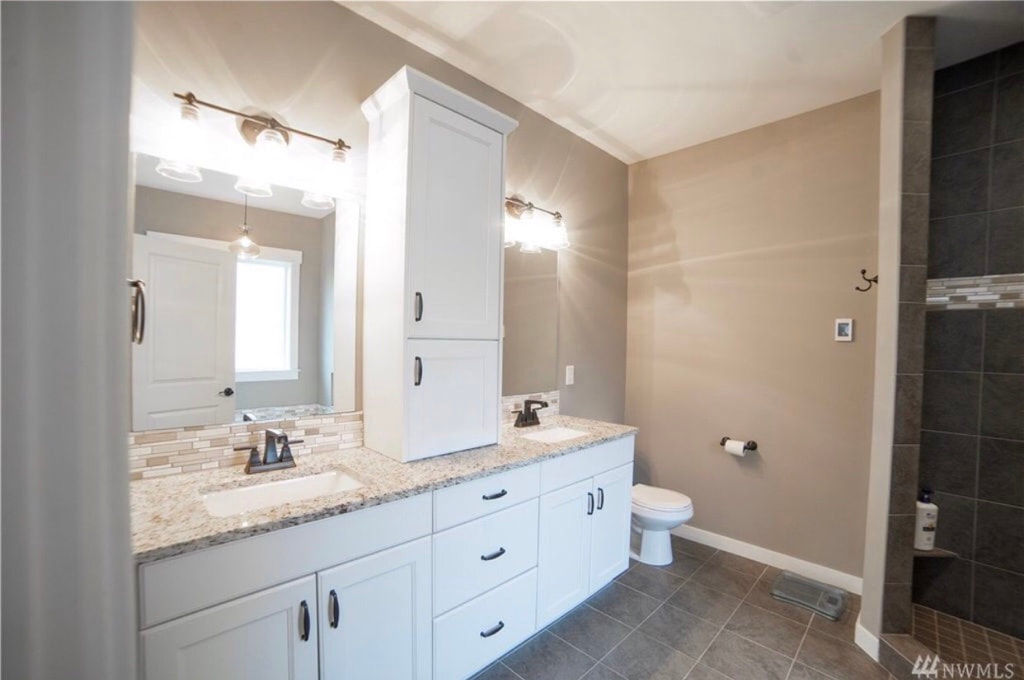 All cabinets throughout home: Canyon Creek Cabinet Company Faucets: Delta Light Fixtures: Lowe’s or Fishtrap Creek Interiors Tile Floors: Lowe’s Tile Backsplash: Lowe’s or Fishtrap Creek Interiors  I was a big fan of our walk in, all tile shower, featuring no glass. Floor, wall and mosaic tile are all from Lowe’s and hardware is from Delta Faucet. 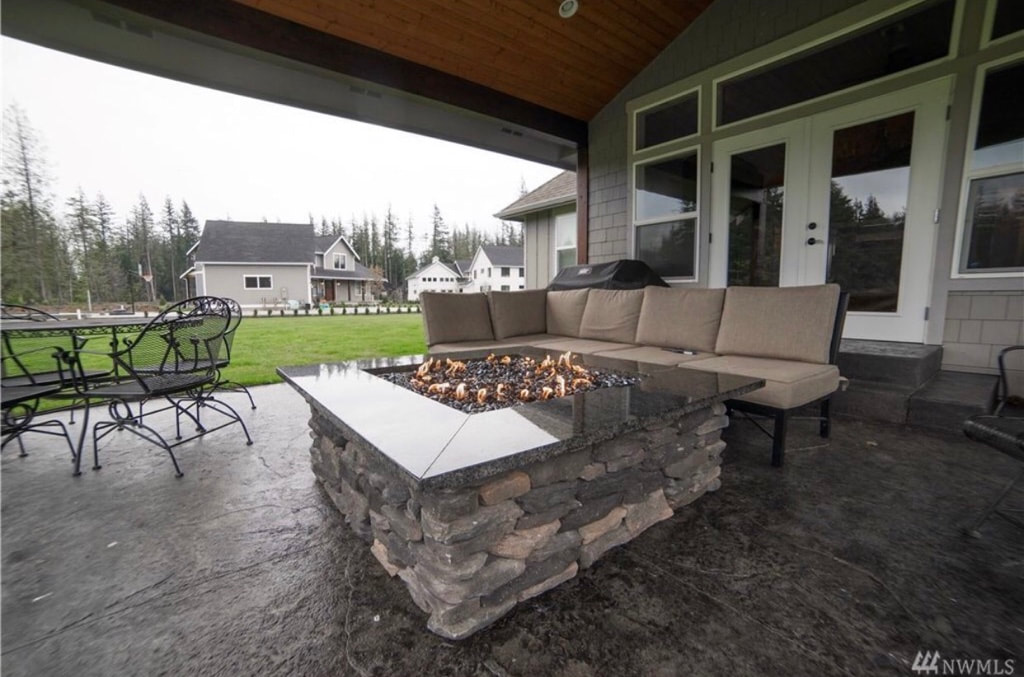 Another custom favorite of ours was our huge built in, natural gas outdoor fire pit. It is a statement piece that became the center of our outdoor living area and got my family outside more because it was so fun and warm to sit by. I hope you have enjoyed this roundup and backstory on our home building process; I’m excited to share more about our current build soon! Feel free to reach out regarding any source information or building questions; I’m happy to help! xo- Haley Other posts you might be interested in: ⭐️Kitchens I’m Currently Loving ⭐️⭐️Holiday Entertaining: Charcuterie and Cheese Boards ➡️Shop home decor and favorite sale finds HERE! With our second home build underway, I find myself spending countless hours getting swept away in the bottomless pit of gorgeous Pinterest kitchens. Gold hardware is making a comeback and I am here.for.it.🤩My favorite are the brushed or matte golds like gold champagne mixed with white or gray cabinets and light hardwood flooring. Here are a few of my favorite kitchens!  Source: Gardenhouz I love the light cabinets mixed with the marble subway tile backsplash, light counters and gold accents in this kitchen. The stainless and gold hood is such a beautiful statement piece and the lights above the island are perfection (I’ll definitely be looking into this style for our build)! Here is the most affordable version that I was able to find. It comes in multiple shade and metal color options. The fact that the island also has drawers and cupboards on the back wide is such a bonus too; think of all that storage space! It does however make it more difficult for people to gather around the island on barstools though since the counter does not hang over the cabinets providing a bar space. Which do you think is better: extra cabinets or bar space?!  Source: Trendehouse This is another one of my top favorite kitchens at the moment..do you see a theme here?😅Very similar lights above the island, marble backsplash (but this is one piece versus as a subway tile) and gold hardware of course. I am also a fan of this hood that matches the cabinets. I do like how the backside of this island provides storage and also a bar overhang; the best of both worlds on my opinion. What do you think of this white kitchen? 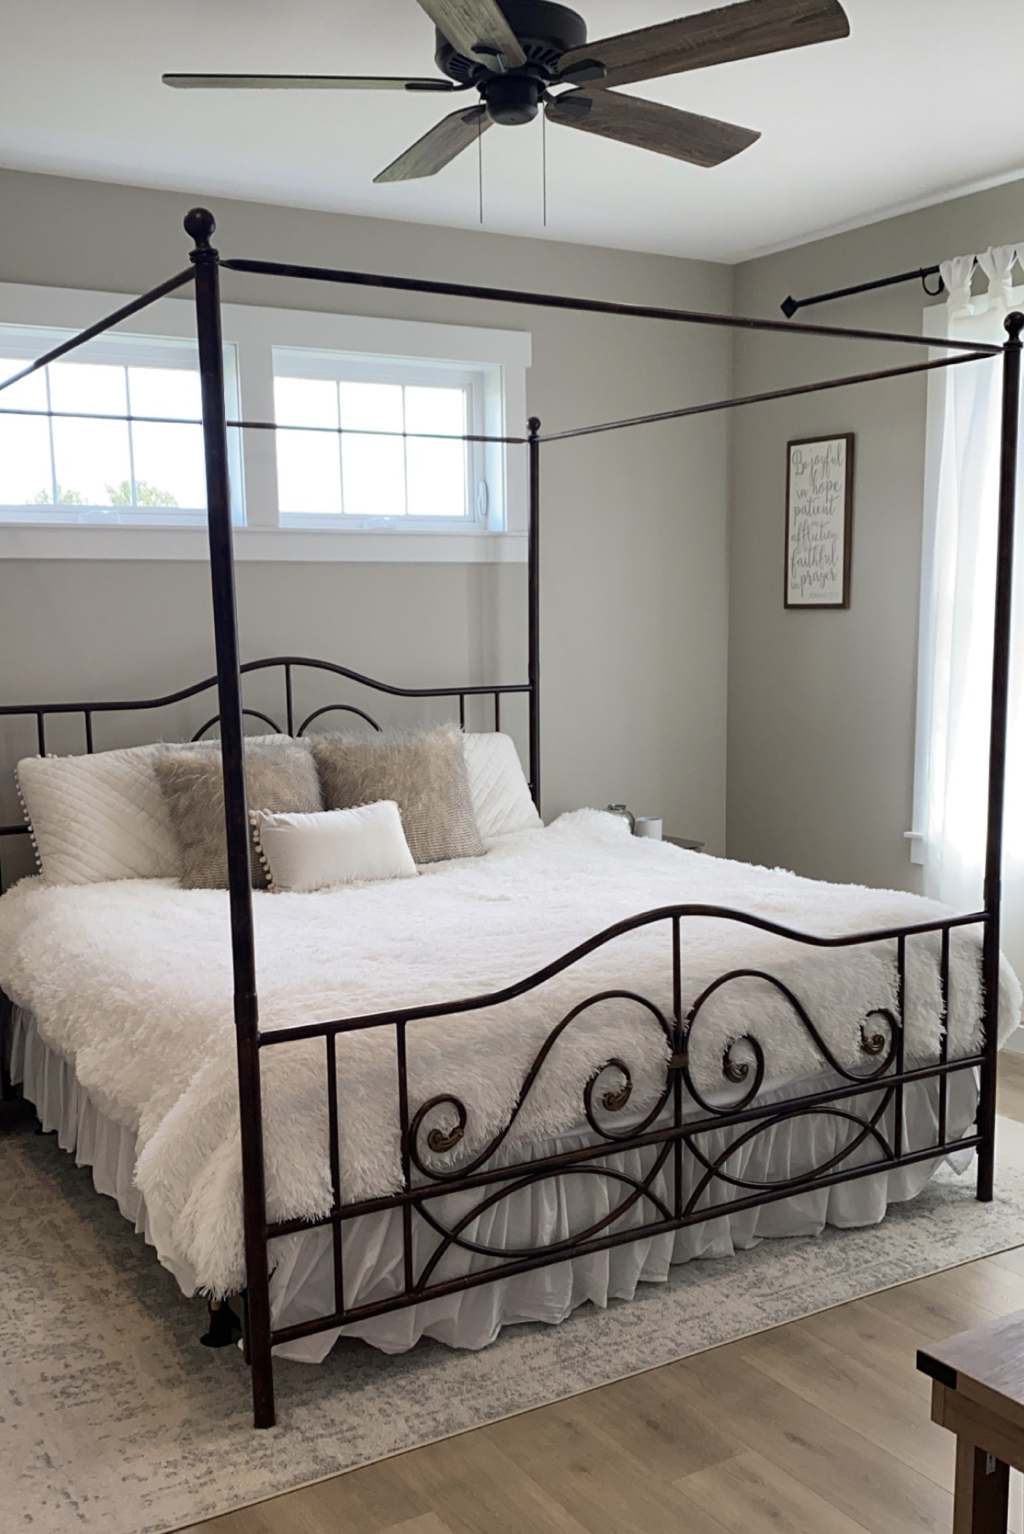 Source: i.pinimg.com These kitchens are all very similar but I love the unique touches and differences in each. Trying to figure out how to incorporate a bit of each into our own to find the right balance for the look and functionality as well as budget we will be working with. I love the look of that cute class cabinets balancing each side of the gorgeous hood cabinet but also don’t want to be cleaning the glass all the time. Have you had glass faced kitchen cabinets before? If so, let me know how they hold up against dust and everyday life! If you know me, you know I love charcuterie and cheese boards. I love how they incorporated them into the decor in this kitchen; it makes it so warm and inviting! Here are a few of my favorite charcuterie and cheese board options. 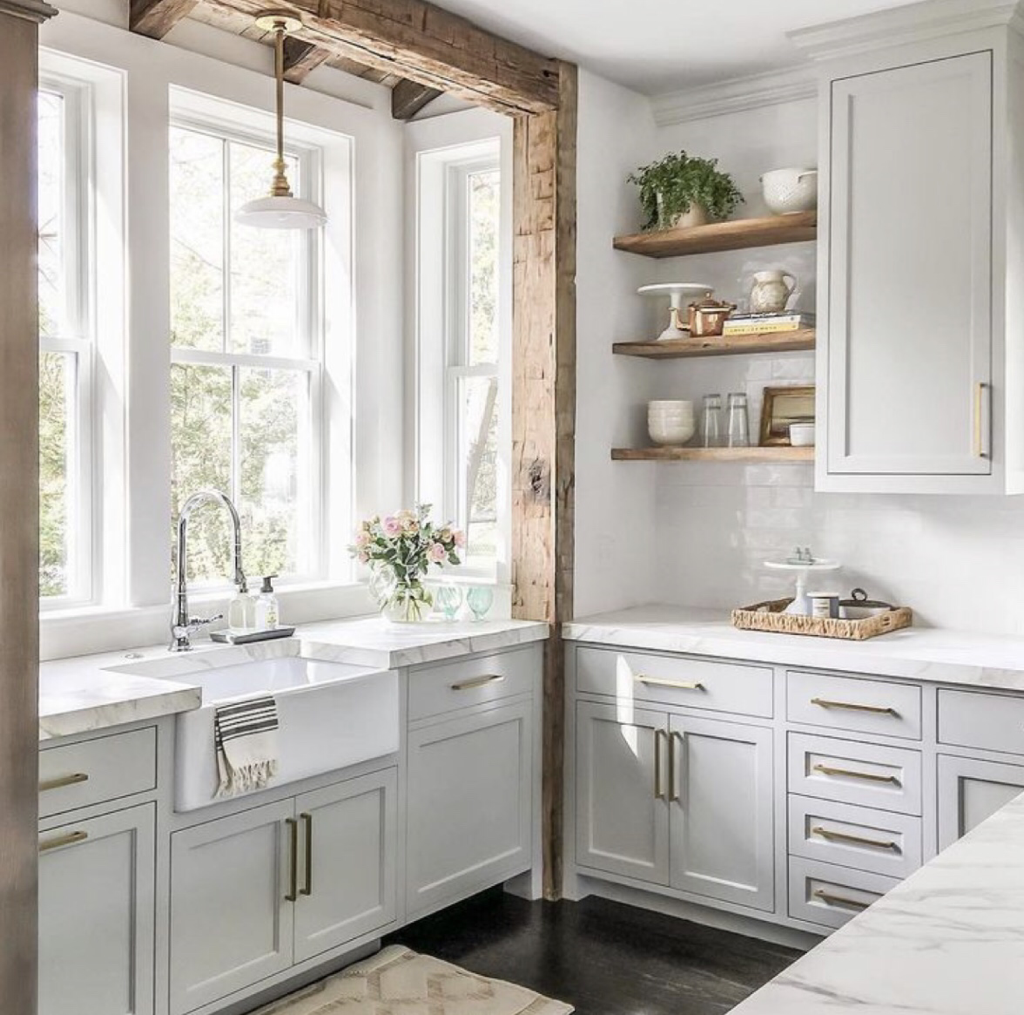 Source: Schoolhouse The rustic wood beams add so much character and warmth to this kitchen. We had wood beams in our last build and absolutely loved them; such a statement piece. I am also a huge fan of this single basin, apron front farmhouse sink. We had this one in our last home and I plan to purchase the same one for our next kitchen. We had the white and it also comes in bisque. For our last build I spent hours searching for single basin farmhouse sinks that were affordable and had good customer reviews and this fireclay one beat out all of the others; highly recommend it! I can’t wait to share our home build process with you guys; I enjoy the process so much! The best way you can follow along for the most updates is on Instagram @haleyparkerhome. xo- Haley ⭐️⭐️Want to make a charcuterie board but don’t know what food to add to it?! Check out this post! ➡️Shop the latest sales and my favorite finds HERE! Merry Christmas friends! I hope you are having such a fun holiday season with your friends and family. It has been such an enjoyable time for me. My girls are exhausted from all of the excitement and currently taking a nap so I thought I’d quickly share about our Christmas Eve finger foods. They would be great for any type of party and are so easy! 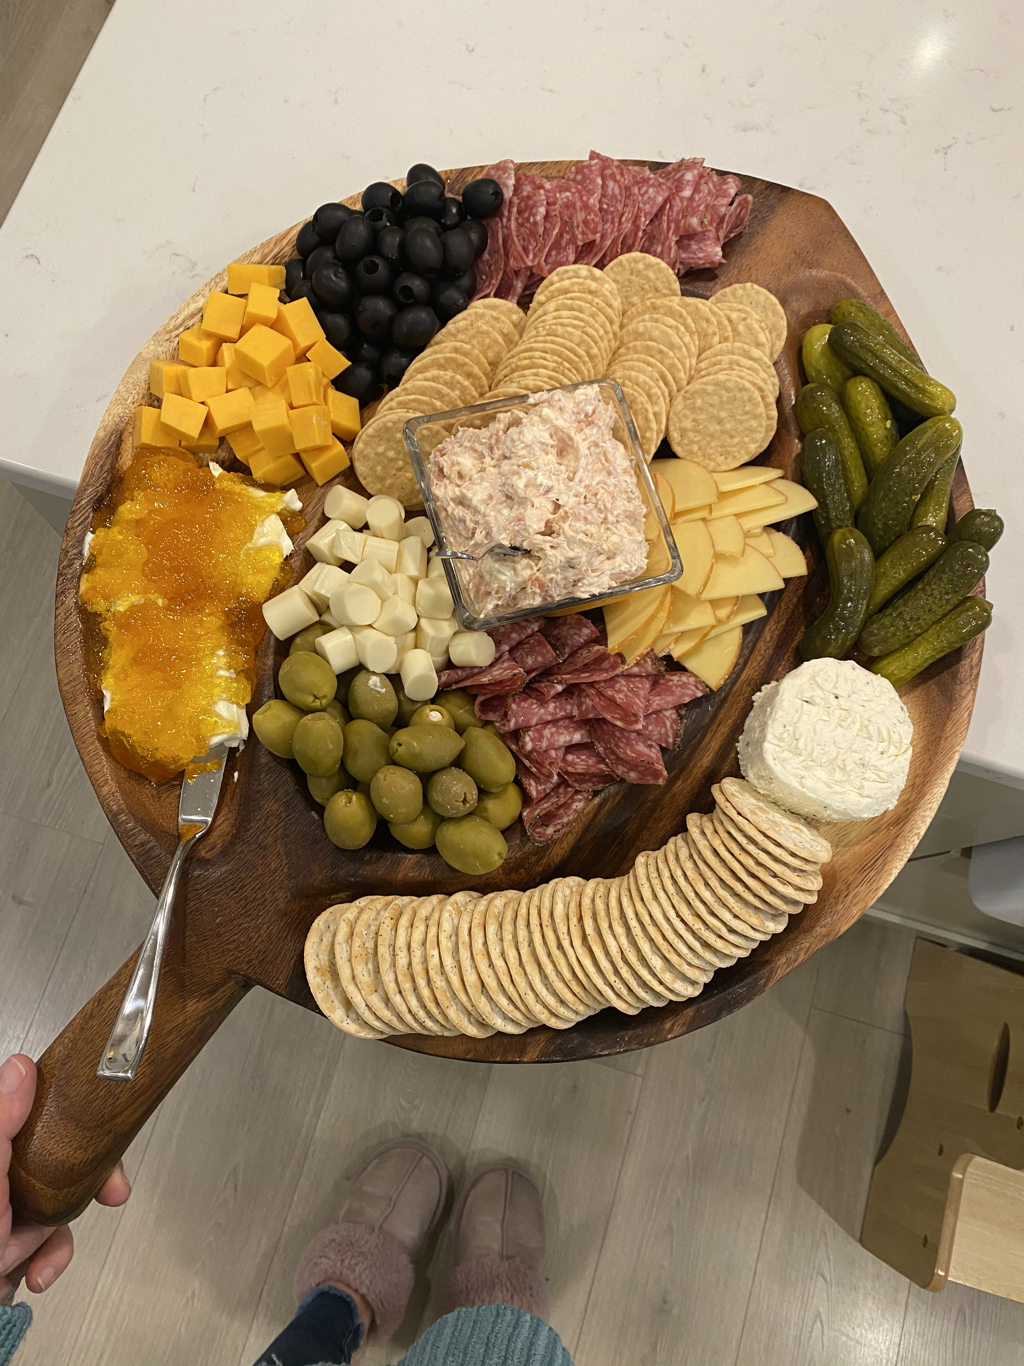 I put this charcuterie board together with a blend of meats, cheeses, pickles, olives, nuts, gingerbread cookies, flatbread crackers, kettle corn and pretzels. I used summer sausage and mini chorizo for the meats. The cheeses I used this time are medium cheddar and sharp white cheddar but you can do as few or as many options as you like. We love Gouda, Brie, Monterey Jack and pepper jack too. I used gingerbread men since they were festive for the Christmas holiday but cookies could be left out completely or swapped with something else more appropriate for your event/season. I purchased this charcuterie board at my local Home Goods but I have linked other board options here. I have been using it a lot as it creates a fun and easy, eye catching appetizer display for parties. 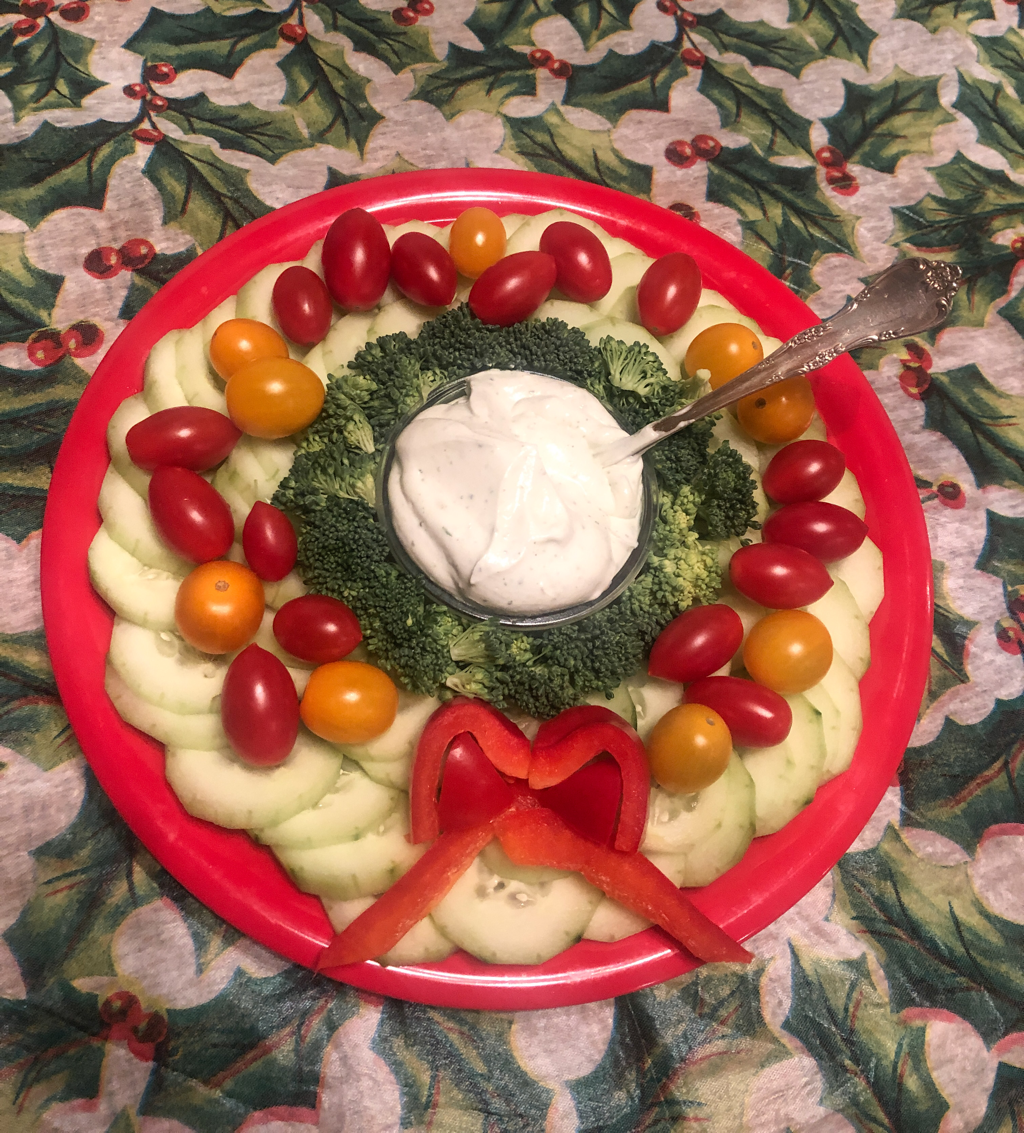 I always try to have vegetables out during snack time so there is a lighter, healthier option available for guests as well. For the Christmas holiday I chose to arrange the vegetables to look like a wreath and my kids thought it was so cool! I simply arranged sliced cucumbers in multiple circles, added broccoli to the inner circle and multicolor baby tomatoes for colorful buds/ornaments on the “wreath”. I made a bow out of red bell pepper or you could put an artificial bow in its place too. Add a small bowl of ranch dip to the center and you’re done! Our favorite for vegetable ranch dip is mixing a Ranch seasoning packet in with a tub of sour cream. It produces a thicker consistency then regular salad dressing and is perfect for dipping your favorite veggies! 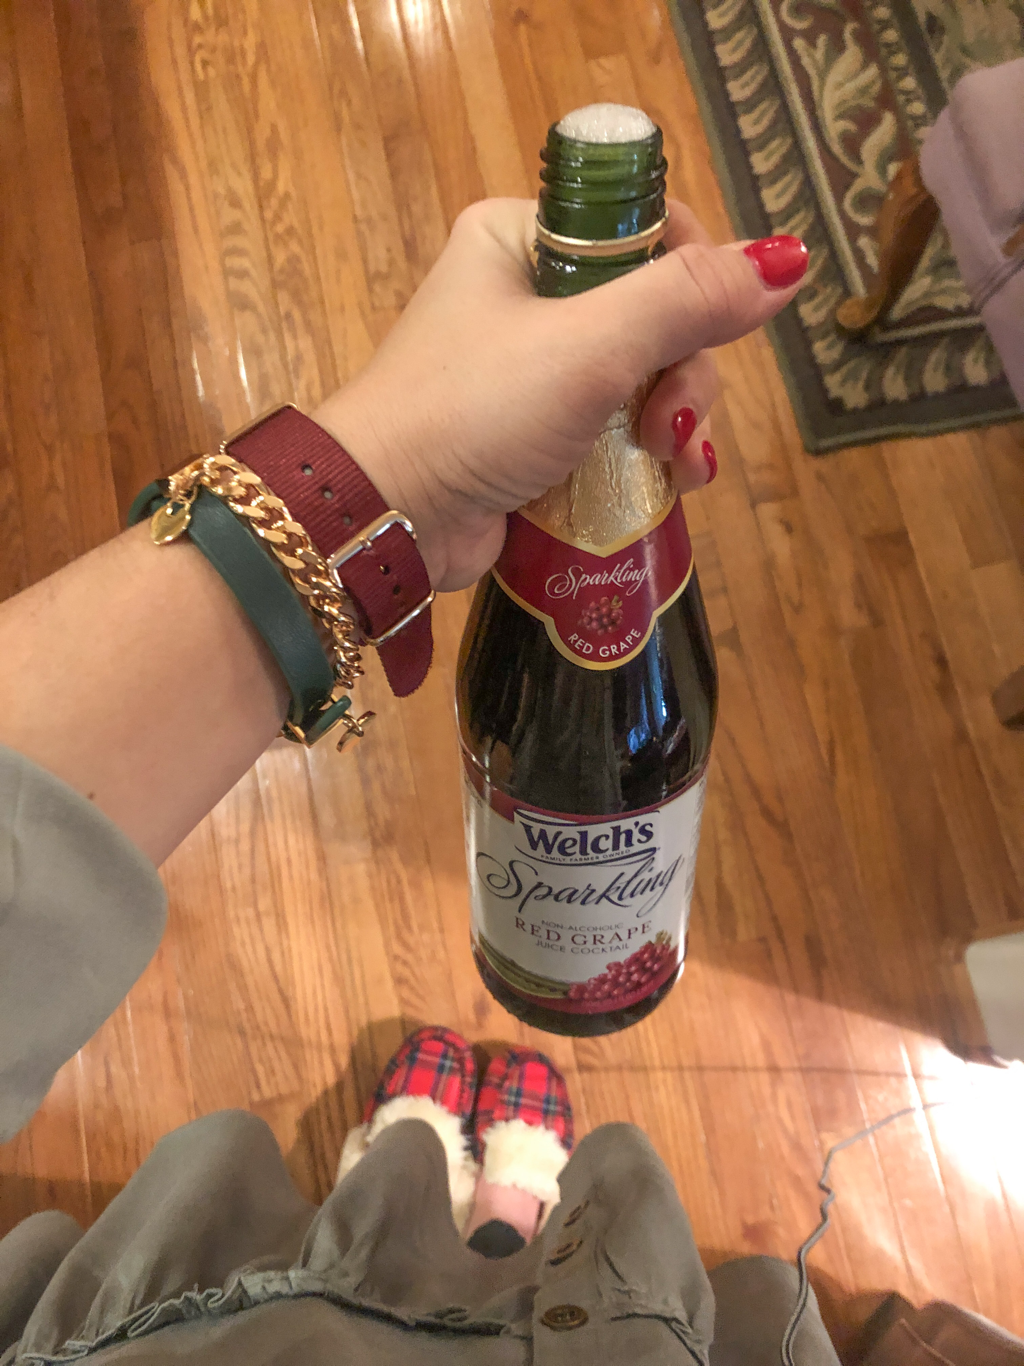 *Not a finger food but definitely a crowd pleaser for the Under 21 or pregnant crowd* For Thanksgiving I had purchased sparkling white grape juice for my little girls to feel like they were getting their own extra special drink when we sat down to our holiday meal. For Christmas I decided to purchase red grape to match our Christmas red and green color scheme better and they said it was “soooo yummy”! Their eyes lit up when I brought it to the table and it’s a simple, inexpensive, fun way for the kids to feel extra special at holiday/important dinners. I hope these ideas were helpful. They are simple and all contain items that can be found at your local grocer. Let me know if you try any of them; I would love to hear about it and see photos!
More of my family’s favorites include jalapeño poppers, pigs in a blanket, crockpot meatballs, 7 layer bean dip, or head to Costco and grab any dip (the La Terra Fina brand ones are our favorite!) plus chips/crackers/bread to go with it; always a hit! For more finger food recipes and ideas visit my Finger Foods Pinterest Board here. xo- Haley Let’s stay connected!! Instagram // Facebook // Pinterest // LIKEtoKNOW.it Have you checked out my Makeup Must Haves!? Whether you are hosting holiday meals and parties this year or the one attending, a charcuterie or cheese board is always a great addition to any event. I created this simple one pictured below a few weeks ago with what we had on hand but the possibilities are endless! 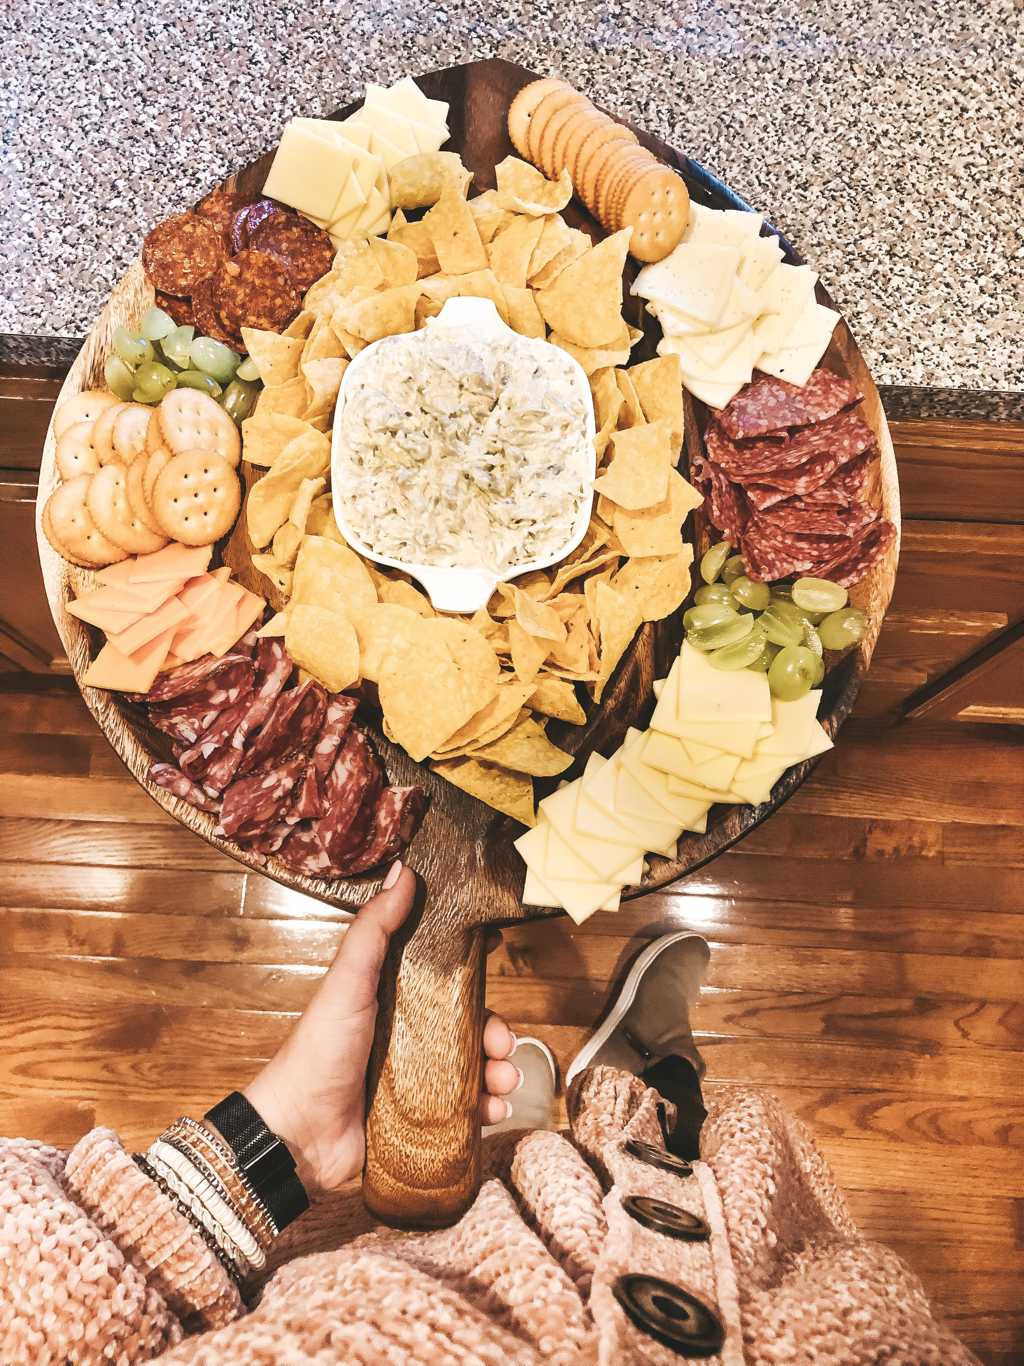 If you are the one hosting, charcuterie boards are a fun, relatively easy way to create and display a beautiful spread of easy to eat foods. Foods that typically go on a charcuterie board are cured meats, cheeses (be sure to include a variety: aged, soft, firm, blue, etc), olives, nuts, dried fruits, pickled vegetables, pickled jalapeños, jelly or jam and crackers or baguette bread. Charcuterie boards can feed as many or as few people as you like! The general rule of thumb is 2oz of charcuterie per person or about 5oz if it makes up the majority of the food people will be eating at the event. If it is the main food for your event be sure to include plenty of bread and/or crackers to be sure it is filling! 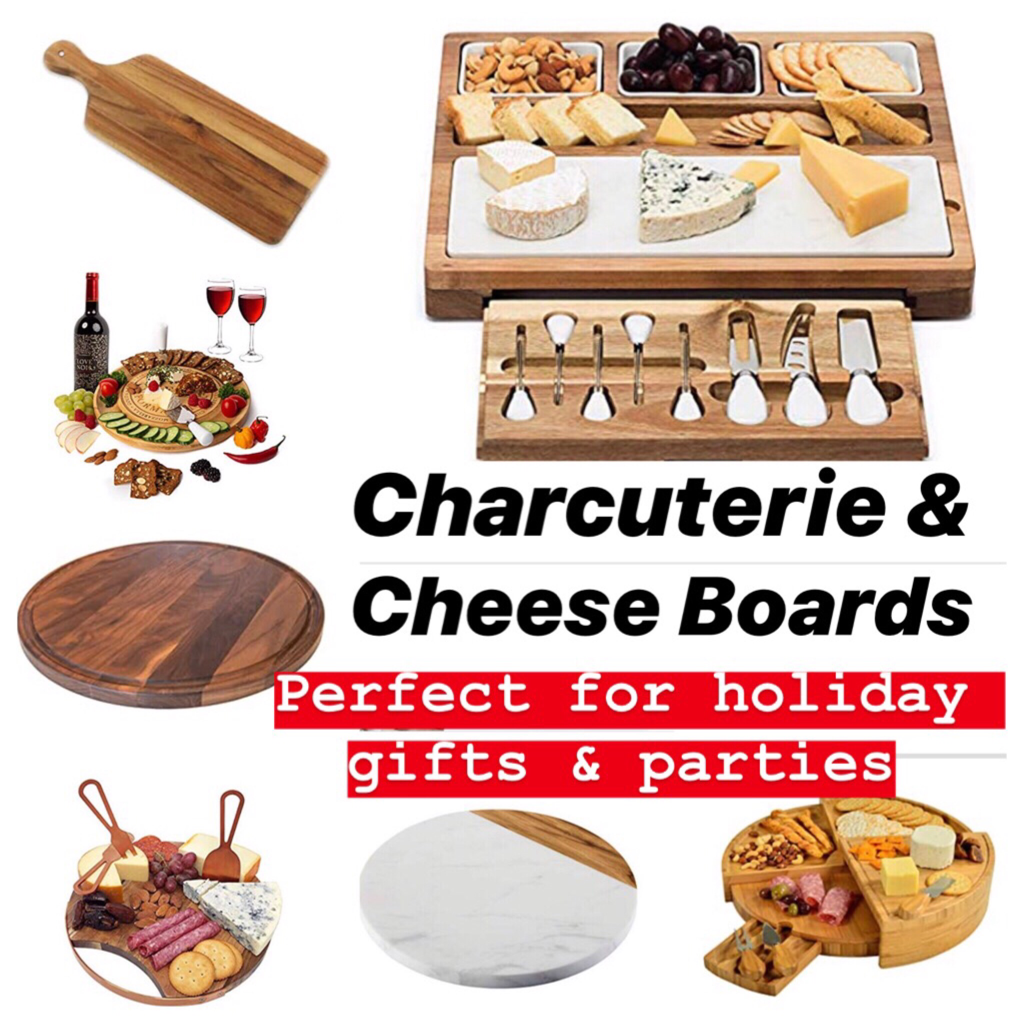 Do you have someone in your life that is hard to buy for or seemingly has everything? A charcuterie or cheese board would make a great gift! Perfect for the New Homeowner, your parents or in-laws, adult children or siblings, or it would make a wonderful host or hostess gift as well!
Looking for more gift ideas for the hard to buy for person in your life? Check here. xo- Haley |
 RSS Feed